SAS® AppDev Studio™ 3.0 Developer's Site
Creating a New Web Application
The Web Application Wizard
Creating a new Web application project is easy using the New Project Wizard in webAF. The steps below tell how to create a new Web application from scratch (or how to create an example Web application to illustrate some feature of interest). If you want to "adopt" an existing Web application as the starting point for your project instead, see Importing an Existing Web Application.
- Select File
![[arrow]](../../images/arrow.gif) New and select the Projects tab if it is not already visible.
New and select the Projects tab if it is not already visible.
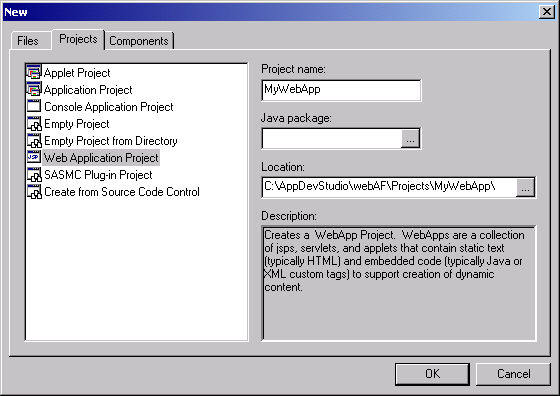
- In the list of project types at the left, select Web Application Project.
- In the Project name text entry field, enter the name you want to use to identify your
Web application (for example,
MyWebApp). By default this will be the name of the directory under theAppDev Studio install directory\webAF\Projectsdirectory. - The Java package field can be left blank, but if you want to designate a principle package name for the project, enter it
(for example
com.mycompany.mypackage). When you later add Java source files to your project, webAF will propose this package as the default (and propose the corresponding directory location, for exampleAppDev Studio install directory\webAF\Projects\MyWebApp\webapp\WEB-INF\classes\com\mycompany\mypackage). - Generally, you will want to accept the default value for Location, but you can choose a different directory.
- Click OK to start the WebApp Project Wizard.
- Step 1 of the wizard lets you choose where your Web application directories will be located.
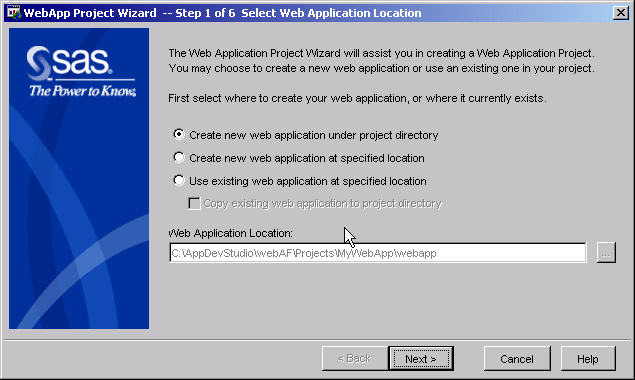
- Usually you will want to accept the default location under your project directory from the previous step.
- Click Next.
- The next step lets you choose a template for your Web application. The template determines what
"boilerplate" files and options will be required and automatically created for your project.
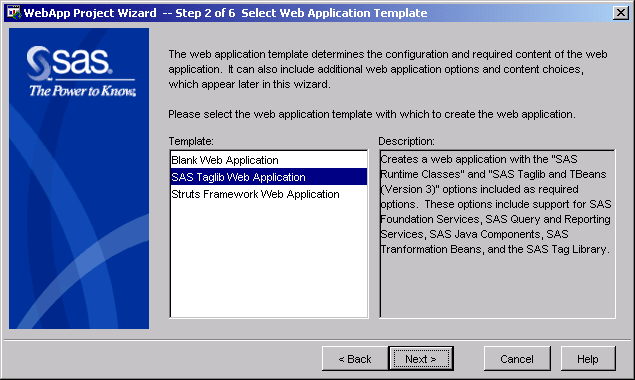
- Select one of the templates in the list. The description at the right tells you what will be included.
Note: If you want a project that includes both the SAS tag libraries and the Struts tag libraries, select the Struts Framework Web Application template; you will be able to include the SAS tag libraries in the next step.
- Click Next.
- Select one of the templates in the list. The description at the right tells you what will be included.
- The next step lets you choose the Web application options.
Note: The options that are available depend on the template you chose in the previous step.
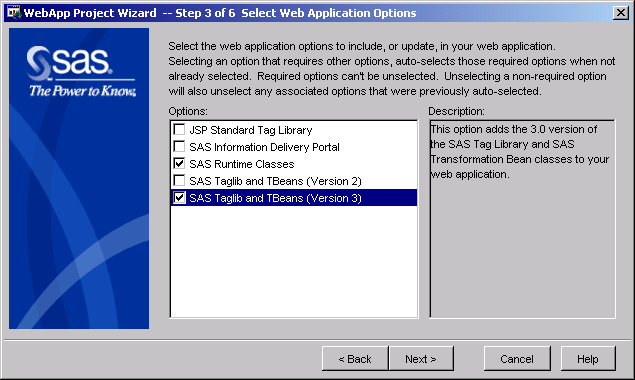
- Select the desired options. If you cannot deselect an option, it is either because it is required by another checked option, or because it is required by the template that you selected in the previous step.
- Click Next.
- The next step lets you choose the initial content for your Web application.
Note: Depending on options that you selected in previous steps, a page of additional project options might be displayed before this page.
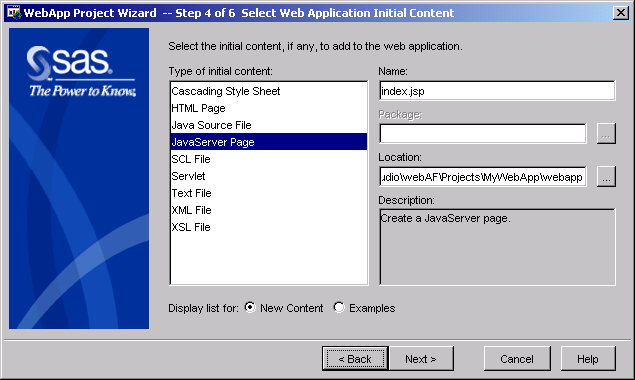
- Select the type of initial file you want from the list.
Note: You can easily add additional files with various options after you complete the wizard.
- Click either New content or Examples at the bottom of the page. This will determine what appears on the next page of the wizard, and the type of content that will eventually be generated by webAF. If you click New content, the generated file(s) will contain only the minimum required boilerplate, and will not "do" anything until you edit the files and add content. If you click Examples, then webAF will generate an example with completed code that illustrates a particular feature (which you will choose on the next page of the wizard). Note: If you choose Examples, the generated files might need some minor manual edits for your specific environment (for example, port numbers or passwords) before the Web application will run properly. Comments in the source code identify where changes will be needed.
- Change any of the default values shown for the selected initial content.
Note: The Package text entry field will be disabled for file types other than Java source files. You can change the directory for the initial file if desired.
- Click Next.
- Select the type of initial file you want from the list.
- The next step lets you choose the template for the initial file. For example, selecting a Tag Library
JavaServer Page will create a JSP file with declarations for the previously-selected tag libraries,
but choosing Blank JavaServer Page will have no initial text at all. If you selected Examples in the
previous wizard page instead of New content, then the list of choices will contain
various examples, each illustrating a feature or technique.

- Choose the template for your initial file from the list.
- Click Next.
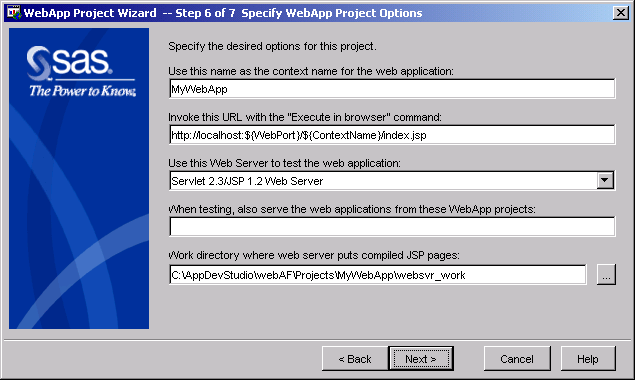
- The next step lets you choose the Web application project options.
- The default values for this page will normally be what you want.
- Use this name as the context name for the application
- The resource name that the browser will use to identify this Web application, defaulting to the project name.
- Invoke this URL with the "Execute in Browser" command
- Shows the URL that will be used by the browser
when you test your Web application by clicking the Execute in browser toolbar button.
${WebPort}and${ContextName}will be replaced by the port number for the selected Web server and the context name, respectively. - Use this Web server to test the application
- Specifies which Web server will be started to serve this application.
- When testing, also serve the Web applications from these web application projects
- Specifies any additional webAF Web application projects that should also be served. These will be activated by the Web server prior to activating this project.
- Work directory where the Web server puts compiled JSPs
- Specifies where servlet source code translated from JSPs (show on the editor's second Source tab for the JSP file) should be located. This option may not be available for all Web servers.
- Click Next.
- The default values for this page will normally be what you want.
- The final step displays a summary of selections made in the wizard.
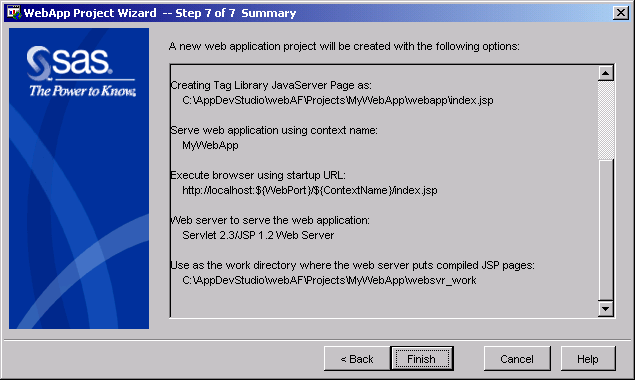
- Click Finish to create the Web application files.
Modifying the Generated Web Application
After the WebApp Project Wizard closes, webAF will create the directories and content files based
on the selections you made. This may take a few seconds. Then webAF will open the
initial file(s) for editing. For the example wizard selections above, the web.xml
and index.jsp files will be opened, with the initial page having the focus, as shown below:

For this example file, the only boilerplate text generated by webAF is the tag library
declaration. You can now edit the files to construct your Web application.
If you examine the web.xml file, you will see that it already contains the
servlet declarations and mappings that are required by the options that you selected.
Note: As you develop your Web application, you might want to change some of the selections you made in the wizard. To do this, select one of the following menu commands:
- File Project Properties
- Change the selections you made in the Web application project options page of the wizard, as well as other settings.
- File Web Application Properties
- Add or remove template options.
Additional Resources
- Debugging a Web Application for information on how to test and debug your new Web application.
- Adding and Editing Servlets, JavaServer Pages, and Other Content to learn how to add additional files to your project.
- Customizing The New File Wizard to learn how to create templates that add new file types or file content choices to the WebApp Project Wizard.