SAS® AppDev Studio™ 3.0 Developer's Site
Importing an Existing Web Application
You can "adopt" an existing Java-based Web application (for example, one that was not created with webAF), so that you can use the power of webAF to enhance and maintain it. To import a Web application, you start a new webAF Web application project as usual, specifying a new project directory. Then you can choose whether to copy the files from the existing external Web application to a location under the project directory, or just have the project directory refer to the existing location. The wizard will also let you add new features (such as SAS tag libraries) during the import, if you want (you can also do this later).
Import Considerations
Before starting the import, you should be aware of the following:
- When you create a new Web application project using an existing Web application,
webAF will validate the
...\WEB-INF\web.xmlfile, if one exists. If any errors occur, an error dialog will be displayed, and you will not be able to complete the import until the web.xml file validates successfully. Note: It is entirely possible that a web.xml file for a "known working" Web application will fail validation. Typically this is because the servlet container does not validate the web.xml against the DTD, and may allow certain irregularities, such as having elements appear in other than the prescribed order. To help ensure portability to other servlet containers, webAF enforces web.xml compliance when importing and when building a WAR file. See Troubleshooting web.xml Errors for more information. - During the import, the existing Web application will be examined to see if it meets the required specifications of webAF. If it does not (for example, if it follows an outdated version of the Servlet specification), it will be upgraded as needed.
- During the import, you will have the choice to copy the existing Web application to
a location under the new project, or to just use the existing Web application in place.
If you choose the latter, and if webAF makes any changes during the import, it will place backup copies
of the original files in a subdirectory of the project directory called
creation_backup. If you want your original Web application to remain un-modified, then you should choose to copy it to the new project location.
Using the Wizard to Create the Project and Import the Existing Files
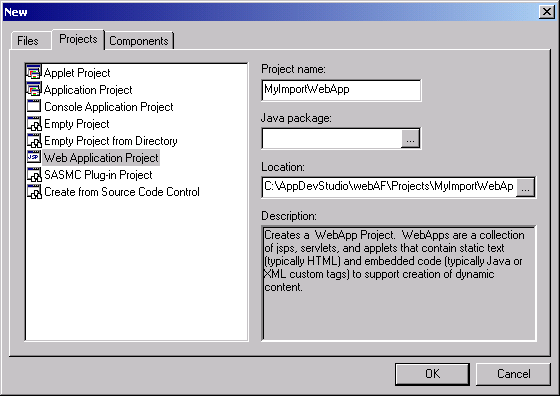
To create a new webAF project for an existing Web application:- Use the webAF menu command File
 New, and enter
the new Project name. Note: Do not set the Location field
to your existing Web application location. In this step, you are only choosing the
project directory location. Then click OK.
New, and enter
the new Project name. Note: Do not set the Location field
to your existing Web application location. In this step, you are only choosing the
project directory location. Then click OK.
- In Step 1 of the project wizard, select Use existing web application at specified location.
Optionally, you can select the Copy existing web application to project directory check box, and then
use the browse button to set the Web Application Location to the base (context) directory
of your existing Web application (that is, the parent of your existing
WEB-INFdirectory). Then click Next.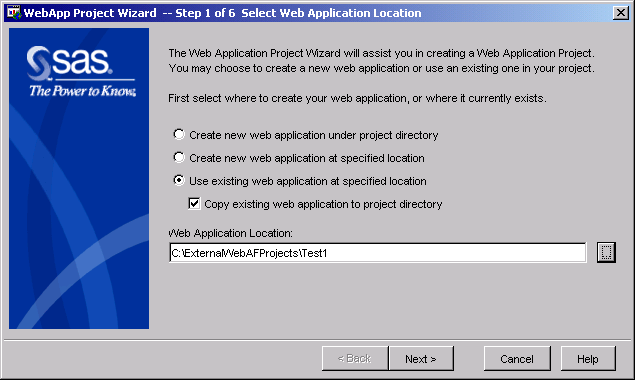
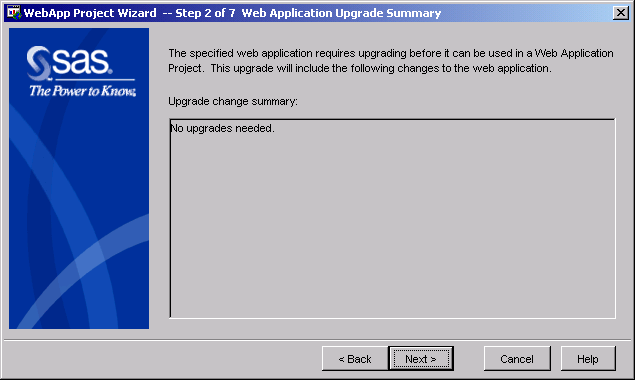
- The Web Application Upgrade Summary page of the wizard will list
any changes that will be made automatically to the existing Web application in order to conform to
webAF standards. Click Next.
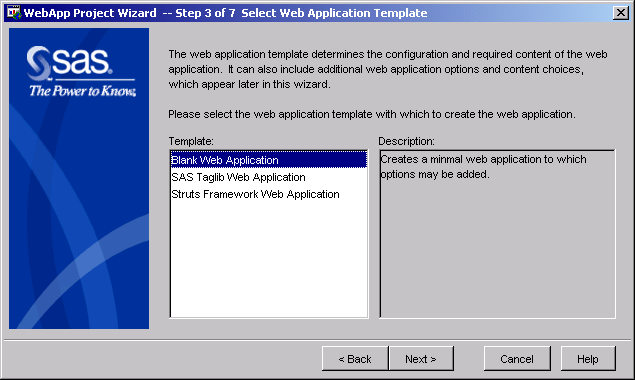
- In the Select Web Application Template page of the wizard, select
the template that best reflects the content you plan to add to your existing Web application.
Note: If you want to enhance your project to include both the SAS tag libraries and
the Struts tag libraries, select the Struts Framework Web Application template.
You will be able to include the SAS tag libraries in the next step. If you don't want to make
any changes at this time, select Blank Web Application. Click
Next.
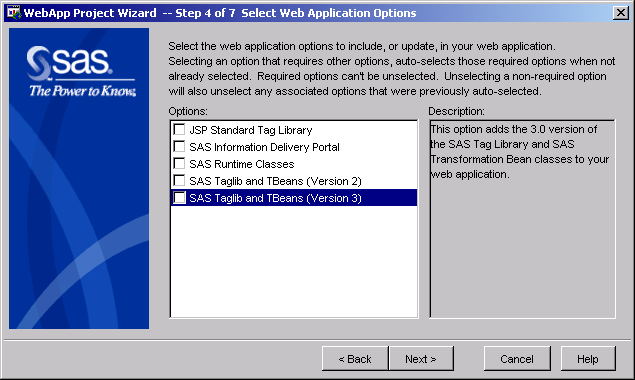
- The Web Application Options page of the wizard lets you choose
which tag libraries should be included by default in new JSP tag library pages that you
create in the future for your project. Select or deselect options to meet your needs.
Note: Since the SAS tag libraries depend on the SAS Runtime classes, you cannot de-select
SAS Runtime Classes until both SAS tag libraries are de-selected.
Click Next.
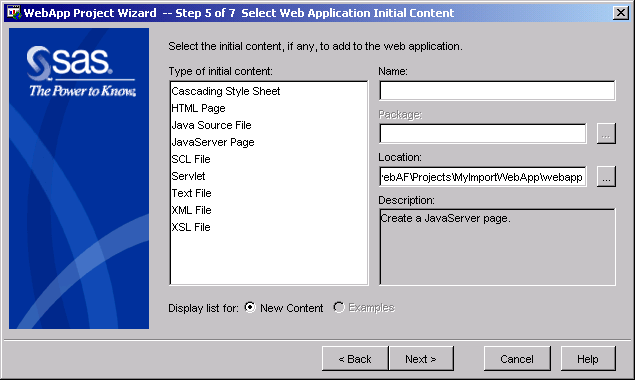
- The Web Application Initial Content page of the wizard enables you to
specify a new page to be the initial page for the Web application. Note: Depending
on the options that you selected in the previous step, an additional page of options may be
displayed before this page. If you do not want
to add a new initial page, use CTRL + CLICK to deselect all options,
as shown below. Then click Next.
- The WebApp Project Options page of the wizard is used to
specify any desired options that will be used when the browser is launched to access
your Web application. If necessary, edit the content of the
Invoke this URL with the "Execute in browser command"
text field so that the correct initial page will be accessed. In the example below,
the initial page is
hello.jsp, located in the Web application base directory. Click Next.
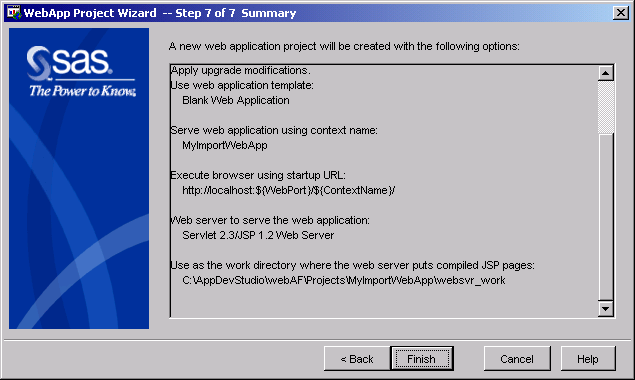
- On the Summary page, click Finish to
complete the wizard, generate the new project files, and (if applicable) copy
the existing Web application files to directories under the project directory.
Completing and Testing the Imported Web Application
After completing the steps above, webAF will open the editor to display the web.xml file contents. Complete the following steps to access the other files and to test your imported Web application:
- Click on the Files tab at the bottom left of the Navigator view,
and notice that only the
web.xmlfile is listed. Although webAF copied your existing files to sub-directories of the project (assuming you chose to do so), it does not automatically include your source files in the project. To add these files to the project so that you can easily select and edit them in webAF, select Insert File Into Project. Then navigate
to the directory (for example ...\webAF\Projects\MyImportWebApp\webapp) and select the file(s) you want (for example,index.jsp). Click OK. - Repeat the previous step for any other directories and source files.
Note: It is important that you add all your Java source code files to the
project, because only files included in the project will be compiled when you
build the project or choose rebuild all. Even if you open a java file by selecting
File Open, change it and save it, it will not be
re-compiled when you build the project if it has not been explicitly added to the project.
- Build the project by selecting Build Rebuild all.
Check the Compile tab output in the bottom frame of webAF to ensure the
build was successful.
- To execute the Web application, first select
Tools Services Start Java Web Server.
Wait a few seconds for the server to initialize, and then click
Execute in browser button. This should display
the initial page of your Web application in the browser.