SAS® AppDev Studio™ 3.0 Developer's Site
Customizing The New File Wizard
How Custom Templates Change The New File WizardQuick Start - Adding New Content Templates For Existing Types
Anatomy of a Sample XML Template File
How the New File Wizard "Discovers" New File Templates
Structure of a New File Template XML File
Content Type and Content Template Attributes
The
<content> Tag and Other Child ElementsAdding Content Templates To Pre-defined File Types
Property Substitution During File Creation
Creating Multiple Files From One Template
Making Defaults Vary With Content Template
Restricting Templates to Certain Web Application Types or Options
Changing the Predefined Templates
Troubleshooting Tips for Templates
Additional Template Examples
This paper explains how to define content types and content templates that will add your custom choices to the webAF New File Wizard. This is very useful if you have additional file types or "boilerplate" file content that you frequently need to add to Web application projects.
Before examining how to create a template, this article looks at how the new choices you can define will appear in the wizard.
How Custom Templates Change The New File Wizard
Once you have defined a template, the custom choices will be visible when you choose
File ![]() New
for a Web application project in webAF. The new file type(s) you define
will be added to the list of predefined file types. For example, this wizard page shows
two new custom types that are not included in the default list ("Java Properties file"
and "XSLT File"):
New
for a Web application project in webAF. The new file type(s) you define
will be added to the list of predefined file types. For example, this wizard page shows
two new custom types that are not included in the default list ("Java Properties file"
and "XSLT File"):
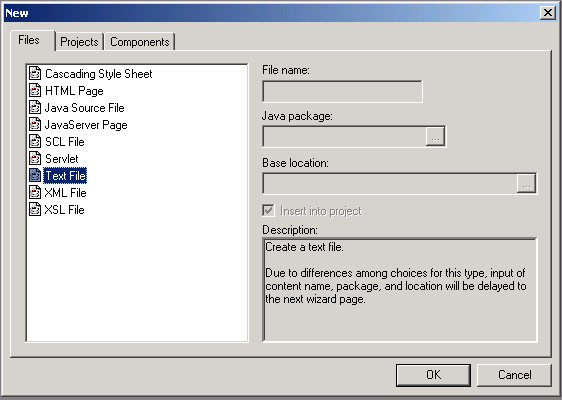
After selecting "Java Properties file" and specifying the new file name, the initial content choices are shown for the selected custom file type:
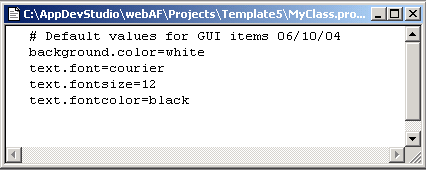
In this example, there are two custom initial content choices for the selected file type of "Java Properties file", but the content template can specify as many choices as you wish. After selecting a choice and completing the wizard, a new file with the specified initial content will be added to the project and displayed in the editor window:
So how do you define a new file template? Typically, you will create an XML file that defines what will be shown in the New File Wizard, and what the initial content of the file should be, based on the choices made in the wizard.
Before looking at the XML file that defines the new file types and initial content templates for the example above, let's take a look at a "quick start" method for defining new file content that does not require any XML.
Quick Start - Adding New Content Templates For Existing Types
If you have one (or more) existing files for one of the predefined file types (listed in the table below) that you would like to use as a template for new files created by the wizard, here's a quick way to do it that does not require XML.
For example, suppose you have a JSP file that contains boilerplate JSP code that you frequently need when starting to edit a new JSP page. To make a file available to the webAF New File Wizard as a source for new JSP file content, for all Web application projects, simply perform these two steps:
- Copy the file (the boilerplate JSP file for this example) to this directory:
<ADS install>\webAF\Master\webapps\content_templatesNote: Throughout this article,
<ADS install>stands for the installation path for SAS AppDev Studio. - Rename the file to a file name with the following form:
<template name>.<type name>.tmplHere
<template name>is the name you want to appear in the wizard list box of templates, with "_" characters where blanks should appear. The<type name>is the name of the predefined type, from the table below:Type shown in wizard Type name Sample template file name format Cascading Style Sheet css My_Styles.css.tmplHTML Page html Customer.html.tmplJava Source File java MyCompany_Standard_Class.java.tmplSCL File scl Trial_Results.scl.tmplServlet servlet Model_2_Controller_Servlet.servlet.tmplText File text Bug_Report_Form.text.tmplXML File xml Vendor.xml.tmplXSL File xsl XSLT_Header.xsl.tmplSo for our example, you might rename the file to:
My_Boilerplate.jsp.tmpl
The file is now available as a template for the webAF new file wizard. To
see it in action, with any Web application project open, choose File ![]() New.
In the wizard, pick the file type you specified ("JSP file" for this example)
and click Next.
New.
In the wizard, pick the file type you specified ("JSP file" for this example)
and click Next.
The new choice now appears in the wizard:
Select this choice, complete the wizard, and a new file will be added to the project, that contains a copy of the content that is in your file.
You can limit availability of a template file to a certain project,
instead of being available when you create a new file in any project.
To do this, put the template file in the content_templates
directory under the project directory instead of under
...\webAF\Master\webapps\content_templates.
Although defining content templates is easy with this method, it is not viable for defining new file types, and does not allow much control over what is displayed in the wizard (such as a more informative description). An XML template file will serve these needs.
Anatomy of a Sample XML Template File
Now let's go back to the original example above, that defines two new file types (Java properties file and XSLT file), with initial content templates for each. How is this example defined?
The templates for the example are defined in a single XML file that specifies two custom file types, and the initial content choices for each of these types. Using an XML file not only lets you define new file types, but also gives you greater control over what is displayed in the New File Wizard, and how the user is permitted to interact with the wizard.
New file templates can be made available to all Web application projects, or you can limit availability to a certain Web application project, or to only Web applications that have a certain option selected. For our example, the two new custom file types are made available to all Web application projects, by creating our XML file here:
<ADS install>\webAF\Master\webapps\content_templates\user_templates.xml
This file defines our two example content types, and the content template choices for each of the two types:
<content-types>
<content-type name="PropertiesFile"
listName="Java Properties file"
description="java.util.Properties text file"
defaultContentName="MyClass.properties"
defaultExtension="properties">
<content-template name="EmptyProperties"
listname="Simple properties file"
description="Contains comment and one key=value line"
contentType="file">
<content>MyCompany/simple.properties</content>
</content-template>
<content-template name="DefaultProperties"
listname="Default GUI properties"
description="Default settings for graphic items"
contentType="file">
<content>MyCompany/gui.properties</content>
</content-template>
</content-type>
<content-type name="XSLT"
listName="XSLT file"
Description="XSLT Stylesheet"
defaultContentName="sheet"
defaultExtension="xsl">
<content-template name="Minimal"
listname="Minimal XSLT"
description="Minimal boilerplate XSLT stylesheet with xml and stylesheet tags"
contentType="text">
<content>
<?xml version="1.0"?>
<xsl:stylesheet version="1.0" xmlns:xsl="http://www.w3.org/1999/XSL/Transform>
</xsl:stylesheet>
</content>
</content-template>
</content-type>
</content-types>
The tag names and attributes are described in more detail later, but for now, here
are the main things to notice about the example user_templates.xml file:
- The root element,
<content-types>, contains two<content-type>child tags. The first defines the file type listed as "Java Properties file" in the New File Wizard, and the second defines the file type listed as "XSLT file". - The
listNameattribute of each<content-type>specifies what will be added to the list of file types in the wizard. Thedescriptionattribute specifies the corresponding description that is displayed when this content type is selected in the wizard. Thenameattribute is a required, unique identifier. - Each
<content-type>in turn has one or more child<content-template>elements, which specify all the choices that will appear on the next wizard page. This wizard page will be dynamically constructed and will list only your custom choices for initial file content for the selected custom file type. In the example, the "Java Properties file" type has two choices, that will be shown in the wizard list box as "Simple properties file" and "Default GUI properties". The "XSLT Stylesheet" type has only a single initial content template choice, "Minimal XSLT". Again, thelistnameanddescriptionattributes specify what will appear in the wizard page, and thenameattribute is a unique identifier. - Each
<content-template>tag contains a child<content>element, which specifies what the newly-created file should contain. In the example, this content is specified by two different methods. The first method specifies a source file name that will be copied (and renamed) when the wizard completes. Each of the two<content-template>tags for "Java Properties file" uses this method. As specified in the example, the wizard will copy one or the other of the following two files, depending on which content is selected:<ADS install>\webAF\Master\webapps\content_templates\MyCompany\simple.properties <ADS install>\webAF\Master\webapps\content_templates\MyCompany\gui.properties
- The second method is used by the
<content>child tag of the single<content-template>for "XSLT file". It specifies the initial file content directly in the template instead of indirectly in a separate file. This is indicated by thecontentType="text"attribute (as opposed tocontentType="file"). Note that text content specified directly inuser_templates.xmlmust have the reserved XML characters "escaped" to the equivalent entity reference, in order to avoid confusing the XML parser.XML Reserved Character Entity Reference &&<< - Note that tag and attribute names for new file templates in webAF are not case
sensitive, so the attribute
Description="XSLT Stylesheet"in the example is acceptable.
How the New File Wizard "Discovers" New File Templates
The New File Wizard uses a discovery process to locate and process custom choices to be added to the wizard pages. The set of content type and content template choices displayed will include:
- Those that are available to all Web application projects, plus
- Those that are only available for the particular, selected Web application Template (for example, "SAS Taglib Web application") or the particular, selected Web application Option (for example, "JSP Standard Tag Library"), plus
- Those that are only available for the current Web application project.
Directories Where webAF Discovers New File Templates
To locate new file templates, webAF searches all subdirectories named
content_templates under these directories:
<ADS install>\webAF\Master\webapps- Base directory of the chosen Web application template. For a standard
SAS AppDev Studio install, the following source directories are available under
the
<ADS install>\webAF\Master\webappsdirectory:Web application Template Parent Directory content_templates
Predefined?Blank Web application ... \templates\BlankWebAppNo SAS Taglib Web application ... \templates\SASTaglibNo Struts Framework Web application ... \templates\StrutsNo - Base directory of any chosen Web application options. For a standard
SAS AppDev Studio install, the following source directories are available under
the
<ADS install>\webAF\Master\webappsdirectory:Web application Option Parent Directory content_templates
Predefined?JSP Standard Tag Library ... \options\JSPStandardTaglibNo SAS Information Delivery Portal ... \options\PortalYes SAS Runtime Classes ... \options\SASRuntimeNo SAS Taglib and TBeans (Version 2) ... \options\SASADSTaglibNo SAS Taglib and TBeans (Version 3) ... \options\SASTaglibYes Struts Tag Library
(if Struts Framework Web application template is chosen)... \templates\Struts\options\StrutsTaglibNo - Project home directory, for example,
<ADS install>\webAF\Projects\MyWebAppProject.
In the tables above, "content_templates Predefined?" is "Yes"
if the content_templates
subdirectory already exists after completing the standard SAS AppDev Studio install.
File Names For New File Template Discovery
When webAF locates a directory named content_templates in a location given above,
it discovers new file templates by trying to perform all these steps in this order:
- Parsing the
templates.xmlfile (for predefined templates installed by SAS AppDev Studio only) - Parsing the
user_templates.xmlfile (for user-defined new file templates) - Parsing any file with a name of the form
user_templates*.xml(for additional user-defined new file templates) - Creating a default new file template for every file that conforms to the
automatic template file naming convention
(for example
My_Boilerplate.jsp.tmpl).
Any or all of these steps can be used in a given content_templates directory. Each
new file template should have a unique name attribute. If a duplicate name
is encountered, the first occurrence is the only one used.
Structure of a New File Template XML File
Once the webAF New File Wizard has discovered a properly-named XML file in one of the qualifying directory locations as described above, the file will be parsed to create internal objects corresponding to various elements of the XML file, and setting properties corresponding to the specified attributes. These objects are then used to dynamically modify the content and sequence of pages displayed in the wizard, and to govern the file creation process when the wizard is successfully completed.
The two most important elements in the XML file are <content-type> and
<content-template>. Each <content-type> describes one choice
that will be added to the list of predefined file types in the New File Wizard.
Each <content-template> child element describes one new choice that will
appear in a wizard page which lists the initial content
choices for the selected file type. This page appears when you choose a new file
type and click Next.
This is the basic syntax for the new file template XML file
(for example, user_templates.xml):
    <content-types>
        <content-type ... >
            <type elements ... />
            <content-template ... >
                <template elements .../>
            </content-template>
            <content-template ... >
                <template elements .../>
            </content-template>
            ...
        </content-type>
        <content-type ... >
            <type elements ... />
            <content-template ... >
                <template elements .../>
            </content-template>
            ...
        </content-type>
    </content-types>
Most of the time, you will use element attributes to set the properties
for the content type and content template. Alternatively you might want to
use sub-elements (represented by <type elements ... /> and
<template elements .../> above) to set certain properties.
This will be described later in the Child Element section.
First, the attributes that are available will be introduced. For example, the
XML snippet below shows how to set the name and description properties for the
new file type:
    <content-types>
        <content-type name="MyFileType" description="Magic information file" ... >
            ...
        </content-type>
    </content-types>
Content Type and Content Template Attributes
The New File Wizard manages new file templates by using internal objects corresponding to
the <content-type> and <content-template> tags defined in the XML
file. The tables below show the available attribute names that can be specified.
Note that only the name and contentIsRelativeTo
attributes are required; all other attributes have a default value.
Attributes for the <content-type> Tag
| Attribute | Description / Example | Default Value |
|---|---|---|
name |
Unique identifier for this content type. Uniqueness is case insensitive.
Example: name="MyCompany_HTML" |
None - must be specified |
listName |
String displayed in the New File Wizard page type selection list.
Example: listName="Java properties file" |
Same as name value with '_' characters replaced with spaces |
description |
String displayed in the wizard page description area when this type is selected.
Example: description="HTML file with standard corporate boilerplate." |
"Create <name> file." |
defaultContentNameSee note 1 |
String displayed in the wizard File name text box when this type is selected.
Example: defaultContentName="index.html" |
"" |
defaultContentLocationSee note 1 |
Absolute or relative path for target location.
If relative, then contentIsRelativeTo specifies what it is relative to.
This value is converted to a full path before being displayed in the
Base location text box of the wizard.
Example: defaultContentLocation="WEB-INF\classes\misc" |
Empty relative path |
defaultPackageSee note 1 |
String used as the default Java package name.
Example: defaultPackage="com.mycompany.spiffy" |
"" |
contentIsRelativeToSee note 1 |
Either webapp or project.
When a relative path is specified for defaultContentLocation,
specifies where the relative path is rooted. Warning: Failure to
specify this required attribute may result in a runtime error (such as a
null pointer exception) that might be hard to diagnose.
Example: contentIsRelativeTo="webapp" |
None - must be specified |
packageUsedSee note 1 |
Either true or false.
If true, the Java package text box in the wizard will be enabled.
Example: packageUsed="true" |
false |
defaultExtensionSee note 1 |
String specifying the default file extension, without the "." delimiter.
If specified, then the extension will be appended to the file name if the
name does not include an extension.
Example: defaultExtension="html" |
No extension |
defaultExtensionRequiredSee note 1 |
Either true or false.
If true, then a "." and the defaultExtension value will always be appended to the name, even if the
file name already contains a ".". If false, then the "." and extension will only
be appended if the name does not contain ".".
Example: defaultExtensionRequired="false" |
true |
typeTitle |
String to be used as the caption (window title) of the wizard page
that will display content template choices for this type.
Example: typeTitle="MyCompany HTML Initial Content" |
"Select <name> file Template" |
typeDescription |
String to be used as a prompt above the list box of the wizard page
that will display content template choices for this type.
Example: typeTitle="Choose initial file content:" |
"Specify the desired <name> file template" |
Note for table above:
- This attribute can also be specified on the
<content-template>element. An example and important restrictions are given in a later section.
After a discovered new file type is selected from the wizard, a new page will
automatically be displayed in the wizard which lists all the template choices
for that file type. The following table defines the attributes that you can set
for each <content-template> tag under a <content-type> tag.
Attributes for the <content-template> Tag
| Attribute | Description / Example | Default Value |
|---|---|---|
name |
Unique identifier for this content template. Uniqueness is case insensitive.
Example: name="Standard_Includes" |
None - must be specified |
listName |
String displayed in the new file wizard page template selection list.
Example: listName="Headers only" |
Same as name value with '_' characters replaced with spaces |
description |
String displayed in the wizard page description area when this template is selected.
Example: description="Boilerplate customer web site page header per corporate guidelines" |
"Create <name> file." |
contentType |
Must be text, file or filelist, to specify
the source of the file content to be copied.
If text, then the content attribute itself (or the <content> child element)
contains the initial file content. If file, then the content attribute
specifies a relative or absolute path name for a file to be copied. If filelist,
then content contains a delimited list of files (See
Creating Multiple Files From One Template
for the required format).
Example: contentType="file" |
text |
content |
String representing the content for the new file
when this template is selected. This string will be interpreted
by webAF as specified by the contentType attribute.
Example: content="MyCompany\StandardHeaders.html" |
None |
The <content> Tag and Other Child Elements
Sometimes it is awkward to set a content type property or content template property
by using an attribute. For example, you might want to specify the content property
of the content template, but the initial content contains several lines.
You could put the initial content in a separate file and set contentType="file",
but an alternative is to use the <content> child element of
<content-template>, embedding the initial content text lines
directly in the XML template file. For example:
<content-types>
<content-type name="XSLT" listName="XSLT file" Description="XSLT Stylesheet"
defaultContentName="sheet" defaultExtension="xsl">
<content-template name="Minimal" listname="Minimal XSLT"
description="Minimal XSLT stylesheet with xml and stylesheet tags"
contentType="text">
<content>
<?xml version="1.0"?>
<xsl:stylesheet version="1.0" xmlns:xsl="http://www.w3.org/1999/XSL/Transform">
</xsl:stylesheet>
</content>
</content-template>
</content-type>
</content-types>
When this template is selected in the wizard, webAF will populate the newly-created file with these three lines of text:
<?xml version="1.0"?> <xsl:stylesheet version="1.0" xmlns:xsl="http://www.w3.org/1999/XSL/Transform"> </xsl:stylesheet>
One drawback of using this method (versus using an external file) is that the two reserved XML characters must be replaced by their respective entity references in the XML file, as shown above.
Only a single <content> element can be defined for each <content-template>.
You cannot create multiple files by adding additional <content> child elements.
The later section Creating Multiple Files From One Template will
explain how to correctly create multiple files from a single content template choice.
Another consideration is that all leading and trailing white space (blanks, tabs and <EOL> characters) will be trimmed from the text. This will be a problem if you want your new file to contain text that does not start in column one of the first line. An alternative syntax that solves this problem will be described shortly.
Property Names as Child Elements
The content child tag is just one case of the general rule that properties of content type and content template objects can be set from the XML file using either an attribute of the element or by a child element with the same tag name as the property.
For example, you might wish to define a lengthy template description using a child tag instead of an attribute:
<content-types>
   <content-type ... >
      <description value="My Content Type"/>
      <content-template ... >
         <description>
            JSP with site headers, boilerplate data-entry form in 2-column table
         </description>
         ...
      </content-template>
      ...
   </content-type>
</content-types>
Note that the text between the start and end tag of a child element having a tag name that is the same as the property will have all leading and trailing white space removed when webAF parses the file.
Keeping White Space Using An Alternative Child Tag Name
A third method for specifying properties for content types and content templates is to use child tags named in one of these two forms, as appropriate:
<content-type-property>
<content-template-property>
For example, to set the description property of the content template object,
you would use <content-template-description>.
Text sandwiched between child begin and end tags of this form will have leading white space up to and including the first <EOL> and white space following but excluding the last <EOL> removed. An example where this might be useful is if you want the initial content of the file to include one or more empty lines at the top of the file:
<content-types>
   <content-type ... >
      <description value="My Content Type"/>
      <content-template ... >
         <content-template-content>


   // This line will start in column 4 and have 2 empty lines above it

         </content-template-content>
         ...
      </content-template>
      ...
   </content-type>
</content-types>
Instead of putting text between the start and end tags, you can also
use the value attribute to set a property using child tag names in this form.
Adding Content Templates To Pre-defined File Types
In the Quick-Start section above,
you learned how you can add a new
content template for one of the predefined file types
by just naming the source file with the appropriate convention. You
can also add new template content to a predefined file type using an XML
file such as user_templates.xml. This method will
let you control what is displayed in the wizard's description box for the
content template.
To add a new content template to an existing content type, just
specify the name attribute of the content-type to be one of the
predefined names given in the Type Name Table
above. The following example shows how to add another choice to the
list of content templates for the pre-defined file type "HTML Page".
As installed by SAS AppDev Studio, there is only one choice, "Blank HTML Page".
The following user_templates.xml file will add a new choice to the
list, "HTML with boilerplate":
<content-types>
   <content-type name="HTML">
      <content-template name="CompanyHTML"
         listname="HTML with boilerplate"
         description="Boilerplate HTML for header and body"
         contentType="file">
         <content>MyCompany/publicHtml.html</content>
      </content-template>
   </content-type>
</content-types>
Notice that the only attribute specified for <content-type>
is the name. You cannot change the displayed description for the pre-defined
file type HTML. But of course you can specify attributes for list name and description
for the new file content choice you are adding in the <content-template> tag.
Naturally to get the example above to work, the file
<ADS install>\webAF\Master\webapps\content_templates\MyCompany\publicHtml.htm
must exist and contain the initial file content you want.
Property Substitution During File Creation
When the New File Wizard completes, it creates the target new file by reading the content (specified by the content template) and writing it to the new file. During this process, webAF will replace certain placeholders in the text with corresponding property name values. To enable substitution, include a placeholder with this syntax in the content:
$WEBAF{property name}
Here property name is one of the predefined property names in the table below:
| Property name | Description / Example value |
|---|---|
content.name |
File name as entered by the user in the wizard,
including any user-specified extension but excluding
any default extension. Example: PopDownAdapter.java |
content.base.name |
File name as entered by the user in the wizard but with any user-added
extension removed. Example: PopDownAdapter |
content.package |
Java package as entered by the user in the wizard. Example: com.mycompany.greatstuff |
package.statement |
A Java package statement corresponding to the Java package
entered by the user in the wizard, including an end-of-line character.
If no package was entered, this property will contain an empty string. Example: package com.mycompany.greatstuff;
|
content.package.path |
Path name corresponding to the Java package as
entered by the user in the wizard, including a trailing
File.separator. Example: com\mycompany\greatstuff\
|
content.class |
A qualified Java class name corresponding to the
package and file name entered by the user in the wizard. Example: com.mycompany.greatstuff.PopDownAdapter" |
content.local.path |
The local path name for the created file,
including the file name and extension. Example: \WEB-INF\classes\PopDownAdapter.java |
content.local.url |
The local URL for the created file,
including the file name and extension. Example: /WEB-INF/classes/PopDownAdapter.java |
content.relative.url |
The relative URL for the created file,
excluding the file name and extension. Example: WEB-INF\classes |
content.local.dir |
The local directory for the created file,
excluding the file name. Example: \WEB-INF\classes |
content.relative.dir |
The relative directory for the created file,
excluding the file name. Example: WEB-INF\classes |
tag.libraries |
Declarations for all tag libraries that were selected
from the Web application template choices and options for the project.
Tag libraries that aren't known to the Web application Project Wizard,
or that were manually added to the Web application are not included. Example: <%@ taglib uri="http://www.sas.com/taglib/sas" prefix="sas" %>
|
Defining Your Own Properties for Substitution
You can also define your own key-value pairs in the XML template that will trigger replacement of placeholders when the new file is created. This is the syntax needed to accomplish this:
<content-types>
    <content-type ... >
        ...
        <content-template ... >
            ...
            <template-properties type="user">
                <property name="my.property.name"
                         value="My property value"/>
                <property name="my.other.property.name">
kept-white-spaceMy other property value
                </template-property>
            </properties>
            ...
        </content-template>
        ...
    </content-type>
</content-types>
To enable a user-defined substitution, include a placeholder with this syntax in the content:
$USER{property name}
As a simple example, the following XML template defines a content template that will create a new Java file. This file will contain a package statement that substitutes the package name entered in the wizard, and a couple of import statements based on a user-defined property:
<content-types>
   <content-type name="Java">
      <content-template name="MyJava"
         listName="Java package and imports">
         <description>
            Skeletal Java source w/ package stmt and my imports
         </description>
         <template-properties type="user">
            <property name="my.imports">
import java.io.File;
import java.util.ArrayList;
            </property>
         </template-properties>
         <content>
$WEBAF{package.statement}
$USER{my.imports}
         </content>
      </content-template>
  </content-type>
</content-types>
To see how this works, after this user_templates.xml file is saved, start
the New File Wizard and choose a content type of "Java source file".
Enter a file name of "MyThing.java" with a package name of
"com.mycompany.mystuff". Click Next and select "Java package and imports"
from the template list. When the wizard completes, webAF will display the
Java source file with the substitutions completed:

Reusing Property Value Strings
If you have a particular value that you want to use with multiple content types or templates, there is a way to declare a common string that can be referenced in multiple locations. First you will associate the value with a key name, using one of the two syntax forms in the following XML snippet:
    <strings>
        <string key="name" value="common string"/>
        <string key="name">
            common string
        </string>
    </string>
The <strings> element can appear as a child element of
the <content-types>, <content-type>,
or <content-template> elements. White space up to and
including the first EOL will be trimmed from the string.
To reference a declared string, use a stringKey attribute giving the key name, as illustrated in this example:
    <content-types>
        <strings>
            <string key="type.desc" value="My Content Type"/>
            <string key="tmpl.desc" value="My Content Template"/>
        </strings>
        <content-type ... >
            <description stringKey="type.desc"/>
            <content-template ... >
                <description stringKey="tmpl.desc"/>
                ...
            </content-template>
            ...
        </content-type>
    </content-types>
Declared strings can be used anywhere within the parent element that
holds the <strings> element. If there are multiple strings
declared with the same key value, the one from the closest parent will
be used.
Creating Multiple Files From One Template
Sometimes when creating a new file, you might want to also create a separate,
related file with a different name or directory location. This can be
accomplished using the contentType="filelist" attribute on the
<content-template> element. In this case, the wizard will
let the user choose a file name, package and location for one of the files,
and the remaining file name(s) can be derived from the information provided
by the user.
The main differences when creating multiple files from a single content template are these:
- Specify
contentType="filelist"for the <content-type> tag. - The
<content>sub-element of<content-template>should contain a comma-delimited list of file items. Each of these file items consists of a source pathname and a destination pathname, delimited by a "|" (vertical bar) character. - Each file item destination path should start with either a
${webapp}or a${project}placeholder to indicate where it should be rooted. - Each file item destination path can optionally contain the following
placeholders, which will be replaced with the values the user supplies in the wizard:
Placeholder Description ${name}User-supplied file name as entered in the wizard ${basename}User-supplied file name as entered in the wizard, without the extension (if any) ${package}User-supplied package name as entered in the wizard, with periods replaced by File.separator characters ("\" or "/"), plus a trailing File.separator character. - The last file item in the list will be the one used to derive the browser startup URL (only applies when creating a new Web application project).
- The
contentIsRelativeToattribute should be explicitly specified for the <content-type> element. This does not apply when using a pre-defined template type (such as "HTML Page" or "JSP File").
For example, suppose you wished to define a new content template that would show an option of "HTML with external CSS" when the predefined content type "HTML Page" is selected in the New File Wizard. When the wizard completes, you want the wizard to create two files:
- An HTML page with the name specified by the user
- An associated cascading style sheet with the same base name but an extension of css.
Suppose further that you want the HTML page to automatically construct the necessary link in the header to the style sheet. For simplicity, assume that both files will be created in the Web application base directory.
These steps will create the two sample source files and the user_templates.xml
file needed to accomplish these requirements for this example:
- Create the source style sheet. The sample CSS source file below has this pathname:
...\webAF\Master\webapps\content_templates\MyCompany\styles\MyCompany_Standard.css<style type="text/css"> body { font-family: Verdana, Arial, sans-serif; font-size: 10pt; } h1{ font-family: Verdana, Arial, sans-serif; font-size: 14pt; font-weight: bold; font-style: italic; margin-top: 8px; margin-bottom:2px; } .pageHead { font-family: Verdana, Arial, sans-serif; font-size: 16pt; font-weight: bold; margin-top: 4px; margin-bottom:4px; text-align:center } </style> - Create the source HTML file with a placeholder in the link to the CSS file.
The sample source file below has this pathname:
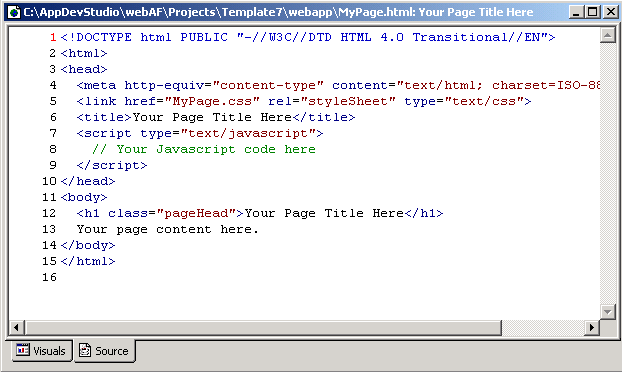
...\webAF\Master\webapps\content_templates\MyCompany\publicHtml.html<!DOCTYPE html PUBLIC "-//W3C//DTD HTML 4.0 Transitional//EN"> <html> <head> <meta http-equiv="content-type" content="text/html; charset=ISO-8859-1"> <link href="$WEBAF{content.base.name}.css" rel="styleSheet" type="text/css"> <title>Your Page Title Here</title> <script type="text/javascript"> // Your Javascript code here </script> </head> <body> <h1 class="pageHead">Your Page Title Here</h1> Your page content here. </body> </html> - Create (or add to) the template file, specifying the file list.
The sample XML file below has this pathname:
...\webAF\Master\webapps\content_templates\user_templates.xml<content-types> <content-type name="HTML"> <content-template name="HTML_CSS" listname="HTML with external CSS" description="Boilerplate HTML plus style sheet file" contentType="fileList"> <content>MyCompany/styles/MyCompany_Standard.css|${webapp}/${basename}.css, MyCompany/publicHtml.html|${webapp}\${name}</content> </content-template> </content-type> </content-types>
After these steps are completed, if you select an "HTML Page" file type in the New File Wizard,
specifying a name of "MyPage.html", and then choose the new content
template choice of "HTML with external CSS", webAF will construct the
files MyPage.html and MyPage.css. The
HTML file will contain the link to the css file:
Making Defaults Vary With Content Template
The New File wizard proposes a default file name and extension defined according to the
specification for the <content-type>. But what if you want
different default file extensions depending on which <content-template> the user
selects? For example, for a file type of "Text file", you might want a
default extension of "txt" for one initial content choice, but an extension of "dat"
for another. The following example user_templates.xml file illustrates
how this can be accomplished:
<content-types>
   <content-type name="text">
      <content-template name="dat_file"
         listname="Partner dat file"
         description="Text file with .dat extension and corporate partner default content"
         defaultExtension="dat"
         defaultExtensionRequired="true"
         defaultContentName="MonthlyReturns.dat"
         defaultContentLocation=""
         contentIsRelativeTo="project"
         contentType="text">
         <content>
Category:other
ID:GEN0001
Count:1
Reason:Defective
         </content>
      </content-template>
      <content-template name="server_bat_file"
         listname="Server-starting .bat file"
         description="Batch file to start standard servers"
         defaultExtension="bat"
         defaultExtensionRequired="true"
         defaultContentName="StartServers.bat"
         defaultContentLocation="utility_files"
         contentIsRelativeTo="project"
         contentType="text">
         <content>
@echo off
cd /d "C:\Program Files\MyCompany\Servers\MiscServer"
echo Starting Misc server...
start/min "MiscServer" "C:\servers\miscserver" -stdaccess "localhost"
         </content>
      </content-template>
   </content-type>
</content-types>
With this template defined, when File ![]() New is selected in webAF and "Text File" is selected
as the file type, the Name, Package name and Location text boxes will be disabled in the wizard.
New is selected in webAF and "Text File" is selected
as the file type, the Name, Package name and Location text boxes will be disabled in the wizard.
When Next is clicked, these fields will instead be displayed on the wizard page for content template selection:
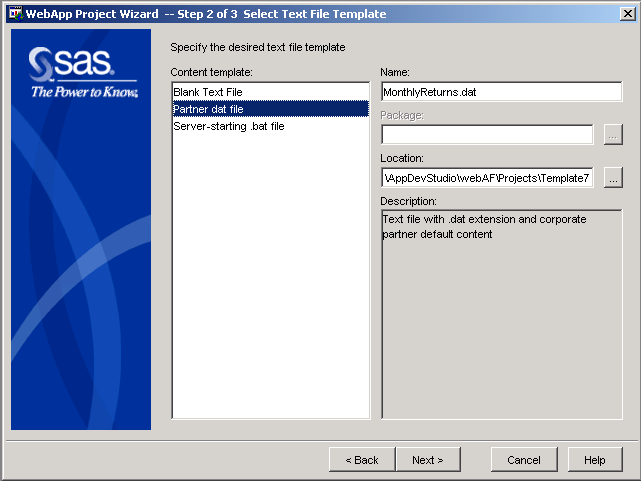
Since "Partner dat file" is the selected content template, "MonthlyReturns.dat" is proposed as the default file name. If "Server-starting .bat file" had been chosen instead, then "StartServers.bat" would have been shown as the default file name instead.
The reason that the file name field entry is postponed until the content template page of the wizard
is that the defaultContentName, defaultExtension
and defaultContentLocation attributes are specified for the <content-template>
element, instead of the <content-type> element where they have
appeared in other examples. If any of these attributes are specified on any of the <content-template>
tags for the chosen <content-type>, then the Name, Package and Location fields
of the wizard will all be postponed until the page for content template selection.
Restricting Templates to Certain Web Application Types or Options
Sometimes you might want to display a content type choice, or certain content template choices, only when the Web application project was created with a certain web application template (for example, SAS Taglib Web Application), or with a certain option selected (for example, Struts Tag Library). This can be accomplished by placing your new file template in one of the subdirectory locations listed in the directory discovery section above.
For example, suppose you wished to provide a content template for a JSP file containing some custom boilerplate code, but this choice should only be available to Web application projects that include the JSTL library option. This can be accomplished with these steps:
- Create the following new subdirectory, which is not included in the standard
SAS AppDev Studio install:
<ADS install>\webAF\Master\webapps\options\JSPStandardTaglib\content_templates - Save a text file containing the source custom JSTL content. For our example,
this is the file name and location that were used, relative to the subdirectory above:
...
\myCompany\CustomJSTL.jsp - Save the
user_templates.xmlfile shown below in the subdirectory created in step 1 above.
<content-types>
   <content-type name="JSP">
      <content-template name="Custom_JSTL"
         listname="JSP with custom JSTL"
         description="JSP file including my custom JSTL boilerplate code"
         contentType="file"
         content="MyCompany\CustomJSTL.htm">
      </content-template>
   </content-type>
</content-types>
Saving the user_templates.xml file in the
...\options\JSPStandardTaglib\content_templates
directory ensures that it will only be "discovered" by the webAF
New File Wizard if the Web application includes the
JSP Standard Template Library.
Changing the Predefined Templates
The examples thus far have focused on ways to augment the pre-defined file types and content types displayed in the New File Wizard. You can also modify most of the pre-defined content types and content templates.
This XML file defines most of the pre-defined content types and content templates for Web application projects:
<ADS install>\webAF\Master\webapps\content_templates\templates.xml
If you examine this file, you will find it is very similar to the
user_templates.xml examples discussed previously. In fact,
it is processed in the same way, except that it supports localization
(internationalization) of the text that appears in the wizard. The
differences are described below:
- The first line of the file has some new attributes:
    <content-types resources="resources\templates.properties"

      keyPostfix="@res" removePostfix="true"
The
resourcesattribute specifies the name of a Java Properties file that supplieskey=valuepairs to be substituted in the wizard.The
keyPostfixattribute specifies a suffix that identifies placeholders in thetemplates.xmlfile that should be replaced with substitutions from thetemplates.propertiesfile.The
removePostfix="true"attribute specifies that the suffix should be removed from the key string before performing the lookup in thetemplates.propertiesfile. - Instead of having literal values throughout the
templates.xmlfile, placeholder keys are specified instead. For example,listName="CSSType.ListName.txt@res"When this attribute is encounted,
CSSType.ListName.txtis used as the lookup key in theresources\templates.propertiesfile, to find the actual string to be displayed. For an English language install of SAS AppDev Studio, this would be "Cascading Style Sheet". - Instead of having a substitution placeholder such as
$USER{package.statement}as described previously, the equivalent placeholder is$WEBAF{package.statement}. This is done so that any future webAF enhancement that might add additional predefined properties will not conflict with user-defined key names.
If you would like to change any of the predefined content types and templates, follow the steps below.
- If you already have a
user_templates.xmlfile of additional content types and content templates, rename it to another name that will be discovered by the wizard, for exampleuser_templates_more.xml. - Rename the
templates.xmlfile astemplates.xml.standard. This will not be discovered by the wizard since it does not have an xml extension, but if you decide at a later time to restore the factory defaults, you can rename it back totemplates.xml. - Make a copy of
templates.xml.standardasuser_templates.xml, and make any needed changes to this file. This file will be discovered by the wizard, and if you subsequently install an upgrade to SAS AppDev Studio, it will not be over-written when an updatedtemplates.xmlis installed.
Troubleshooting Tips for Templates
Any error detected while processing an XML file will abort the discovery process
for the directory containing the XML file. As a result, no file types will
be displayed in the wizard. In particular, note that if an error is detected in
<ADS install>\webAF\Master\webapps\content_templates\user_templates.xml,
none of the predefined types (HTML, JSP, etc.) will appear in the wizard since they are
discovered in this directory.
If you have modified an XML file and the choices disappear from the wizard, check the webAF Component Log for error messages.
The wizard makes an existence check for a file you specify as the content
of the template (assuming fileType="file" is specified).,
Therefore you can't "try out" adding a new template in the XML file to see how it looks in the
wizard until you also create the source file specified.
If your content is specified directly in the XML template file instead of an external text file, don't forget to check for ampersand (&) and less-than (<) characters in your content, which must be converted to the equivalent entity references.
Remember that if you have a <content-type> tag with a name attribute
that duplicates a previous tag or that duplicates one of the predefined name types,
the attributes of the first tag will be used and conflicting attributes in later tags will
be ignored. Remember too that webAF uses case-insensitive compares.
If a null pointer exception occurs during the execution of the New File Wizard,
check to make sure you didn't forget to specify the required
contentIsRelativeTo attribute on the <content-type>
element.
Additional Template Examples
A sample XML template file that provides additional examples illustrating correct syntax is included with the standard install, and can be found here:
<ADS install>\webAF\Master\webapps\content_templates\user_templates.xml.sample
This file is organized in a tutorial fashion, with lots of explanatory comments. As you read it from top to bottom, the examples will become more complex. Please note however, that the template choices it creates are not intended to be useful in their own right, but simply to illustrate syntax.
To make the examples in the file visible to the New File Wizard,
make a copy of this file and then rename the copy to
user_templates_sample.xml, since this fulfills the naming
requirements needed for discovery by webAF.
Note: Do not just rename the original user_templates.xml.sample
file to user_templates_sample.xml. If you do so, it will fail and the
wizard will not display any file type choices (because one of the example templates in the file
uses a <content-template> attribute of
content="user_templates.xml.sample", and that file no longer exists).
Note that several of the examples have exactly the same name
attribute on the <content-type> tag, so only the
first of the group with the same name will show up in the wizard. To see
one of the latter templates that has a duplicate name, comment out the
ones before it that have the same name.