Creating a Study or Submission

Overview: Creating a Study or Submission

You create a study or submission by providing basic object metadata such as name, description, and content location in the metadata tree. Then, SAS Clinical Data Integration collects metadata about the item. For example, a study collects metadata such as protocol title, indication, and phase. After metadata is collected, the versions of the data standards that can be used for the study or submission are defined.
Note: Only an administrator can set the default content for a study or submission. For more information, see Adding Users to the Clinical Administrators Group.
You can create a study from a study definition in a CRT-DDS define.xml file. If the define.xml file contains multiple study definitions, the first study definition is imported.

Folder Organization of Studies and Submissions

A study or submission can be located at the root of the hierarchy in the Folders tree (Study 1 and Submission 1 in the following figure) or within a general folder (Study 2 and Submission 2).
Illustration of Basic Folder Hierarchy
illustration of basic folder hierarchy
You can create more complex hierarchies based on the containment rules shown in the following table:
Folder Containment Rules
Content
Study
Submission
Container
Study
not allowed
not allowed
Submission
allowed
not allowed
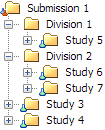
Using the containment rules, here is an example of a more complex folder hierarchy:
Illustration of Complex Folder Hierarchy
illustration of complex folder hierarchy

Name Requirements

A study or submission name has a maximum length of 60 characters.

Description Requirements

A study or submission description has a maximum length of 200 characters.

Create a Study or Submission

To create a study or submission, perform the following steps:
  1. In the Folders tree, right-click a folder, and then select Newthen selectStudy or Submission.
    The New Study or New Submission wizard appears.
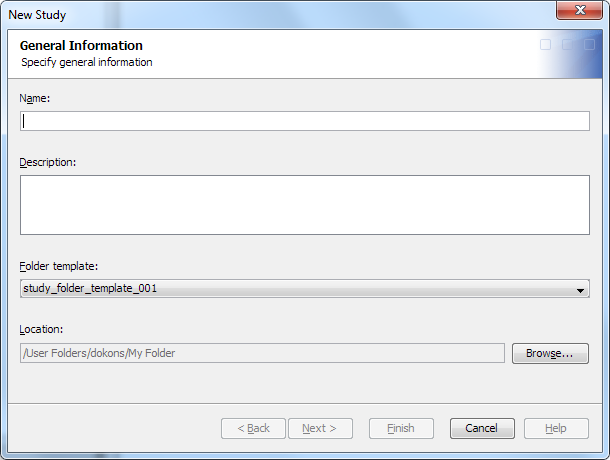
    New Study wizard
  2. Enter a name and an optional description.
    The name must meet certain requirements. (See Name Requirements. )The description must meet certain requirements. (See Description Requirements.)
  3. Select a folder template.
    For more information, see Working with Folder Templates.
  4. To change the location of the study or submission, click Browse, and then select a new location.
    For information about the location of a study or submission, see Folder Organization of Studies and Submissions.
  5. Click Next.
    The Data Standards Selection page appears.
  6. (Optional) Select one or more data standards.
    All active data standards to which you have access are displayed.
    Note: You cannot select multiple items for the same data standard.
  7. Click Next.
    The Properties page appears.
  8. (Optional) Specify the property values.
    The properties that appear on this page and their default values are predetermined by the administrator's configuration of the data standard’s property model.
    Note: Do not use single quotation marks, double quotations marks, or hyphens in the property value fields.
  9. Click Next.
    The Library Selection page appears.
  10. (Optional) Select one or more libraries to associate with the study or submission.
    The libraries that are available on this page are predetermined by the default content for a study or submission. For more information, see Working with Library Templates.
  11. Click Next.
    The Controlled Terminology page appears.
  12. (Optional) To select a controlled terminology package to associate with the study or submission, perform the following steps:
    1. Click Add.
      The Available Terminology Packages dialog box appears. The controlled terminology packages that are available, as predetermined by the administrator, are listed.
    2. Select a package, and then click OK.
  13. To remove a selected controlled terminology package, click Remove.
  14. If you are creating a study, click Finish.
  15. If you are creating a submission, click Next.
    The Contributing Studies page appears.
  16. (Optional) Select one or more studies to associate with the submission, and then click Finish.
    All studies to which you have access are displayed.

Create a Study from a CRT-DDS define.xml File

To create a study from a study definition in a CRT-DDS define.xml file, perform the following steps:
  1. In the Folders tree, right-click a folder, and then select Newthen selectStudy From CRT-DDS.
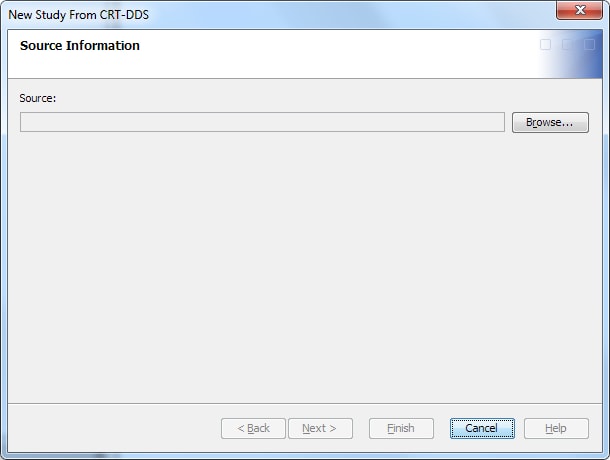
    The New Study From CRT-DDS wizard appears.
    New Study From CRT-DDS wizard
  2. Click Browse, select a define.xml file on your local computer, and click Open.
  3. Click Next.
    The General Information page appears.
  4. (Optional) Enter a name and a description.
    Note: The name and description are automatically derived from the define.xml file. However, you can change the values.
    The name must meet certain requirements. (See Name Requirements. )The description is not required. If you provide a description, it must meet certain requirements. (See Description Requirements.)
  5. Select a folder template.
    For more information, see Working with Folder Templates.
  6. To change the location of the study, click Browse, and then select a new location.
    For information about the location of a study, see Folder Organization of Studies and Submissions.
  7. Click Next.
    The Data Standards Selection page appears.
  8. (Optional) Select one or more data standards to associate with the study.
    All active data standards to which you have access are displayed.
  9. Click Next.
    The Properties page appears.
  10. (Optional) Specify the property values.
    The properties that appear on this page and their default values are predetermined by the administrator’s configuration of the data standard’s property model.
    The attribute values that are specified in the define.xml file and that map to SAS Clinical Data Integration properties are imported.
    Note: Do not use single quotation marks, double quotations marks, or hyphens in the property value fields.
  11. Click Next.
    The Library Selection page appears.
  12. (Optional) Select one or more libraries to associate with the study.
    The libraries that appear on this page are predetermined by the default content of a study. For more information, see Working with Library Templates.
  13. Click Next.
    The Controlled Terminology page appears.
  14. (Optional) To select a controlled terminology package to associate with the study, perform the following steps:
    1. Click Add.
      The Available Terminology Packages dialog box appears. The controlled terminology packages that appear are predetermined by the administrator.
    2. Select a controlled terminology package, and then click OK.
  15. To remove a selected controlled terminology package, click Remove.
  16. Click Finish.