|
|
COM/DCOM
Note: This topic does not apply to the following Windows environments: Windows XP Service Pack 2 and later, Windows Server 2003 Service Pack 1 and later. See Configuring DCOM on Windows XP Service Pack 2 and Windows Server 2003 Service Pack 1.
To grant permissions to users and groups specifically for accessing and launching the SAS server (instead of defining
global permissions as shown in the previous section):
From the Windows taskbar, click Start  Run.
Run. Type dcomcnfg and click OK. The Component Services window appears.
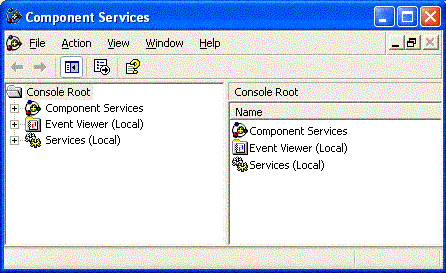
- Expand the Component Services folder, expand the
Computers folder, expand the My Computer folder, and then expand the DCOM Config folder.
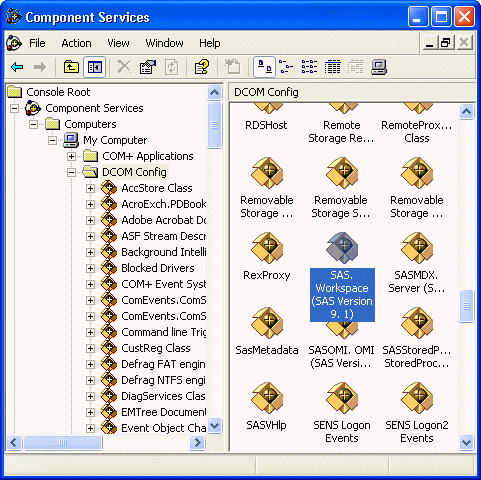
This view shows the AppID description for each DCOM server that can be launched on your machine. (The AppID GUID is shown for servers that register without a description.)
Select the AppID for the SAS Integrated Object Model (IOM) Server. The AppID differs depending on which version of SAS is installed. See AppIDs for Configuring DCOM to determine which AppID to look for. After you highlight the selection, right-click and select Properties. The Properties dialog
box for the server object appears. Select the Location tab.
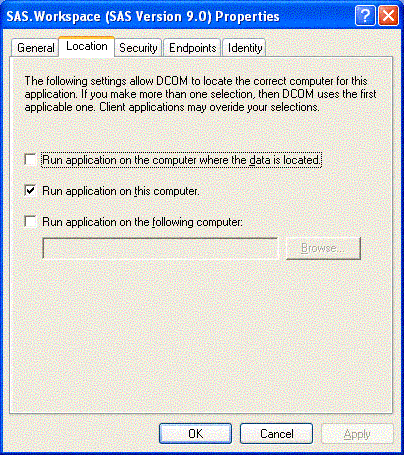
Check the default location setting. By default, the only option enabled is Run application on this computer, as shown
in the illustration. No other
options are required for SAS applications. Select the Identity tab.
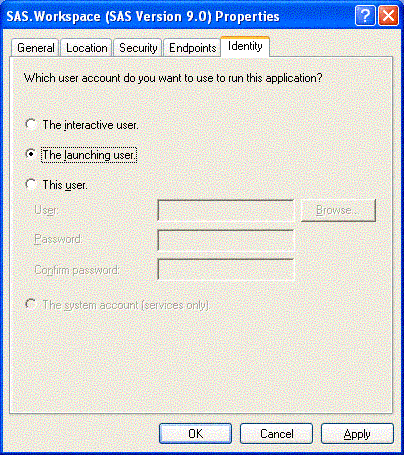
Select the identity based on the type of server:
For multi-user servers (SAS Metadata Server, SAS System 9 OLAP server),
select This user and specify the User, Password, and Confirm Password
information.
CAUTION: Support for the use of COM in the SAS Metadata Server is
experimental in SAS 9.1. Do not use COM in the SAS Metadata Server
in production jobs.
For SAS Workspace Servers, check the desired default identity setting. For maximum security, select the
option The launching user.
Note that some versions of Windows prevent servers with COM connections that are configured
with the "This user" identity choice to be run from a command prompt. The
recommended approach for multiuser servers is to install them as a Windows
service, generally with "protocol=(com,bridge)" in order to support the
maximum possible range of clients.
Select the Security tab.
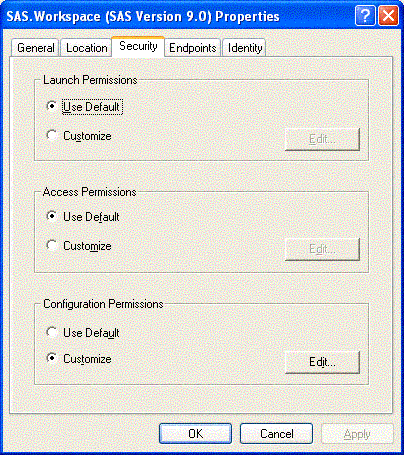
If you want to use default access permissions, select Use Default, click OK, and then
continue with Step 12.
If you want to grant access to users who are not in the list of default access permissions:
Select Customize and click the adjacent Edit button. The Access Permissions dialog box appears:
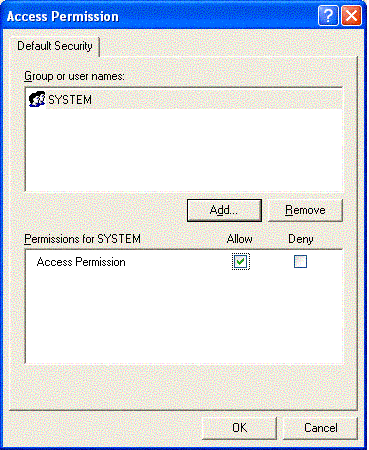
Select Add. The Select Users, Computers, or Groups dialog box appears:
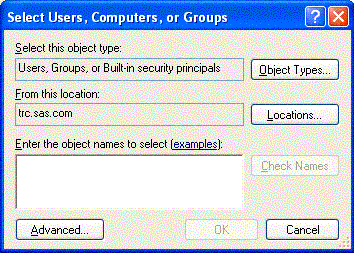
Use this dialog box to grant users and groups (who are not listed in the Access Permissions) access to SAS through DCOM.
You should also give access permission to System.
(For field descriptions, refer to the Windows Help.) You can also identify users and groups that are denied access to SAS by changing the selection in Type of Access.
When you are finished, click OK in the Select Users, Computers, or Groups dialog box, and then click OK in the Access Permissions dialog box.
On the Security tab, in the Launch Permissions box, select Customize and click the adjacent Edit button. The Launch Permissions dialog box appears. Click Add. The Select Users, Computers, or Groups dialog box appears. Use this dialog box to identify users and groups at your site and the type of access (allow or deny launch). It is recommended that you enter the same values that you entered for the Custom Access Permissions.
You should also give launch permission to System.
(For field descriptions, refer to the Windows Help.) When you are finished, click OK.
Note: If you grant launch permissions for an application to specific users and groups, you might affect those users who previously had permission to the application through default permissions. Click OK in each of the open dialog boxes to save your selections and exit the dcomcnfg utility.
Note: On Windows XP, if you have used the dcomcnfg utility to edit
an application's security settings and you have left the Authentication Level
on the General tab as Default, then DCOMCNFG will store the
"AuthenticationLevel" value under the
HKEY_CLASSES_ROOT\AppID\{hexadecimal-appid} key in the
Windows registry with a value of "0". This value is not defined as a
supported value by the COM library (which reads these values at runtime
to determine your application's security settings). When this occurs,
the symptom is "0x80070005 - Access is denied" on the first call from the
client to the IOM server.
The easiest workaround is to set the Authentication Level on the General tab
to some specific value other than "Default".
For more information about this problem, see Microsoft
Knowledge Base Article 814430.
|