Working within Your SAS Session
Using the Docking View
Introduction to the Docking View
The Docking View allows
for easy navigation within the main SAS window. When the docking view
is enabled, windows that can be docked (integrated with the main SAS
window) such as the Explorer and the Results windows, appear on the
left side of the main SAS window. When you open an object from a
docked window, the opened object appears to the right of the docking
area.
Docking and Undocking Windows
For information about
setting docking view preferences, see View Preferences. To use a command to dock and undock the docking view,
see WDOCKVIEW Command: Windows.
Resizing the Docking View
You can also resize
the docking view by using the WDOCKVIEWRESIZE command. For more information,
see Resizing the Docking View in the Main SAS Window and WDOCKVIEWRESIZE Command: Windows.
Minimizing and Restoring the Docking View
Using the Window Bar
The window bar, similar to the Windows
taskbar, is a reserved space at the bottom of the main SAS window
that is used to display a button for each opened window within SAS,
providing immediate access to any opened window. When you click a
button in the window bar, that window becomes the active window and
appears on top of all other windows. When you click the button for
the active window, the window is minimized.
Each button on the window
bar has a menu that is associated with it. To access the menu, place
the mouse pointer over the button and click the right mouse button.
When you place the cursor
over a window bar button, a ScreenTip pops up with the name of the
window, or for an editor, the name of the opened file. You enable
ScreenTips by using the Preferences dialog
box or by typing
wscreentips in the command
bar. For more information about enabling ScreenTips, see View Preferences and WSCREENTIPS Command: Windows.
By using drag-and-drop
editing, you can use an application's window bar button to load a
file into an application, such as the Enhanced Editor, that accepts
file input. To load a file:
Using Menus
You can access SAS commands, tools, and options by selecting
them from the menus at the top of the main SAS window or by using
the pop-up menus within application windows. The menus display options
that are available to the active window. To access a pop-up menu for
a particular window, click the right
mouse button anywhere within the window. The pop-up menu that appears
contains the menu items that are available for that particular window.
Some SAS windows (such
as the Explorer window) along with the main
SAS window can contain objects that have their own pop-up menus when
you right-click an object. For example, the command bar, the toolbar,
and the status bar each have a pop-up menu. In these windows, the
pop-up menu is specific to the selected object.
Changing the SAS Current Folder
What Is the Current Folder?
The current folder is the operating
environment folder to which many but not all of the SAS commands and
actions apply. The current folder is displayed in the status bar at
the bottom of the main SAS window. By default, SAS uses the folder
that is designated by the SASUSER system option in the SAS configuration
file as the current folder when you begin your SAS session. You can
specify a different default current folder by changing the Start In field that is available in the Properties tab
for the SAS program shortcut or by specifying the SASINITIALFOLDER
system option during SAS invocation. For more information, see SASINITIALFOLDER System Option: Windows.
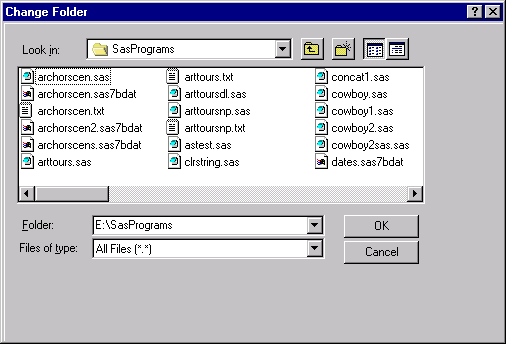
Interactively Selecting a New Current Folder
Using SAS Statements to Change the Current Folder
You can change the current
drive and folder by submitting the change directory (CD or CHDIR)
command with the X statement in SAS. SAS intercepts the change directory
command and then changes drive commands and changes its current folder.
Issuing SAS Commands
Using the Toolbar to Issue Commands
When you start SAS, by default, the toolbar appears
at the top of the main SAS window. The toolbar provides a convenient
way to issue commands that you use often. The toolbar commands are
specific for the active SAS window.
To submit a command
by using the toolbar, click the tool button that represents the command
that you need.
To learn which tools
perform what commands, position the mouse pointer over a tool briefly
to reveal the ScreenTip for that tool.
You can add or change
the tools that are defined in the toolbar and customize the toolbar
for an application. For more information, see Customizing the Toolbar.
Using the Command Bar to Issue Commands
The command bar, as shown in The Main SAS Window, is an integrated command line that offers a central location
from which you can type any SAS command, as long as the command is
valid for the active window. The command bar can also be undocked
and appear in a separate window. It can be moved anywhere on your
desktop. If you type a command that is not valid for the active window,
an error message is displayed on the status bar.
SAS stores the commands
that you type in the command bar from session to session, and you
can easily retrieve previously issued commands by selecting them from
the command list. The default number of commands to save is 15, but
you can save from 0 to 50 commands. To change the number of commands
to save in the command bar
By default, SAS stores
the commands in the order of most frequently used. To store commands
in the order of most recently used
You can also retrieve previously issued commands by
using the AutoComplete feature. When you start to type in the command
bar, SAS completes the command that best matches the command that
you are entering. When the command that you want appears in the command
bar, press ENTER. To enable AutoComplete
To customize the command
bar by using a command, see COMMAND Command: Windows. For more information about the Customize Tools Toolbars
tab, see Setting General Toolbar Preferences.
Using the Command Line to Issue Commands
You can toggle the command line so that
each window contains a command line. Commands that you enter in a
window apply only to that window. For example, the INCLUDE command
applies in the Enhanced Editor window, but
not in the Log window.
Sending E-Mail Using SAS
Overview of Sending E-Mail
You can use SAS to send electronic
mail either interactively (using a dialog box) or programmatically
(using SAS statements in a DATA step or SCL). SAS supports three
types of electronic mail interfaces:
You might need to install
an e-mail client that supports one of these protocols before you can
use SAS e-mail support. Also, although you can use SAS to send messages,
you must use your e-mail program to view or read messages.
When you send mail interactively,
SAS automatically includes the contents of the active window as an
attachment to your e-mail. Depending on the contents of the active
window, the attachment can be a text file (.TXT), a bitmap (.BMP),
an HTML file (.HTML), or an RTF file (.RTF).
SMTP is available only
by using the FILENAME statement for e-mail. If you specify SMTP as
the e-mail system in the EMAILSYS system option and you are using
an e-mail dialog box, the MAPI e-mail system is used. For information
about using SMTP, see SAS Language Reference: Concepts as well as FILENAME Statement, EMAIL (SMTP) Access Method in SAS Statements: Reference, the EMAILHOST= System Option in SAS System Options: Reference, and the EMAILPORT System Option in SAS System Options: Reference.
Initializing E-Mail
To send
e-mail from within SAS, use the following system options that are
appropriate for your e-mail system in the SAS configuration file or
when you invoke your SAS session. These e-mail options can be set
during the SAS session with the options statement.
specifies which e-mail
interface to use. By default, SAS uses MAPI. The SMTP interface is
available only when you send e-mail programmatically. SMTP is not
available when you use either your e-mail program native dialog box
or the SAS e-mail dialog box.
specifies whether to
use the native e-mail interactive dialog box that is provided by your
e-mail application or the e-mail interface that is provided by SAS.
SAS uses the native dialog box by default.
specifies the domain
name for the SMTP server that supports e-mail access for your site.
This option is necessary only if you are using the SMTP e-mail interface.
Multiple SMTP servers can be specified:
EMAILHOST SMTP
server| (‘server1’ ‘server2’ <...’server-n’>)specifies the authorization
protocol to use in SMTP e-mail. The default for this option is NONE.
The only supported protocol is LOGIN.
specifies either your
VIM e-mail login ID, the MAPI profile that you use to access the underlying
e-mail system, or a fully qualified e-mail address if you are using
SMTP. If any of these values contain spaces, you must enclose them
in double quotation marks.
Using Your E-Mail Software to Send Mail
Using the SAS Send Mail Dialog Box
If the value of the EMAILDLG system
option is set to SAS, you can send electronic mail by using the Send Mail dialog box that is provided by SAS, as shown
in the display.
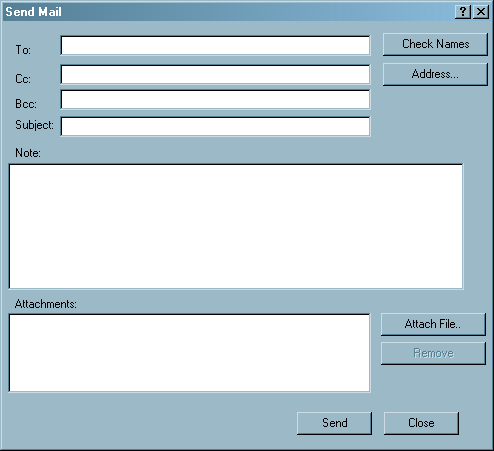
The Send
Mail dialog box contains the following fields:
the primary recipients
of your e-mail. You must specify one or more e-mail addresses that
are valid for your mail system before you can send e-mail. Separate
multiple recipients with a semicolon (;).
the e-mail addresses
of any users that you want to receive a copy of the mail that you
are sending. You can leave this field blank if you want. Separate
multiple recipients with a semicolon (;).
specifies the recipients
who will receive a copy of the e-mail. These addresses will not be
visible to those individuals in the TO and CC options.
You can copy text from
SAS application windows or other Windows applications and paste it
here (using the CTRL+C and CTRL+V accelerator key combinations). If
your note text exceeds the window space that is provided, you can
scroll backward and forward by using the arrow keys, or you can use
the PgUp and PgDn keys.
icons and names of
any files that you want to send with the message. You or the recipient
can open an attached file by double-clicking its icon, provided that
its file extension has a File Manager association with a Windows application
(for example, the .TXT extension might be associated with Notepad).
To verify whether the
addresses that you specified in the To and Cc fields are valid, click Check Names. If one or more of the addresses is ambiguous (that is, the mail
program cannot locate them in the address books) SAS displays an error
message and highlights the first ambiguous address.
Note that an ambiguous
address is not necessarily invalid. It is possible to send mail to
recipients who are outside your immediate local-area-network (LAN)
by using gateways, even though the addresses might not be resolved
by using Check Names.
Whether an address is
considered invalid or ambiguous depends on the e-mail program that
you are using and on the configuration of your network. For example,
suppose you want to send e-mail to a colleague on the Internet. Your
LAN might have a gateway to the Internet that enables you to address
the mail to
JBrown@rhythm.com at Internet (where at is the gateway directive keyword
and Internet is the name of a gateway on
your LAN). Because your mail program uses the at keyword to direct your message to the Internet gateway, the address is considered valid. However, when you click Check Names, the address is considered ambiguous because
the final destination address cannot be resolved by using the local
address book. You can still click Send to
send the message without an error.
Sending the Contents of a Window by E-mail
Using the DATA Step or SCL to Send E-mail
By using the EMAIL access method,
you can use the DATA step or SCL to send electronic mail from within
SAS. This method has several advantages:
FILENAME fileref EMAIL 'address' <email-options>;
where
is the valid destination
e-mail address that you want to send mail to. You must enclose the
address in quotation marks. Specifying an address as a FILENAME statement
argument is optional if you specify the TO= e-mail option or the PUT
statement !EM_TO! directive, which will override an address specification.
can be any of the following:
Note: Each e-mail option can be
specified only in a FILENAME statement that overrides the corresponding
SAS system option.
specifies your e-mail
login ID, MAPI profile name or your SMTP e-mail address that is used
to access the underlying e-mail system. If you specify MAPI in the
EMAILSYS system option, specify your profile name. If the value contains
a space, enclose the name in double quotation marks. This e-mail option
can be specified in the FILENAME statement that overrides the SAS
system option.
specifies your e-mail
login password, where password is the login password for your login name. If password contains a space, enclose it in double
quotation marks. This e-mail option can be specified in the FILENAME
statement that overrides the SAS system option.
specifies the primary
recipients of the e-mail. If an address contains more than one word,
you must enclose the address in double quotation marks. If you want
to specify more than one address, you must enclose the group of addresses
in parentheses and each address in double quotation marks. For example,
valid TO values are
to="John Smith" to=("J. Callahan"
"P. Sledge")specifies the recipients
who will receive a copy of the e-mail. If an address contains more
than one word, you must enclose the address in double quotation marks.
If you want to specify more than one address, you must enclose the
group of addresses in parentheses and each address in double quotation
marks. For example, valid CC values are
cc="John Smith"
cc=("J. Callahan" "P. Sledge")specifies the recipients
who will receive a copy of the e-mail. These addresses will not be
visible to those individuals in the TO and CC options. If an address
contains more than one word, you must enclose the address in double
quotation marks. If you want to specify more than one address, you
must enclose the group of addresses in parentheses and each address
in double quotation marks. For example, valid BCC values are
bcc="John Smith" bcc=("J. Callahan" "P. Sledge")specifies the subject
of the message. If the subject text is longer than one word (that
is, it contains at least one blank space), you must enclose the text
in double quotation marks. You must also use quotation marks if the
subject contains any special characters. For example,
subject=Sales and subject="June Report" are valid subjects.
filename.ext specifies the full path and filename
of one or more files to attach to the message.
LRECL=record-length specifies the record length (in
bytes). Under Windows, the default is 256. The value of record-length can range from 1 to 1,073,741,823
( 1 gigabyte ).
If you want to attach
more than one file or if you want to specify a record length and record
format, you must enclose the group of filenames in parentheses and
each filename in double quotation marks. For example, valid values
for file attachments are
attach=opinion.txt attach=("june2004.txt" "july2004.txt")
                                             attach=("home.html" recfm=v lrecl=372);
If your e-mail system
is SMTP, see FILENAME Statement, EMAIL (SMTP) Access Method in SAS Statements: Reference for additional ATTACH arguments.
Options that you specify in a FILE statement override any corresponding
options that you specified in the FILENAME statement. In your DATA
step, after using the FILE statement to define your e-mail fileref
as the output destination, use PUT statements to define the body of
the message. For an example of using e-mail options in the FILE statement,
see Attaching a File and Specifying Options in the FILE Statement.
You can also use PUT
statements to specify e-mail directives that change the attributes
of your electronic message or perform actions with it. You can specify
only one directive in each PUT statement; each PUT statement can contain
only the text that is associated with the directive that it specifies.
The following are the directives that change your message attributes:
replaces the current
primary recipient addresses with addresses. If a single address contains more than one word, you must enclose
that address in quotation marks. If you want to specify more than
one address, you must enclose each address in quotation marks and
the group of addresses in parentheses.
replaces the current
copied recipient addresses with addresses. If you want to specify more than one address, you must enclose
each address in quotation marks and the group of addresses in parentheses.
Here are the directives
that perform actions:
sends the message with
the current attributes. By default, SAS sends a message when the fileref
is closed. The fileref closes when the next FILE statement is encountered
or the DATA step ends. If you use this directive, SAS sends the message
when it encounters the directive, and again at the end of the DATA
step. This directive is useful for writing DATA step programs that
conditionally send messages or use a loop to send multiple messages.
Example of Sending E-Mail from the DATA Step
Suppose you want to share a copy of your SAS configuration file
with your coworker Jim, whose user ID is
JBrown. The following example code shows how to send the file with the
DATA step.
Sending a File with the DATA Step
filename mymail email "JBrown"
         subject="My SASV9.CFG file"
         attach="c:\sas\sasV9.cfg";
data _null_;
   file mymail;
   put 'Jim,';
   put 'This is my SAS configuration file.';
   put 'I think you might like the';
   put 'new options I added.';
run;
The following example
code sends a message and attaches a file to multiple recipients, and
specifies the e-mail options in the FILE statement instead of the
FILENAME statement.
Attaching a File and Specifying Options in the FILE Statement
filename outbox email "Ron B";
data _null_;
   file outbox
   /* Overrides value in */
   /* filename statement */
   to=("Ron B" "Lisa D")
   cc=("Margaret Z" "Lenny P")
   subject="My SAS output"
   attach="c:\sas\results.out"
   ;
   put 'Folks,';
   put 'Attached is my output from the SAS';
   put 'program I ran last night.';
   put 'It worked great!';
run;
You can use conditional
logic in the DATA step to send multiple messages and control which
recipients get which message. For example, suppose you want to send
customized reports to members of two different departments. The following
example code shows such a DATA step.
Sending Customized Messages Using the DATA Step
filename reports email "Jim";
data _null_;
   file reports;
   length name dept $ 21;
   input name dept;
   /* Assign the TO attribute */
   put '!EM_TO!' name;
   /* Assign the SUBJECT attribute */
   put '!EM_SUBJECT! Report for ' dept;
   put name ',';
   put 'Here is the latest report for ' dept '.';
   if dept='marketing' then
      put '!EM_ATTACH! c:\mktrept.txt';
   else  /* ATTACH the appropriate report */
      put '!EM_ATTACH! c:\devrept.txt';

    /* Send the message. */
    put '!EM_SEND!';
    /* Clear the message attributes.*/
    put '!EM_NEWMSG!';
    /* Abort the message before the */
    /* RUN statement causes it to   */
    /* be sent again.               */
    put '!EM_ABORT!';
    cards;
Susan          marketing
Jim            marketing
Rita           development
Herb           development
;
run;
The resulting e-mail
message, and its attachments, are dependent on the department to which
the recipient belongs.
Note: You must use the !EM_NEWMSG!
directive to clear the message attributes between recipients. The
!EM_ABORT! directive prevents the message from being automatically
sent at the end of the DATA step.
The following example
code shows how to send a message and attach a file to multiple recipients.
It specifies the e-mail options in the FILENAME statement instead
of in the FILE statement. This method will override the values for
the SAS system options EMAILID, EMAILPW, and EMAILSYS.
filename outbox email "Ron B" emailsys=VIM
 emailpw="mypassword" emailid="myuserid";
data _null_;
  file outbox
        /* Overrides value in */
        /* filename statement */
     to=("Ron B" "Lisa D")
     cc=("Margaret Z" "Lenny P")
     subject="My SAS output"
     attach="c:\sas\results.out"
     ;
  put 'Folks,';
  put 'Attached is my output from the SAS';
  put 'program I ran last night.';
  put 'It worked great!';
run;
Example of Sending E-Mail Using SCL Code
The following example
code shows the FRAME entry that also contains SEND button that invokes
this SCL code (marked by the
send label).
Invoking SCL Code from a FRAME Entry
send:
   /* set up a fileref */
   rc = filename('mailit','userid','email');
   /* if the fileref was successfully set up,
      open the file to write to */
   if rc = 0 then do;
      fid = fopen('mailit','o');
      if fid > 0 then do;
       /* fput statements are used to
          implement writing the mail and
          the components such as subject,
          who to mail to, etc. */
   fputrc1= fput(fid,line1);
   rc = fwrite(fid);
   fputrc2= fput(fid,'!EM_TO! '||mailto);
   rc = fwrite(fid);
   fputrc3= fput(fid,'!EM_CC! '||copyto);
   rc = fwrite(fid);
   fputrc4= fput(fid,'!EM_ATTACH! '||attach);
   rc = fwrite(fid);
   fputrc5= fput(fid,'!EM_SUBJECT! '||subject);
   rc = fwrite(fid);
   closerc= fclose(fid);
      end;
   end;
return;
cancel:
   call execcmd('end');
return;
Example of Sending E-Mail Using SMTP
The
following examples show how you can send e-mail by using SMTP from
a DATA step and how you can send your ODS HTML output as HTML and
not as an attachment to your e-mail.
Ask your system administrator
for the location of your.email.server.com. Port 25 is the most common port.
The following code uses
the FILENAME statement and a DATA step to send e-mail:
filename mymail email from="yourid@email.com"
                      to=("id1@.emailaddr.com" "id2@emailaddr.com")
                      subject="Put Subject Here"
                      content_type="text/plain";
data _null_;
   file mymail;
   put 'hello world';
run;
quit;Saving Windows to External Files
You can save any text editor window,
such as the Enhanced Editor window, the Program Editor window, or other SAS windows, such as
the Log, Output, or Results Viewer windows to an external file.
-
Either click the Save button (the storage device) or select the File menu and select Save. If you have previously saved the contents of this window to a file (and the filename is part of the window title), SAS saves the contents to the file that you specified previously. If you have not saved the window contents during this session, then SAS displays the Save As dialog box.If you have previously saved the window contents but now want to save the window contents to a different file, type
dlgsavein the command bar or select File Save As.
CAUTION:Using Save instead of Save As from the File menu to save a file causes SAS to overwrite or append the file.Always use Save As when you want to save the contents of the editor to a new file. If you open a text file in the editor window, whether you use the Open dialog box or the INCLUDE command, the editor title bar displays the name of the file that you opened. When you select the File menu and then the Save item, SAS overwrites or appends the file of that name with the current contents of the editor.
Save As.
CAUTION:Using Save instead of Save As from the File menu to save a file causes SAS to overwrite or append the file.Always use Save As when you want to save the contents of the editor to a new file. If you open a text file in the editor window, whether you use the Open dialog box or the INCLUDE command, the editor title bar displays the name of the file that you opened. When you select the File menu and then the Save item, SAS overwrites or appends the file of that name with the current contents of the editor. -
Select or name the file in which to store the window contents. You can also select a file type from the Save file as type list. SAS saves most file types as plain text and assigns different file extensions based on the type that you select; the exception is the RTF file type, which SAS saves in rich text format (RTF).
Clearing the Window and Filename
Defining Keys
To display
the key definitions that are active for the SAS session (that is,
the DMKEYS entry in your Sasuser.Profile catalog), either type KEYS
in the command bar or select ToolsOptionsKeys. These key definitions apply to the basic SAS windows,
such as the Enhanced Editor, Output, and Log windows. For a list of
default keys, see Default Key Definitions under Windows and Keyboard Shortcuts within the Enhanced Editor.
The definition must
be a valid SAS command or sequence of commands. When you specify a
sequence of commands, separate the commands with a semicolon ( ; ).
For example, if you want to define the Ctrl + H key sequence to maximize
a window and recall the last submitted program, specify the following
commands in the Definitions column next to CTL H:
zoom; recall
SAS does not check the
syntax of a command until it is used (that is, when the key is pressed).
If you misspell a command or type an incorrect command, you do not
discover your error until you use the key and receive an error message
that indicates that the command was unrecognized.
Key definitions are
stored in your Sasuser.Profile catalog. SAS creates a Profile catalog
each time you invoke SAS with a different value for the SASUSER option.
Changes that you make to one Profile catalog are not reflected in
any other catalog. However, you can use the COPY command from the KEYS window or the CATALOG procedure to copy key definition
members to other Profile catalogs. For more information, see the CATALOG
procedure in Base SAS Procedures Guide.
Navigating with Microsoft IntelliMouse
SAS provides support
for the Microsoft IntelliMouse. The IntelliMouse is a modified mouse
that includes a rotation wheel (wheel control) that enables new forms
of navigation. The IntelliMouse works within the SAS windows that
use a vertical scroll bar to scroll the window contents.
With the IntelliMouse,
you can use the mouse to scroll instead of interacting with the navigational
controls in the SAS windows. To scroll with the IntelliMouse, you
rotate the wheel control forward or backward, which is equivalent
to pressing the up arrow or down arrow on the scroll bar.
The IntelliMouse
also supports AutoScroll. To initiate AutoScroll, click the mouse
wheel and then move the mouse away from the origination point. The
contents of the window starts to scroll in the direction that you
move the mouse. The farther away you move the mouse from the origination
point, the faster the contents scroll. Pressing a key, clicking a
mouse button, or rotating the mouse wheel terminate AutoScroll mode.
Using the Clipboard
Selecting and Copying Text
For windows that contain text, such as the Enhanced
Editor, Notepad, Log, Output, and KEYS windows, you can hold down
either the left mouse button or ALT + the left mouse button and drag
the mouse to mark the area that you want to cut or copy. Holding down
the left mouse button when you are selecting multiple lines selects
whole lines of text. Holding down ALT + the left mouse button selects
a rectangular block or column of text. The text area is immediately
marked in reverse video while you are dragging the mouse. In text
windows, you can scroll while you are dragging the mouse by moving
the mouse pointer beyond the border of the window in the direction
that you want to scroll. To extend the selection of a text area, use
the SHIFT key + the left mouse button. Release the mouse button when
you have included all the text that you want to copy.
To paste text that is
stored on the clipboard, position the insertion pointer in a text
area of a window and do one of the following:
The text from the clipboard is pasted to the area
that you indicate. If there is already an area of selected text within
the target window, the selected text is replaced with contents of
the clipboard. You can paste text only into SAS windows that accept
text input, such as the Enhanced Editor or the SAS Notepad.
Selecting and Copying in Nontext Windows
For windows
such as SAS/GRAPH windows, an area is marked by a box, not by reverse
video. The box indicates that the area that you are marking is in
bitmap format. After you finish marking an area, you can copy it to
the clipboard. If the window that you are working in has no Edit pop-up
menu, you can use the following key combinations to perform the copy
and paste functions:
Pasting Bitmapped Information into Your SAS Session
Some windows, such as the BUILD: DISPLAY window for FRAME entries in SAS/AF software, enable you to paste bitmaps
into the window. For more information, see “Pasting an OLE
Object from the Clipboard” in the “Using OLE in SAS/AF
Software” chapter of the SAS Companion for Windows.
Also, you can paste
bitmaps into the SAS GRAPH window to import
graphics. For more information, see Importing Graphics from Other Applications.
Submitting SAS Code from the Clipboard
SAS enables you to use the Windows clipboard to submit
SAS code. This feature can be used to copy or cut SAS code from another
application, such as the Windows Notepad or another text editor, and
submit it to SAS for execution. This feature is also convenient for
submitting the sample programs that are available in SAS Help and
Documentation.
To submit SAS code that
is stored on the clipboard, select the Run menu and then select Submit clipboard when the Enhanced Editor window or the Program Editor window is
active. Alternatively, you can use the GSUBMIT command from the command
line, with the following syntax:
gsubmit buf=default
The GSUBMIT command
can be used to submit SAS code that is stored on the clipboard even
if the editor window is not the active window (or is closed). If you
use the GSUBMIT command often, you can define an icon for the command
in the toolbar, or assign the GSUBMIT command to a function key. For
more information about how to define buttons, see Customizing the Toolbar.
Creating Text Highlighting and Special Characters
Special Character Attributes
The SAS Notepad and SAS/AF applications let you use
extended color and highlight attributes for text. To access these
attributes, press the ESC key and the appropriate letter or number
to toggle a color or attribute. With this feature, you can alter the
color or attributes of entire lines or individual words or letters.
Valid colors and attributes, as well as the keys that you use to implement
them, are listed in Extended Color Key Sequences and Extended Attribute Key Sequences. You can type the letters for the colors in either uppercase
or lowercase letters.
Alternate ASCII Characters
If you want to create alternate
ASCII characters such as foreign language characters, you can use
the ALT key in combination with the ASCII character code. Use the
numeric keypad and press the Num Lock key to enter the character code.
For a list of ASCII character codes and instructions about how to
use the ALT key sequences, see your Microsoft documentation.