Install and Migrate SAS Interactively
Installing and migrating SAS interactively with the
SAS Deployment Wizard consists of two main phases:
This topic describes
some of the more important configuration dialog boxes that you will
encounter during the migration and configuration phase of a SAS 9.3
deployment. The type and number of configuration-related dialog boxes
that you will see depend on the prompt level that you choose, the
SAS tier that you are currently migrating, and the contents of your
SAS 9.3 custom order. For information about all SAS Deployment Wizard
prompts, see the online Help for the wizard page in question.
Note: Starting with the March 2012
release of SAS 9.3, the deployment wizard can be run on operating
systems that do not have windowing systems. For more information,
see the SAS Deployment Wizard and SAS Deployment Manager
User's Guide, available at http://support.sas.com/documentation/installcenter/en/ikdeploywizug/64204/PDF/default/user.pdf.
-
Verify that you have performed the earlier required steps outlined in Overview of Installing SAS and Migrating Your Content.Note: A few pages into the SAS installation, the SAS Deployment Wizard prompt you for paths to the requested third-party software. You must have the necessary third-party software installed on the current machine, or the SAS Deployment Wizard will not let you continue with the installation. In this situation, you will have to end the SAS Deployment Wizard session and install the required third-party software before you can continue.
-
Ensure that you have the list of required user IDs available. For more information, see Completing the Pre-migration Checklists.
-
If you are deploying a middle-tier machine, make sure that you have read and understood the information in Middle-Tier Considerations.
-
Review information about where to source certain SAS content repositories described in Content Repository Considerations.
-
Review information about SAS Deployment Wizard configuration prompting levels described in Overview of Configuration Options by Prompt Level.
-
If you are deploying SAS on multiple machines, make sure that you are following the process described in Installation Order Rules for Multiple Machine Deployments.
-
Unless you plan to use different ports for the SAS servers to which you are migrating, make sure that the SAS servers are not running on the machine on which you are currently migrating.Note: In situations where you are rerunning the deployment wizard to address configuration errors, make sure that there are no SAS 9.3 servers running. On UNIX and z/OS, you can run the following command:
./sas.servers
                              status
. If any SAS 9.3 servers are running, shut them down with the following command:./sas.servers stop. -
Start the SAS Deployment Wizard from the highest-level directory in your SAS Software Depot using the command appropriate for your operating system:
-
Specify the location (SAS Home) where you want to install SAS. For more information, see SAS Installation Directory (SAS Home) Considerations.
-
-
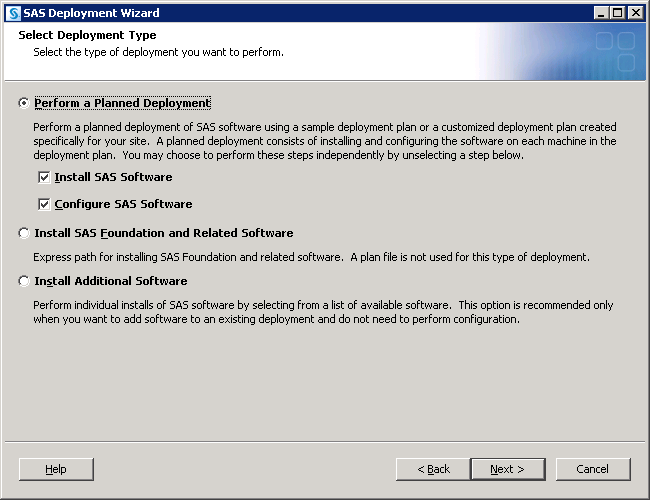
Choose Select a standard deployment plan, and then choose the appropriate plan in the drop-down list.For more information, see About Deployment Plans.
-
Select the locale that affects how SAS displays text, numbers, currencies, dates, times, and sorts data. If you want to configure SAS as a Unicode server, do that here.For more information, see Locale and Encoding Considerations in SAS Intelligence Platform: Installation and Configuration Guide.
-
For more information, see http://support.sas.com/resources/thirdpartysupport/v93/jres.html.
-
On Windows, on the Select Microsoft Office Applications page, choose the Microsoft Office applications for which you want the SAS Add-In for Microsoft Office activated.When the Office application is launched, the activated SAS add-in automatically loads, and users see either a SAS tab on the Ribbon (Microsoft Office 2010 and 2007) or a SAS menu and toolbars (Microsoft Office 2003). To activate the SAS Add-In for Microsoft Office in Microsoft Excel, Word, PowerPoint, or Outlook after the installation, you can run SwitcherUtility.exe. For more information, see the Help for the SAS Add-In for Microsoft Office.
-
If you use a third-party database and SAS/ACCESS is a part of your order, select the software version for the third-party database.The deployment wizard uses your selection to configure SAS/ACCESS for the correct version of the third-party database.Make sure that you perform any additional configuration on your system, such as installing the third-party database client and configuring the system environment for access to the native client libraries. For more information about the correct environment variables, go to the SAS Install Center at http://support.sas.com/documentation/installcenter/93, and use the operating system and SAS version to locate the appropriate SAS Foundation Configuration Guide.
-
(UNIX only) If your system uses Pluggable Authentication Modules (PAM), select Use PAM Authentication. In addition, you might also need to update your PAM configuration files in order for SAS 9.2 to use PAM authentication. For more information, see the Configuration Guide for SAS 9.3 Foundation for UNIX Environments.
-
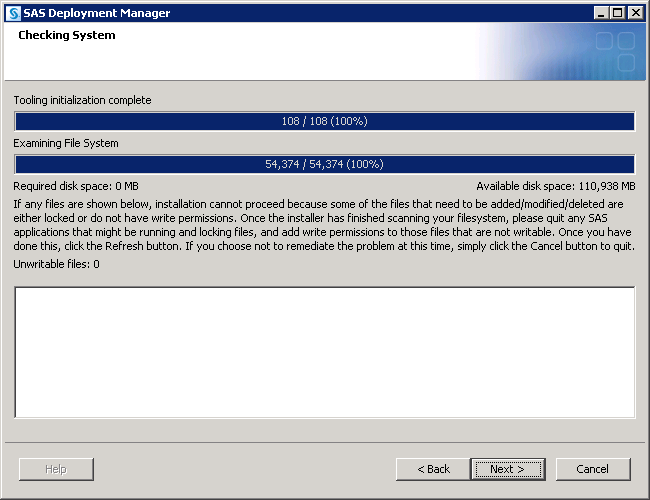
The deployment wizard scans your machine to determine whether any pre-existing SAS files are locked or do not have Write permission. If the wizard lists any files in the text box, then while the wizard is running, quit SAS and add Write permission to the files listed. When you are finished, click Next.
-
Note: For more information, see the Configuration Guide for SAS 9.3 Foundation for z/OS, available at http://support.sas.com/documentation/installcenter/en/ikfdtnmvscg/64313/PDF/default/config.pdf.
-
Specify the parameters for various ways that SAS can be run with different performance implications. Choose SAS (default ENTRY point) to run the unbundled configuration. Choose SASB to run the bundled configuration. Choose SASLPA to run the bundled configuration with some modules installed in the Link Pack Area (LPA).
-
Specify the amount of information to provide the SAS Deployment Wizard for configuring the SAS software you are installing on the current machine. Choose one of the three prompting levels:Refer to Overview of Configuration Options by Prompt Level for more information about the SAS Deployment Wizard prompting levels.
-
Choose a path where the SAS Deployment Wizard will write SAS 9.3 configuration files and logs and the level you want to deploy. (For example, Lev1 = production.) This path should differ from your current SAS configuration path.Note: The last digit of the default port number reflects the configuration level that you select in the SAS Deployment Wizard. For example, when you select Lev1, the default port for the metadata server is 8561. If you choose another level, such as Lev2, the wizard changes the default port to 8562. During a migration, this setting pertains only to ports for servers that are introduced after SAS 9.1.3. The deployment wizard will retain the port settings from your current SAS servers. For information about how to change port numbers, see the instructions for how to remap ports.For more information, see Overview of the Configuration Directory Structure in SAS Intelligence Platform: System Administration Guide.Note: Although your SAS Home and SAS configuration directories can share the same parent directory, one directory should not reside inside another. Defining the configuration directory under the SAS Home directory, or vice versa, can lead to file permission issues arising from the need to manage installed files differently from site-specific configurations.On z/OS, the mount point must exist; the SAS Deployment Wizard will create the necessary subdirectories.If you are deploying the SAS Framework Data Server, then SAS configuration path should be a path local to the machine. The configuration path should not be on an NFS shared disk. If you want to put your configuration path on a shared disk, then you must make sure that you specify a local path for the Framework Data Server content directory. You can set the content directory on the Framework Data Server Invocation Options page. This page is available only on the custom configuration prompting level.
-
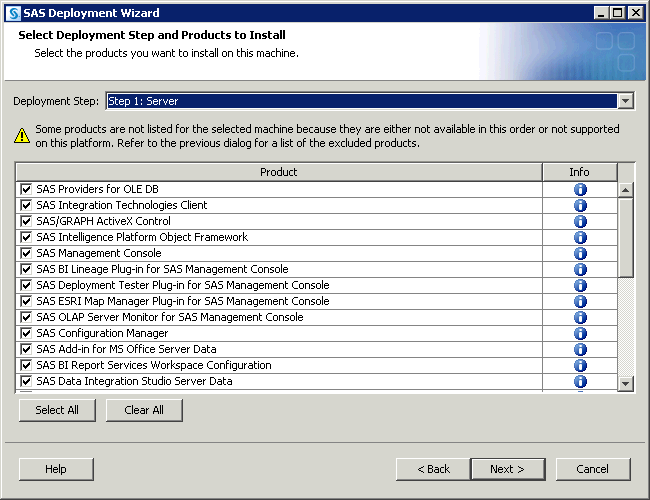
Migrating via the SAS Deployment Wizard should be performed only once per tier for a deployment. You cannot selectively choose products to migrate. You must migrate all products targeted for the current machine.Note: Additional configuration steps might not be needed on a machine when you use a deployment plan that calls for multiple steps. This can depend on whether the multiple steps were triggered by a sequencing issue across different machines in the plan or whether the multiple steps were needed to configure multiple instances of the same product.
-
Enter the complete name of the local host in Fully-qualified Local Host Name. The fully qualified local host name typically takes the form of the local host name plus the domain name server (for example, myserver.example.com). Enter a short host name in Short Local Host Name. The short local host name is the abbreviated, more common method of referring to the host, usually only a single word.
-
Choose Perform Migration and enter the path to the package that you created with the SAS Migration Utility. This path should be to the top level directory of the migration package (for example:
C:\SMU\913_Deployment). (This path should match the value of theSMU.Output.Dirproperty.)Note: Migrating via the SAS Deployment Wizard should be performed only once per tier for a deployment. (Also, you cannot selectively choose products to migrate. You must migrate all products targeted for the current machine.) If SAS components are unconfigured for a particular tier, you cannot migrate them a second time by choosing Perform Migration. In this situation, you have to perform a standard, non-migrated configuration using the deployment wizard (unless you want to unconfigure the entire SAS deployment). -
By default, the deployment wizard assumes that ports used in your current SAS deployment will be identical to the ports used in your SAS 9.3 deployment. Use this page if you want to specify different ports in your SAS 9.3 deployment.
-
Note: This topic describes some of the more important pages that you will encounter during the migration and configuration phase of a SAS 9.2 deployment. The options for which the SAS Deployment Wizard prompts you depend on which SAS products are identified in your deployment plan and, in multiple machine deployments, which machine you are currently deploying. For information about all SAS Deployment Wizard prompts, see the online Help for the wizard page in question.Authentication DomainAccept the default value (DefaultAuth), unless the deployment that you are migrating uses a different SAS authentication domain for servers on this machine.For example, if the metadata server is on Windows and the workspace server is on UNIX, the workspace server might be assigned to a SAS authentication domain named UnixAuth. For more information, see Manage Authentication Domains in SAS Management Console: Guide to Users and Permissions.Windows Options (run as managed scripts or services)On Windows, choose how to run your SAS servers either by using management scripts or running them as Windows services. If you choose the script option, then the user account that runs the object spawner must meet the following requirements on the object spawner machine:SAS Metadata ServerIf you have any changes for the metadata server, enter them in this page.The deployment wizard creates a separate server context (SASMeta) for the metadata server and the other servers required to perform metadata server utility functions, such as backup and promotion. A server context is a SAS IOM server concept that describes how SAS Application Servers manage client requests. A SAS Application Server has an awareness (or context) of how it is being used and makes decisions based on that awareness. The server context name is prepended to all server names defined in the server context. Therefore, we recommend that you not change the logical server or server prefix (SASMeta).For more information, see Overview of the SAS Metadata Server and Its Initial Configuration in SAS Intelligence Platform: System Administration Guide.Deployment Accounts: Type of AccountsSelect whether to use internal accounts when appropriate. Internal user accounts are accounts known only to SAS and are created and authenticated internally in metadata rather than externally. For more information, see Choose to Use SAS Internal Accounts.Unrestricted AdministratorFor external accounts: Enter user ID and password for an account known to the host that will serve as an unrestricted administrator for the purpose of configuring the SAS metadata server. On Windows, enter a domain-qualified user ID. If your SAS 9.3 operating system user account is different from the one you use for your earlier version of SAS, then you must be sure to make the corresponding file permissions changes. For more information, see Determine the User ID Associated with Scheduled Flows.For internal accounts: enter the password for the account known to SAS that will serve as an unrestricted administrator for the purpose of configuring the SAS metadata server. For more information, see Change to SAS 9.2 Internal Account Password Hashing.Trusted UserFor external accounts: Enter the user ID and password for an account known to the host that will enable the SAS server and spawner components to communicate securely with each other. On Windows, enter a domain-qualified user ID. If your SAS 9.3 operating system user account is different from the one you use for your earlier version of SAS, then you must be sure to make the corresponding file permissions changes. For more information, see Determine the User ID Associated with Scheduled Flows.For internal accounts: enter the password for the account known to SAS that will enable the SAS server and spawner components to communicate securely with each other. For more information, see Change to SAS 9.2 Internal Account Password Hashing.SAS BI Web Services: Authentication MethodSelect the method by which users of SAS BI Web Services are authenticated:
-
Web Authentication is managed by the Web application server using container-based authentication or a third-party product. Selecting Web authentication has these effects:
-
partially configures Web authentication for Java BI Web Services.For more information, see Securing SAS BI Web Services for Java in SAS Intelligence Platform: Middle-Tier Administration Guide.
-
Anonymous Web AccessWhen using SAS authentication you can select this option to set up a SAS identity for anonymous access to certain Web services and Web applications that support this feature. Currently, SAS BI Web Services for Java and .NET and the SAS Stored Process Web Application are the only components that support this feature.For more information, see Using the SAS Anonymous Web User with SAS Authentication in SAS Intelligence Platform: Middle-Tier Administration Guide.External Account: Anonymous Web User(Optional) Enter the user ID and password for an account to be used to grant clients access to applicable SAS Web Infrastructure Platform applications such as SAS BI Web Services and the Stored Process Web Application. On Windows, enter a domain qualified user ID. When SAS authentication is being used and the user has not preemptively specified credentials, the client will be given access to these Web applications under the anonymous user account.For more information, see Using the SAS Anonymous Web User with SAS Authentication in SAS Intelligence Platform: Middle-Tier Administration Guide.External account: SAS Spawned Servers AccountEnter the user ID and password for the external account to be used to start the pooled workspace server and the stored process server. On Windows, enter a domain qualified user ID. For migration purposes, you must use the same operating system accounts and passwords that you had in SAS 9.1.3.For more information, see Important Notes on User Accounts and Authentication.Client-side Credentials PolicySelect this option to set the policy to allow users to save their user IDs and passwords in client-side connection profiles on the metadata server for desktop applications. This input sets the value for OMA_SASSEC_LOCAL_PW_SAVE in omaconfig.xml.For more information, see Reference Information for omaconfig.xml in SAS Intelligence Platform: System Administration Guide.E-mail ServerEnter the port and host name for an SMTP e-mail server that the SAS Metadata Server uses to send e-mail alerts to an administrator if journaling issues arise. The SAS Deployment Wizard also uses this e-mail server as the default for the SAS Application Server to provide e-mail services to various SAS clients. For example, with SAS Data Integration Studio, you can use a Publish to Email transformation to alert users about various data changes. In order for SAS BI Dashboard to send alerts by e-mail to dashboard users and administrators, the port and host name must be configured for the e-mail server.For more information, see Adding or Modifying E-Mail Settings for SAS Application Servers in SAS Intelligence Platform: Application Server Administration Guide.SAS Pooled Workspace ServerEnter the name of the logical pooled workspace server and the pooled workspace in metadata. You also need to enter the name of the machine on which the pooled workspace server runs and the port on which the object spawner will listen for client requests to launch pooled workspace servers. The machine name should match the name specified to the object spawner.The pooled workspace server is a new SAS post-9.1.3 server. For more information, see Overview of Workspace Servers and Stored Process Servers in SAS Intelligence Platform: Application Server Administration Guide.SAS Pooled Workspace Server DependenciesMake sure that you choose an application server context that exists in the foundation repository, or SAS components dependent on the pooled workspace server (such as SAS BI Dashboard) will not be able to access the server.SAS Framework Data ServerEnter the name of the logical Framework Data Server in metadata. You also need to enter the name of the machine on which the Framework Data Server runs and the TCP/IP port on which the Framework Data Server will listen to. For more information, see the SAS Intelligence Platform: Middle-Tier Administration Guide.Metadata Utility SAS DATA Step Batch ServerEnter the various values required to configure a SAS DATA step batch server. The directory fields identify where the deployed SAS program is stored and the name of the deployed SAS DATA step program job. Access to this server is limited to members of the SAS Administrators group, and its use is limited to metadata server backup.For more information, see Contents of the Metadata Server Subdirectory (SASMeta) in SAS Intelligence Platform: System Administration Guide.Query Cache LibraryEnter the physical location on the file system where the SAS library will exist for temporary files used when creating optimized tables for query look up.In Query Cache Libref, enter the SAS library reference which SAS will use to refer to the query optimizer SAS library. The name must be eight characters or shorter and should be unique from other librefs used within this repository. Librefs must start with a letter or underscore and contain only letters, numerals, or underscores. The typical installation libref name is wrstemp. The libref will be used in conjunction with the server context name to form the SAS library name for the optimizer library.Select Enable Query Cache to allow the query optimizer to run. If this selection is not made, then the query optimizer will not attempt to optimize queries and will not create temporary data sets for improving performance during rendering. A typical installation will have this selection turned on. The temporary files created within the query cache library will be visible to anyone with Read permission on the Renderer Optimizer directory, so if you have security concerns with the authorization on this folder you might want to leave the optimizer off.For more information, see Using the Query Cache in SAS Intelligence Platform: Web Application Administration Guide.Output Management LibraryEnter the physical location on the file system where the SAS library will exist for burst set definition tables for reports which will be distributed by e-mail. A burst definition table will contain e-mail addresses, channels, and possibly by group information.In Output Management Library Libref, enter the SAS library reference that SAS will use to refer to the output management SAS library. The name must be eight characters or shorter and should be unique from other librefs used within this Repository. Librefs must start with a letter or underscore and contain only letters, numerals, or underscores. The typical installation libref name is wrstemp. The libref will be used in conjunction with the server context name to form the SAS library name for the distribution library.For more information, see Verifying Permissions for the Distribution Library in SAS Intelligence Platform: Web Application Administration Guide.Web Application Server: Automatic ConfigurationSelect this option for the deployment wizard to automatically build and configure the SAS Web applications as well as configuring a sample Web application server for use with SAS 9.2. (To use this wizard feature, be sure that your Web application server is not running before proceeding. For WebSphere, it is necessary to stop all deployment manager servers, all node agent servers, and all application servers before continuing with your SAS 9.2 deployment.) For more information, see Middle-Tier Considerations.If you choose not to automatically configure your Web application server, you will still be prompted for Web application server information, and deployment stages such as Configure Products, Deploy Web Applications, and Start Web Application Servers will execute to create instructions for manual deployment. When configuration is complete, follow these manual instructions on how to configure your server and deploy your Web applications. If you manually configure WebLogic, a reference domain will be created in your SAS configuration area, but no servers will be started. If you manually configure JBoss, sample start scripts will be created, but not launched.For more information, go to http://support.sas.com/resources/thirdpartysupport/v93 and search for the product name of your Web application server.Web Application Server: Multiple Managed ServersSelect to have the deployment wizard automatically configure multiple managed servers for you using SAS best practices for choosing the server to deploy each application to.In some situations it might be preferable to split the SAS Web applications across multiple managed servers. This is usually done for performance reasons.If you chose to manually configure your Web application servers, you will be provided with recommended configuration settings in a generated instructions file (Instructions.html) when the SAS Deployment Wizard completes.More advanced performance configuration considerations are documented in the SAS Intelligence Platform: Middle-Tier Administration Guide.Web Application Server: Managed ServerEnter a logical name for your managed server. This name will be displayed in your Web application server administrative console and used in administrative scripting.CAUTION:The managed server name must be unique. Non-unique names will cause your Web configuration to fail.In Configured Protocol, select the communication protocol for the administration server: HTTP or HTTPS. Automated configuration through the SAS Deployment Wizard only supports the HTTP protocol. If you perform a manual configuration, you can set up HTTPS.In Additional JVM Options, enter any additional Java options that you want the managed server JVM (Java Virtual Machine) to use. These JVM options are tagged onto the end of the managed server's command line. Options that are deployment wizard defaults can be overridden in this way.For more information, go to http://support.sas.com/resources/thirdpartysupport/v93and search for the product name of your Web application server.Database type for SAS Web Infrastructure PlatformIf you want to use a database other than the SAS Framework Data Server to store SAS Web Infrastructure Platform data, then choose the type of database here. In SAS 9.3, the following third-party databases are supported: DB2, MySQL, Oracle, PostgresSQL, and SQLServer.SAS Web Infrastructure Platform database propertiesEnter the host name, fully qualified host name, or IP address for the host where the database is installed. Specify the port that the database server is listening to and the name of the database that will contain the SAS Web Infrastructure Platform tables.Note: Third-party databases often have particular requirements that you need to know about, such as database name limits, minimum tablespace sizes, and so on. If you have not already, make sure that you review “Configuring an Alternative Database for SAS Web Infrastructure Platform Services,” available at http://support.sas.com/resources/thirdpartysupport/v93/appservers/SharedServicesAlternativeDatabase.pdf.Choose Automatically create tables and load data to have the deployment wizard automatically create tables and load the selected pre-existing database with initial data.Choose Use Catalog to indicate whether the database catalog needs to be specified in order to uniquely locate a table in the database. The database catalog should be specified if using one of the following databases: MySQL, SAS Framework Data Server, or SQL Server.Choose Use Schema Pattern to indicate whether the database schema needs to be specified in order to uniquely locate a table in the database. The database schema should be specified if using either DB2 or Oracle.In the case of MySQL, the SAS Web Infrastructure Platform configuration process will also create a new MySQL database in addition to creating tables and loading data. The new database is named according to the value specified in the Database Name field.Note: If you are using MySQL, do not specify a pre-existing MySQL database or the configuration will fail. For more information, see “Configuring an Alternative Database for SAS Web Infrastructure Platform Services,” available at http://support.sas.com/resources/thirdpartysupport/v93/appservers/SharedServicesAlternativeDatabase.pdf.For more information, see JDBC Data Sources in SAS Intelligence Platform: Middle-Tier Administration Guide.SAS Web Infrastructure Platform JDBC PropertiesEnter the user account and its password for accessing the database used with your SAS Web Infrastructure Platform tables.If you have selected to automatically configure the SAS Web Infrastructure Platform database, this user account must have the ability to create tables and insert records. If you are not automatically configuring the SAS Web Infrastructure Platform database, this user account must have the ability to insert, update and delete records. The default user account is the SAS Trusted User account (sasadm@saspw). For more information, see JDBC Data Sources in SAS Intelligence Platform: Middle-Tier Administration Guide.Web Application Server: Automatic DeploymentSelect to automatically deploy SAS 9.2 Web applications to the Web application server. For more information, see Middle-Tier Considerations.Regardless of whether you choose to automatically deploy your SAS Web applications, when building Web applications, the wizard also automatically explodes Web application archive files (.EAR files).If you choose not to automatically deploy SAS Web applications, the deployment wizard writes manual deployment instructions to Instructions.html during the Web application deployment stage, that you will need to complete after the wizard finishes executing. For more information, go to http://support.sas.com/resources/thirdpartysupport/v93/appservers/index.html and select the product name of your Web application server.External Account: Web Application Server AdministratorYou are prompted for this information if your site uses the WebSphere or WebLogic Web application server. Enter the user ID and password for the administrator account for either the WebSphere Application Server or the WebLogic Server. On Windows, be sure to enter a domain-qualified user ID.For more information about configuring Web application servers to support the SAS middle tier, go to http://support.sas.com/resources/thirdpartysupport/v93and select “IBM WebSphere” or “Oracle WebLogic”.Web Application Server: Proxy InformationIf you are using SAS Information Delivery Portal RSS feeds, then you will have to provide proxy server information. Enter the fully qualified host name for the proxy server and its port that your site uses to access the Internet.For NonProxy Hosts enter the DNS names of all the machines that should not be accessed through the proxy server. Be sure to include other machines where application servers are configured as part of a common WebLogic Domain or are part of a WebSphere cell. Separate each machine name with a vertical line character (|). Use an asterisk (*) as a wildcard for an entire subnet. For example, *.subnet.com excludes all machines with a DNS name that ends with .subnet.com.If your site does not allow Internet access on production systems, refer to configuration information available at http://support.sas.com/resources/thirdpartysupport/v93 and select your Web application server.WebSphere Application Server: NodeIn Profile Name, enter a profile name, or accept the default (SAShostname01). The profile name is used for the directory that contains the node agent and the SAS Web application server.IP MulticastAccept these IP multicast settings or enter new ones.A multicast group communications protocol is used to communicate among middle-tier SAS applications in a single SAS deployment (the set of applications connected to the same metadata server). The combination of multicast IP address and multicast UDP port should be different for each SAS deployment and also different from those used by other multicast applications at your site. The defaults are most appropriate for deployments in a firewall-isolated data center environment.For more information, see Designating Ports and Multicast Addresses in SAS Intelligence Platform: Installation and Configuration Guide.SAS Remote Services Application: JVMEnter the desired initial heap size for the remote services application using the JVM option format.In Max JVM Heap Size, enter the desired maximum heap size for the remote services application using the JVM option format.In Additional JVM Options, enter any additional Java options that you want the Remote Services VM to use. For example, you might want to add-Dmulticast_udp_ip_ttl=1to restrict multicast traffic to a single subnet based on your network topology.For more information, see SAS 9.3 Web Applications: Tuning for Performance and Scalability, available at http://support.sas.com/resources/thirdpartysupport/v93/appservers/WebTierScalabilityAndPerformance.pdf.SAS Web Report Studio: SchedulingChoose whether to enable scheduling for SAS Web Report Studio. If Platform Suite for SAS is in your deployment plan, then you have a choice between using Platform Process Manager, provided by Platform Computing, Inc., or SAS In-Process Services.For more information, see Setting Up Scheduling Using Platform Suite for SAS in Scheduling in SAS, or Setting Up Scheduling Using SAS In-Process Scheduling in Scheduling in SAS.SAS Content Server: Repository DirectoryEnter the location on the disk for the actual contents of the content repository.Use the check box on this page if you want to use the database configured for the SAS Web Infrastructure Platform to store SAS Content Server content. Selecting the SAS Web Infrastructure Platform database type is discussed on .The content server is a new post-SAS 9.1.3 server. For more information, see Administering the SAS Content Server in SAS Intelligence Platform: Middle-Tier Administration Guide.SAS Web Parts for Microsoft SharePoint: DetailsWe recommend that you accept the defaults.The Site URL is the site collection where the feature is activated. A Web application can have multiple site collections and a site collection can contain multiple sites. In most instances the URLs are the same (a site collection at the root of the Web application), but they can also be different.The SAS User ID is the metadata identity that you use to implement shared identity mode. For more information, see Configure User Access for SAS Web Parts for Microsoft SharePoint in SAS Intelligence Platform: Installation and Configuration Guide.SAS Information Delivery Portal unchallenged accessWhen unchallenged access is enabled, users can access the portal and interact with selected content without providing a user ID and password.Enter a user ID that SAS will use to grant unchallenged access to portal users. (On Windows, be sure to qualify the User ID as appropriate. For example,myDomain\sasguest.)Deselect Display Search Menu for Unchallenged Access if you want to suppress the search link from displaying in the main portal banner.For more information, see Enabling Unchallenged Portal Access in SAS Intelligence Platform: Web Application Administration Guide. -
When you see the Deployment Summary page, the deployment wizard has finished collecting installation and configuration input. This is the last opportunity to go back and change any information you have provided in previous pages before the wizard begins writing to your system.Note: Before proceeding with the migration, make sure that the input that you have provided to the deployment wizard is correct. Incorrect user input such as user ID and passwords will cause all or portions of your migration to fail.Make one of the following choices:
-
Click Cancel to terminate the wizard session. Note that you will lose installation and configuration information previously entered.Note: If you encounter a situation in which the deployment wizard reports a configuration failure, consult Overview of Troubleshooting Your Initial SAS 9.3 Deployment in SAS Intelligence Platform: Installation and Configuration Guide.
On UNIX, when you are installing the server tier, you will be prompted to enter the root password. As the message in the installation program explains, certain SAS products and features use functionality that requires SAS to check user ID authentication and file access authorizations. This in turn necessitates that certain files within your SAS installation have setuid permissions and be owned by root. -
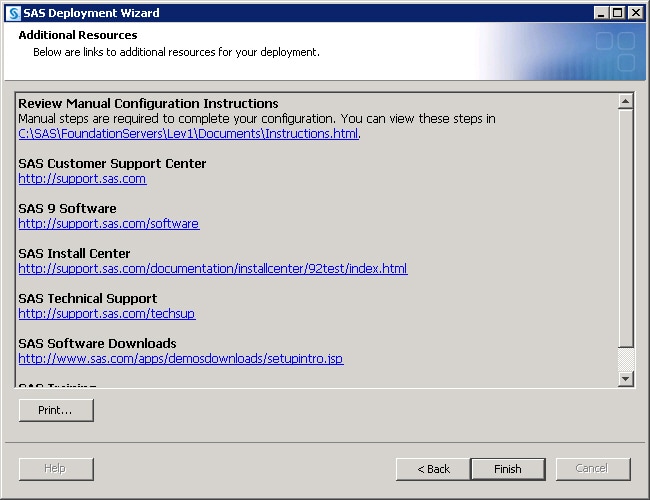
Proceed to the section, Review SAS Deployment Wizard Documents, Reports, and Logs to examine the SAS Deployment Wizard output to troubleshoot any configuration errors and complete any necessary manual configuration steps.
-
For multi-machine deployments, back up your metadata repository and your SAS configuration directory before you run the SAS Deployment Wizard on the next machine called for by your deployment plan. (You do not need to back up machines that contain only SAS 9.2 clients.)
-
Back up your metadata repository and repository manager on the SAS Metadata Server machine. For more information, see Best Practices for Backing Up and Restoring Your SAS Content in SAS Intelligence Platform: System Administration Guide.
-
When you are finished installing and migrating SAS on each machine called for in your deployment plan, proceed to Overview of Performing Post-migration Tasks.