|
|
HTTP Servers
Using SAS Management Console to Define an HTTP Server
To define an HTTP server using the SAS Management Console:
- Start SAS Management Console and connect to a metadata repository.
- From the navigation tree, select Server Manager. Then select Actions
 New Server from the menu bar. The New Server Wizard appears. New Server from the menu bar. The New Server Wizard appears.
- Select Http Server from the list of resource templates and click Next.
- Enter a unique Name and a Description for this HTTP server. Click Next.
Enter the Version and Vendor of your server software.
Select or configure your Base paths:
To create a new base path, click New. The New Base Path dialog box appears. Complete the following fields:
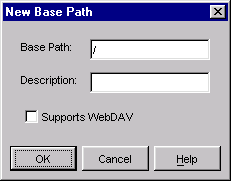
| Base Path | specifies the base path for the server. |
| Description | specifies an optional description for the base path. |
| Supports WebDAV | specifies whether the base path supports WebDAV. |
Click OK to return to the New Server Wizard.
To edit a base path, select the path and click Edit. The Edit Base Path dialog box appears. When you are finished editing the path, click OK to apply your changes. To delete a base path, select the path and click Delete. You will be prompted to confirm the deletion.
Note: You can define more than one base path. Typically, an HTTP server should specify "/" (all locations) as a base path, but not specify WebDAV support for that path. If your applications use different paths for WebDAV content, you should define those paths individually. For example, if your configurations for SAS Web Report Studio and the Publishing Framework use different WebDAV paths, you would specify three base paths:
/ - standard HTTP content
/sasdav/wrs - WebDAV content for SAS Web Report Studio
/sasdav/publish - WebDAV content for the Publishing Framework
When you are finished, click Next.
- Enter your settings for the following fields:

- Authentication Domain
- specifies the domain that is associated with a set of computing resources that use the same authentication process. To add a new authentication domain, click New and enter the name and description for the domain in the New Authentication Domain dialog box.
- Application Protocol
- specifies the application protocol for the server. Valid values are
http and https.
- Host Name
- specifies the host name used to access the server.
- Port Number
- specifies the port number used to access the server.
- Proxy URL
- specifies a proxy URL for use in accessing the server.
When you are finished, click Next.
- Verify the server information. If any of the settings are incorrect, click Back to make changes.
When your settings are all correct, click Finish to complete the server definition and return to the SAS Management Console main window.
|