Sample 31563: Creating a SAS® Information Map that filters using identity-driven, row-level permissions
 |  |  |  |
Overview
BI row-level permissions enable you to limit access to SAS data and third-party relational data that is accessed through information maps. Row-level permissions are enforced when relational information maps are accessed from applications such as SAS® Web Report Studio.
This sample shows you how to create a simple identity-driven, row-level permission in SAS Information Map Studio. As the input table for the information map, this sample uses the SASHELP.CLASS table.
Note: This feature is only available for relational information maps. For OLAP-based information maps, you can specify member-level security (see How to Assign an OLAP Permission Condition).
Note: Row-level permission filters also can be based on group membership (see Sample 31885).
Note: This sample was written using SAS Information Map Studio 3.1, but the tasks are essentially the same for SAS Information Map Studio 4.2 and later.
Tip: If your environment includes a SAS Demo User, then use that account to follow along with the sample steps.
Create the Security Associations Table
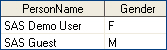
A security associations table documents the relationships between a user and the information that you want to control access to. The following DATA step code was used to create the security associations table that is used in this sample.
data sashelp.rlp_class;
   input PersonName $13. @14 Gender $;
   datalines;
SAS Demo User F
SAS Guest     M
;
run;
|
Note: Remember to register the security associations table in SAS® Management Console.
In this sample, SAS Demo User is given permission to only view information for females and SAS Guest is given permission to only view information for males.
| About the security associations table
Instead of creating a separate security associations table, the PersonName column could have been added to the CLASS table. In this case, SAS Demo User would have been the value in the female rows and SAS Guest would have been the value in the male rows. |
Create the Information Map
- Log in to SAS Information Map Studio. This sample uses the credentials for SAS Demo User.
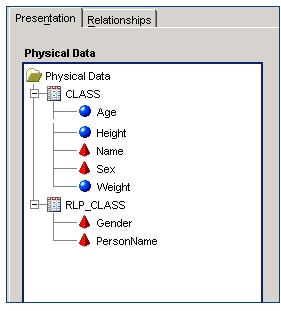
- Use Insert –> Table to insert both the CLASS table and the RLP_CLASS table.
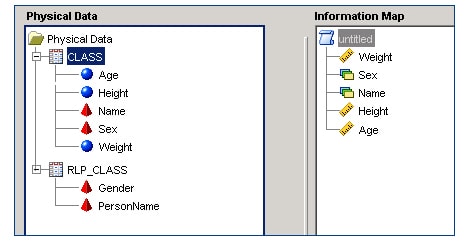
- From the Physical Data panel, move all of the columns from the CLASS table over to the Information Map panel. Do not move over any columns from the RLP_CLASS table.
- Save the information map.
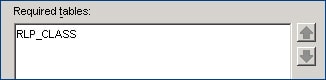
- Right-click on the information map name and select Properties.
- Select the Required Tables tab, make RLP_CLASS a required table, and then click OK.
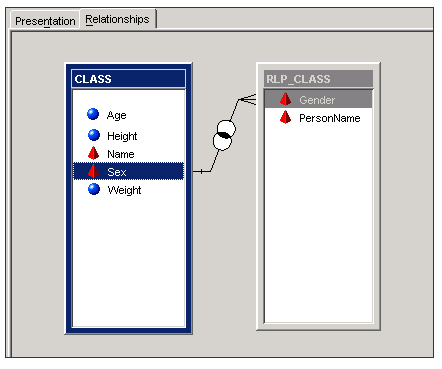
- On the Relationships tab, associate
Sexin the CLASS table withGenderin the RLP_CLASS table. - Click the Presentation tab, and select Insert–>Filter.
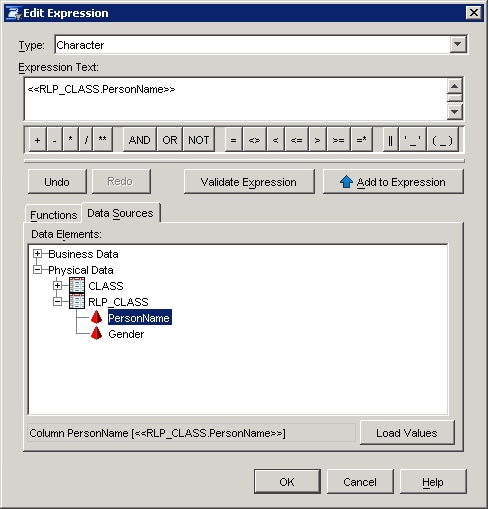
- Name the filter and then click Edit Data Item to open the Edit Expression dialog box.
- Select Character as the type of expression.
- On the Data Sources tab beneath the Expression Text box, expand the RLP_CLASS table, select the
PersonNamecolumn, and then click Add to Expression. - Click OK to return to the New Filter dialog box.
Define the Identity-Driven Filter
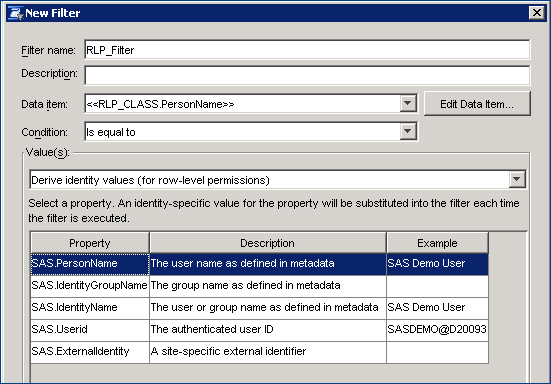
From the drop-down list beneath Value(s), select Derive identity values (for row-level permissions) to see a list of identity-driven properties. This sample filters on SAS.PersonName.
Expand Filter expression at the bottom of the dialog box to see the criteria that you have just defined.

|
About the Example column
The examples are derived from the currently logged in user (in this sample, the user is SAS Demo User). The examples are showing you how the value for the identity property should appear in the security associations table. This sample filters on SAS.PersonName. The sample could also filter on the SAS.IdentityName property. If the security associations table had included the values SASDEMO@d20093 and SASGUEST@d20093, then the sample could have filtered on the SAS.Userid property. |
Make the Filter Required
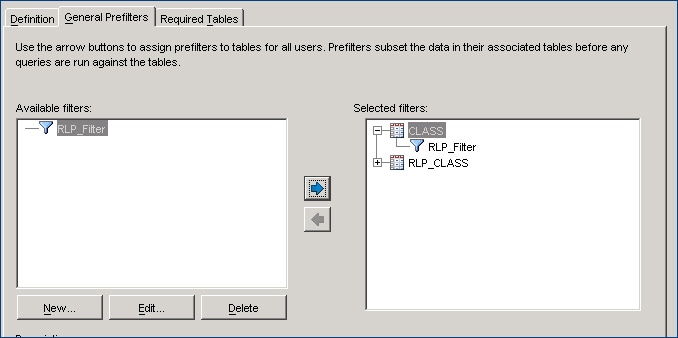
- Right-click on the information map name and select Properties.
- Select the General Prefilters tab, and assign the RLP_Filter to the CLASS table, and then click OK.
|
About prefilters
A prefilter is a mandatory filter that pre-screens and subsets the data in its associated table before any other part of a query is run. |
View the Results
To see results of testing this filter in SAS Information Studio and SAS Web Report Studio, click the Results tab at the top of this sample.
Additional Documentation
For more information about creating row-level permissions, see the documentation for the version of SAS that you are using:
- SAS 9.4 Guide to BI Row-Level Permissions .
- SAS 9.3 Guide to BI Row-Level Permissions .
- SAS 9.2 Intelligence Platform: Security Administration Guide: BI Row-Level Permissions.
- SAS 9.1.3 Intelligence Platform: Security Administration Guide, "Chapter 10: BI Row-Level Permissions".
For more information about SAS Information Map Studio, see the SAS Information Map Studio documentation page.
These sample files and code examples are provided by SAS Institute Inc. "as is" without warranty of any kind, either express or implied, including but not limited to the implied warranties of merchantability and fitness for a particular purpose. Recipients acknowledge and agree that SAS Institute shall not be liable for any damages whatsoever arising out of their use of this material. In addition, SAS Institute will provide no support for the materials contained herein.
These sample files and code examples are provided by SAS Institute Inc. "as is" without warranty of any kind, either express or implied, including but not limited to the implied warranties of merchantability and fitness for a particular purpose. Recipients acknowledge and agree that SAS Institute shall not be liable for any damages whatsoever arising out of their use of this material. In addition, SAS Institute will provide no support for the materials contained herein.
Test the Filter in SAS Information Map Studio
- Select Tools–>Test.
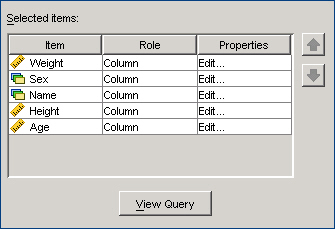
- Select all of the data items. (You do not have to select the filter because you made it required).
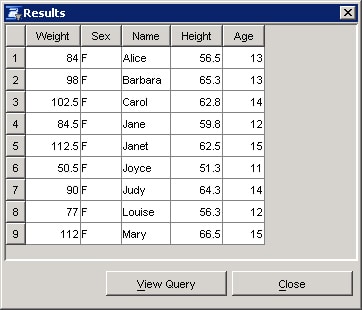
- Click Test to see results only for females because SAS Demo User is the currently logged-in user.
Test the Filter in SAS Web Report Studio
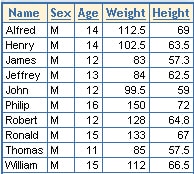
- Log into SAS Web Report Studio as SAS Guest.
- View a report that is based on the RLP Sample Map. Recall that SAS Guest can only view information about males.
| Type: | Sample |
| Topic: | Query and Reporting ==> Interactive Querying Query and Reporting System Administration ==> Security ==> Authentication System Administration ==> Security ==> Permissions Data Management ==> Data Sources ==> Information map |
| Date Modified: | 2008-03-24 16:54:37 |
| Date Created: | 2008-03-22 18:03:58 |
Operating System and Release Information
| Product Family | Product | Host | Product Release | SAS Release | ||
| Starting | Ending | Starting | Ending | |||
| SAS System | SAS Information Map Studio | Microsoft® Windows® for x64 | 3.1 | 9.1 TS1M3 SP4 | ||
| Microsoft Windows 2000 Advanced Server | 3.1 | 9.1 TS1M3 SP4 | ||||
| Microsoft Windows 2000 Datacenter Server | 3.1 | 9.1 TS1M3 SP4 | ||||
| Microsoft Windows 2000 Server | 3.1 | 9.1 TS1M3 SP4 | ||||
| Microsoft Windows 2000 Professional | 3.1 | 9.1 TS1M3 SP4 | ||||
| Microsoft Windows NT Workstation | 3.1 | 9.1 TS1M3 SP4 | ||||
| Microsoft Windows Server 2003 Datacenter Edition | 3.1 | 9.1 TS1M3 SP4 | ||||
| Microsoft Windows Server 2003 Enterprise Edition | 3.1 | 9.1 TS1M3 SP4 | ||||
| Microsoft Windows Server 2003 Standard Edition | 3.1 | 9.1 TS1M3 SP4 | ||||
| Microsoft Windows XP Professional | 3.1 | 9.1 TS1M3 SP4 | ||||
| SAS System | SAS Web Report Studio | Microsoft® Windows® for x64 | 3.1 | 9.1 TS1M3 SP4 | ||
| Microsoft Windows 2000 Advanced Server | 3.1 | 9.1 TS1M3 SP4 | ||||
| Microsoft Windows 2000 Datacenter Server | 3.1 | 9.1 TS1M3 SP4 | ||||
| Microsoft Windows 2000 Server | 3.1 | 9.1 TS1M3 SP4 | ||||
| Microsoft Windows 2000 Professional | 3.1 | 9.1 TS1M3 SP4 | ||||
| Microsoft Windows NT Workstation | 3.1 | 9.1 TS1M3 SP4 | ||||
| Microsoft Windows Server 2003 Datacenter Edition | 3.1 | 9.1 TS1M3 SP4 | ||||
| Microsoft Windows Server 2003 Enterprise Edition | 3.1 | 9.1 TS1M3 SP4 | ||||
| Microsoft Windows Server 2003 Standard Edition | 3.1 | 9.1 TS1M3 SP4 | ||||
| Microsoft Windows XP Professional | 3.1 | 9.1 TS1M3 SP4 | ||||
| 64-bit Enabled AIX | 3.1 | 9.1 TS1M3 SP4 | ||||
| 64-bit Enabled Solaris | 3.1 | 9.1 TS1M3 SP4 | ||||
| HP-UX IPF | 3.1 | 9.1 TS1M3 SP4 | ||||