DataFlux Data Management Studio 2.6: User Guide
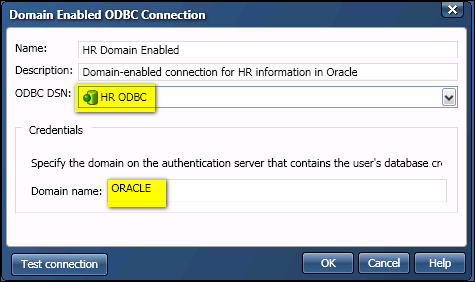
A standard ODBC connection has some disadvantages. For example, suppose that you use a standard ODBC connection in a job. You will have to save user credentials for the connection in order to execute the job. Alternatively, you could create a domain-enabled ODBC connection that references the ODBC connection and an appropriate authentication server domain, as shown in the next figure.

In the previous figure, HR ODBC is a standard ODBC connection. ORACLE is an authentication domain for the same resource that is specified in the ODBC connection. The credentials that are required to use the ODBC connection are accessible from the domain on the authentication server. When a user who is a member of the specified domain uses the domain-enabled connection, he or she is authenticated by the authentication server and is permitted to access the information that is specified in the ODBC connection. In many cases, this approach is better than forcing users to authenticate every time they use the connection in a profile, for example, or to save user credentials with a connection that is used in a job.
It is assumed that following resources are available in your DataFlux Data Management Studio session.
If the prerequisites have been met, perform the following steps to add a domain-enabled connection.
When a job is executed in batch mode, any user credentials that are required by data connections in the job must be retrieved at run-time. One way to do this is to combine the following features:
|
Documentation Feedback: yourturn@sas.com
|
Doc ID: dfDMStd_T_DataConnDomODBC.html |