|
|
COM/DCOM
Configuring DCOM on Windows XP Service Pack 2 and Windows Server 2003 Service Pack 1
Introduction
Microsoft Windows XP Service Pack 2 (SP2) and Windows Server 2003 Service Pack 1 (SP1) include many changes that enhance security. Although these changes resolve problems that were present in earlier versions of Windows, they also prevent SAS DCOM servers from functioning. To enable SAS DCOM functionality, you must disable the additional security that is provided by these service packs.
Because enabling DCOM exposes security vulnerabilities that were corrected with Windows XP SP2 and Windows Server 2003 SP1, we recommend that you consider changing your SAS configuration to use IOM Bridge servers instead of DCOM.
If you continue to use DCOM, you will need to perform the following steps:
Disabling the Windows Firewall
The Windows Firewall software that is enabled by default in Windows XP SP2 and Windows Server 2003 SP1 prevents SAS DCOM connections from functioning. To disable the Windows Firewall:
- From the Start menu, select Settings
 Control Panel and then double-click Windows Firewall. Control Panel and then double-click Windows Firewall.
- On the General tab of the Windows Firewall dialog box, select Off.
- Click OK to disable the firewall.
Note: You must disable the firewall on the server machine, and on each client machine.
Configuring DCOM Settings on the Server Machine
To enable DCOM on the server machine, you must grant launch and activate permissions to the client users as follows:
From the Start menu, select Run, and then type dcomcnfg. Click OK to launch the Component Services dialog box. In the Component Services dialog box, select Component Services, and then click  in the toolbar. in the toolbar. In the My Computer dialog box, select the COM Security tab, and then click Edit Limits under Launch and Activation Permissions. - In the Launch Permission dialog box, click Add to add the users and groups that will access the SAS server. For each user or group, select the name from the Group or user names panel and then select Allow for each permission.
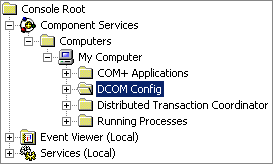
- Return to the Component Services dialog box. Expand the tree in the left panel as follows: Component Services Computers My Computer DCOM Config.
- Select DCOM Config, and then locate your SAS server component in the right panel (for example, SAS.Workspace). Right click on the server component, and then select Properties.
- In the Properties dialog box, select the Security tab, then select Customize under Launch and Activate Permissions and click Edit.
- In the Launch Permission dialog box, click Add to add the users and groups that will access the SAS server. For each user or group, select the name from the Group or user names panel and then select Allow for each type of permission.
- Return to the Properties dialog box, select Customize under Access Permissions, and then click Edit.
Select SELF in the Group or user names panel, and ensure that the Allow box is selected for the Local Access and Remote Access permissions. If the SELF user is not available, add it by clicking Add and typing SELF in the Select Users, Computers, or Groups dialog box.
Configuring DCOM Settings on Each Client Machine
SAS servers use anonymous callbacks to notify client applications of events such as the completion of a SAS job. In Windows XP Service Pack 2 and later, you must grant ANONYMOUS LOGON permissions on each client machine in order to enable anonymous callbacks.
To configure the ANONYMOUS LOGON permissions:
From the Start menu, select Run and then type dcomcnfg. Click OK to launch the Component Services dialog box. In the Component Services dialog box, select Component Services, and then click in the toolbar. In the My Computer dialog box, select the COM Security tab and then click Edit Limits under Access Permissions. - In the Access Permission dialog box, select ANONYMOUS LOGON in the Group or user names panel, and then select the Allow box for the Remote Access permission.
|