Installation Note 35631: Installing SAS® Foundation 9.2 (TS2M0) and SAS® Enterprise Guide® 4.2 when you have a planned-installation package
 |  |  |
If you have a planned-installation package and you intend to install SAS Foundation 9.2 (TS2M0) and SAS Enterprise Guide 4.2 for local use only, there will not be a sample plan file for performing the installation.
To install SAS Foundation 9.2 (TS2M0) and SAS Enterprise Guide 4.2, use one of the following methods:
- Use the New Install SAS Foundation and Related Software Selection (available in SAS 9.2 (TS2M0) Revision 09W28* and later)
- Use the SKIPPLANNING Option
- Use the Install Additional Software Button
* Revision 09W28 is planned to be released in early July 2009.
Notes:
- These three installation methods are appropriate only if you want to install SAS Enterprise Guide on your local machine so you can use the graphical user interface (GUI).
- Software administrators: If you need to change the order type from Planning to Basic, contact SAS Technical Support for assistance.
Use the New Install SAS Foundation and Related Software Selection
- Select the language in which you want to view the SAS® Deployment Wizard.
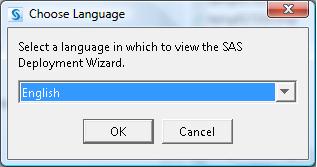
Then click OK to display the SAS Deployment Wizard 9.2.
Select Install SAS Software.
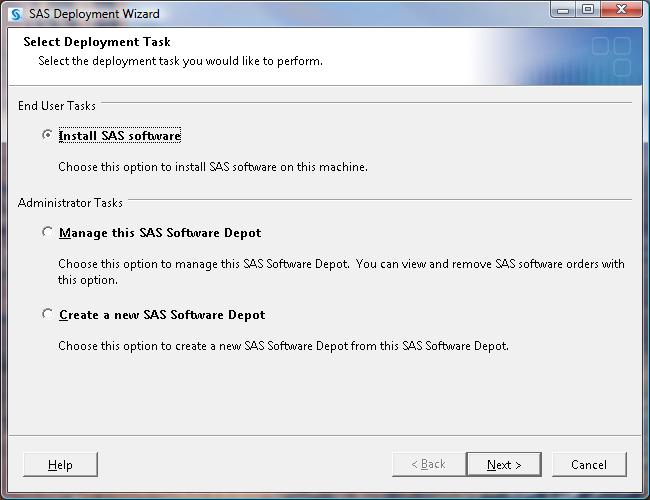
Then click Next to display the Select SAS Software Order screen.
- Select your SAS software order from the list that is displayed and then verify the specific items in the SAS Products to Install text box.
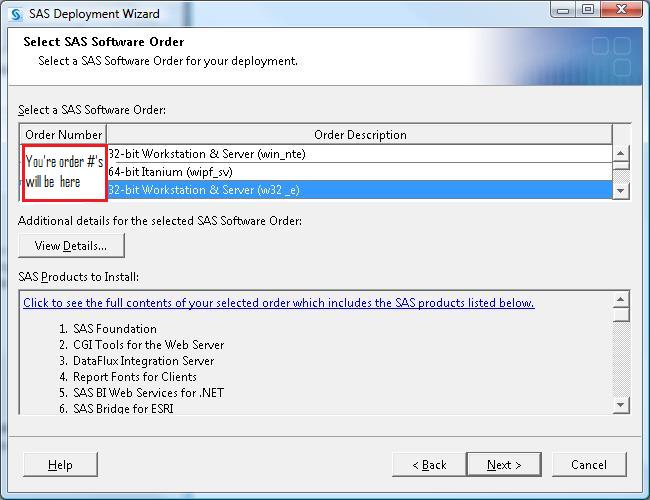
Then click Next to display the Select Deployment Type screen.
- In the SAS Deployment Wizard, select Install SAS Foundation and Related Software as the type of deployment you want to perform.
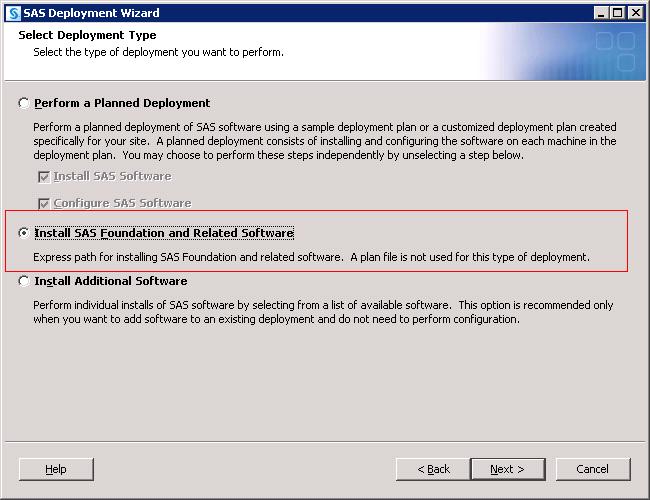
Then click Next to display the Select Products to Install screen.
- Select the software that you want to install. Make sure that you select both SAS Enterprise Guide and SAS Foundation.
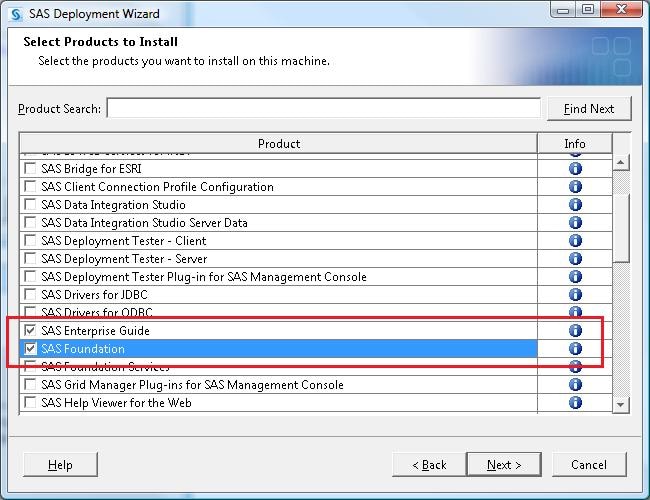
Then click Next to display the Specify SAS Installation Data File screen.
- Specify the path to your SAS installation data (SID) file.
Click Next to display the Select Language Support screen, which shows all languages checked, as shown here: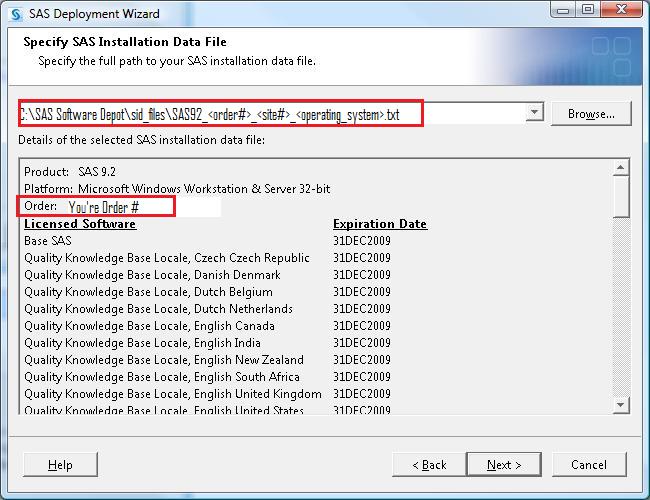
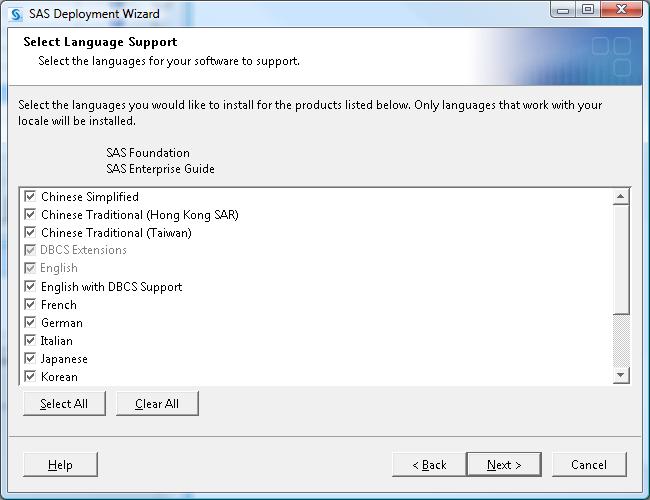
In most cases, you can just click the Clear All button. When you click Clear All, SAS installs only the default languages that work with the locale on your operating system. The screen then shows just those languages selected, as shown here.
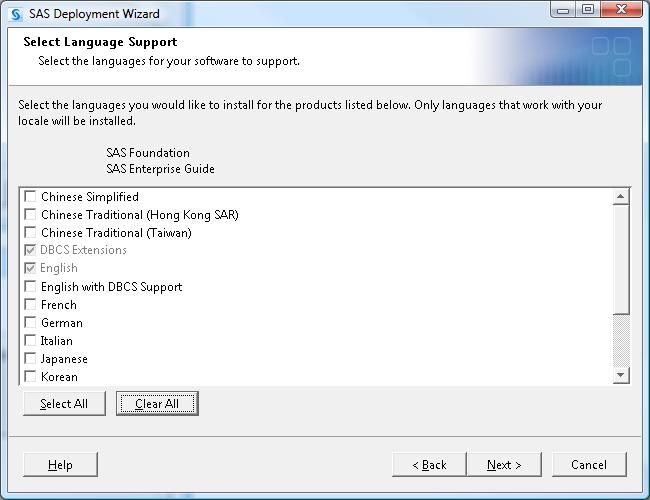
- Click Next to display the Deployment Summary panel. You should see SAS Foundation and SAS Enterprise Guide listed under Stage 2: Installation, as shown here:
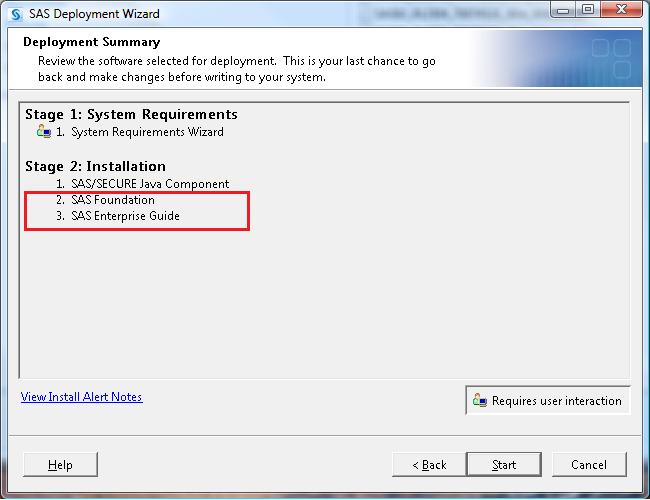
Note: In Windows environments, if you do not have the required Java Run-Time Environment (JRE) installed, you will also see Java Platform Standard Edition Run-Time Environment listed as the first item under Stage 2: Installation.
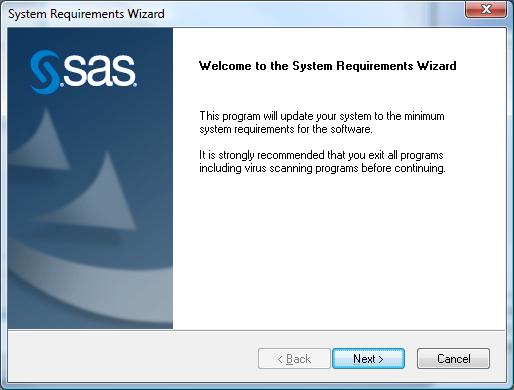
Click Start to display the System Requirements Wizard.
- In the wizard, click Next.
-
As the System Requirements Wizard runs, accept the default options and click Next for each option that is offered. If you do not install the system requirements, your software installation will fail.
For details on the system requirements for Windows environments, see the following documentation:
- System Requirements for SAS® 9.2 Foundation for Microsoft Windows
- System Requirements for SAS® 9.2 Foundation for Microsoft Windows for x64
- After accepting all of the default options in the wizard, click Finish.
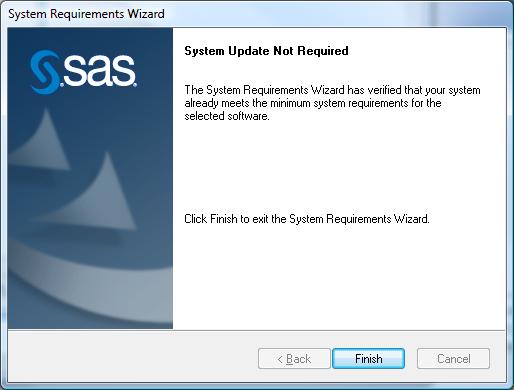
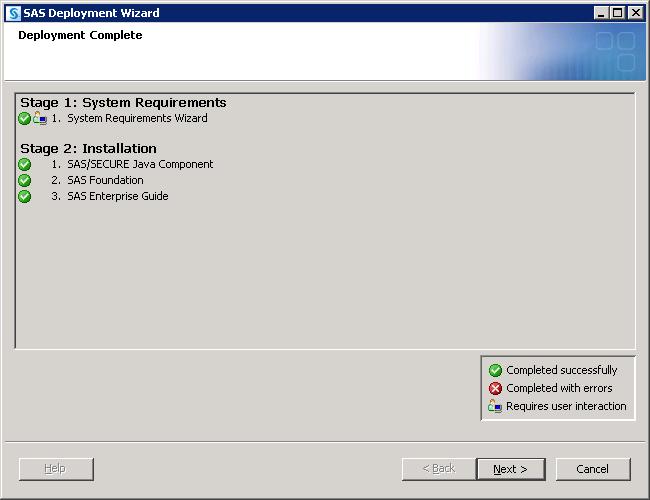
You should see a screen similar to the following showing that the deployment is complete. A check mark appears next to each software product indicating that the installation completed successfully.
-
Click Next, which displays the Select Support Option screen.
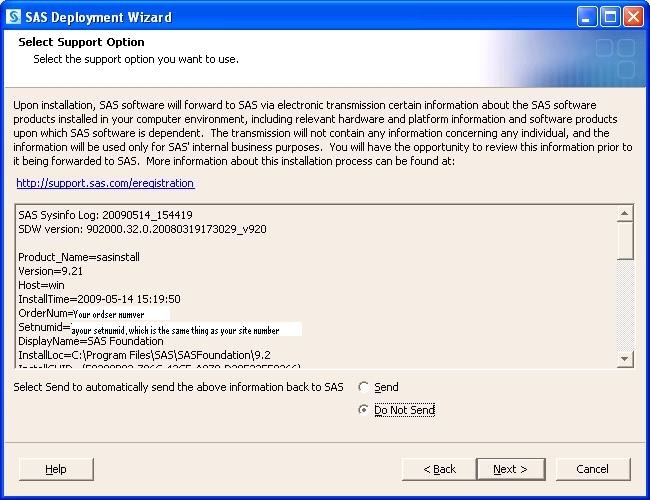
Select your support option and click Next. This displays the Additional Resources screen, which provide links to additional resources you can use for your deployment.
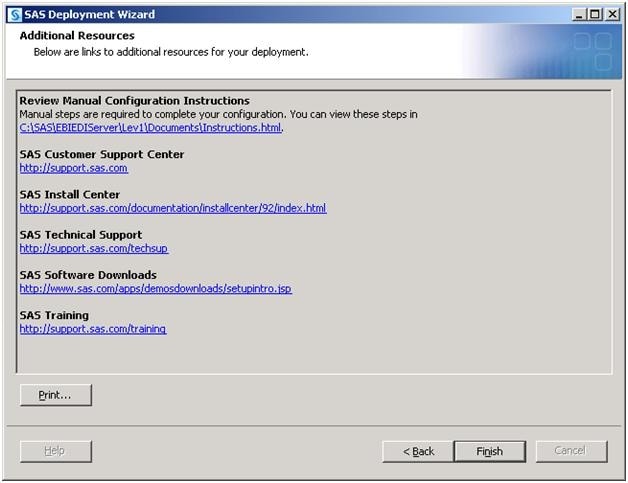
To complete the process, click Finish.
Use the SKIPPLANNNING Option
- Add the SKIPPLANNING option either from your SAS Software Depot or from the installation DVD:
- From a SAS Software Depot:
- On your machine, select Start ► Run.
- In the Run dialog, Click Browse and navigate to the root of your SAS Software Depot.
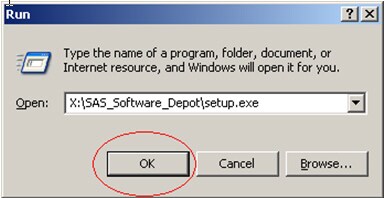
- Select the setup.exe file and click OK, as shown here:
- In the Run dialog box, add the SKIPPLANNING option in the Open text box, as shown in this example:
x:\SAS Software Depot\setup.exe -skipplanning
In this line, X: specifies your mapped drive location.
- From a DVD Supplied by SAS:
- On your machine, select Start ► Run.
- In the Run dialog, Click Browse and navigate to the root of the DVD.
- Select the setup.exe file and click OK.
- In the Run dialog box, add the SKIPPLANNING option in the Open text box, as shown in this example:
D:\setup.exe -skipplanning
In this line, D: specifies your DVD drive.
After you add the SKIPPLANNING option, the installation begins.
- From a SAS Software Depot:
- Select the language in which you want to view the SAS Deployment Wizard.

Then click OK to display the SAS® Deployment Wizard 9.2.

Select Install SAS Software.

Then click Next to display the Select SAS Software Order screen.
- Select your SAS software order from the list that is displayed and then verify the specific items in the SAS Products to Install text box.
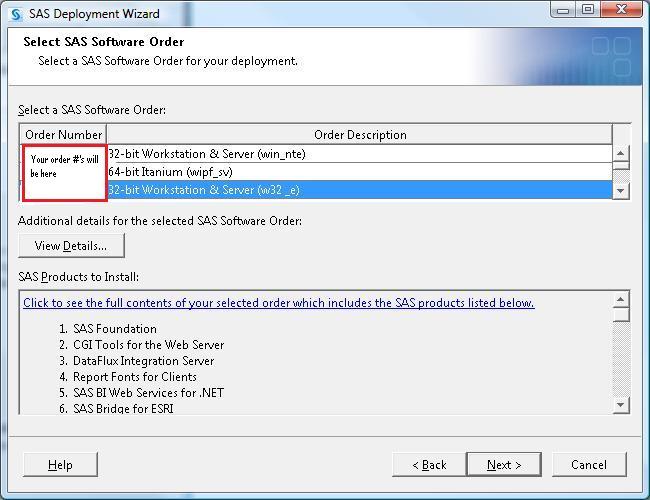
Then click Next to display the Software Products to Install screen.
- Select the software that you want to install. Make sure that you select both SAS Enterprise Guide and SAS Foundation.
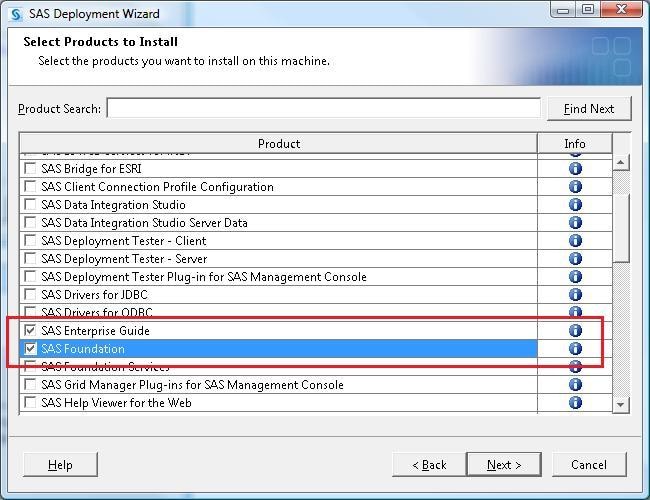
Then click Next to display the Specify SAS Installation Data File screen.
- Specify the path to your SAS installation data (SID) file.
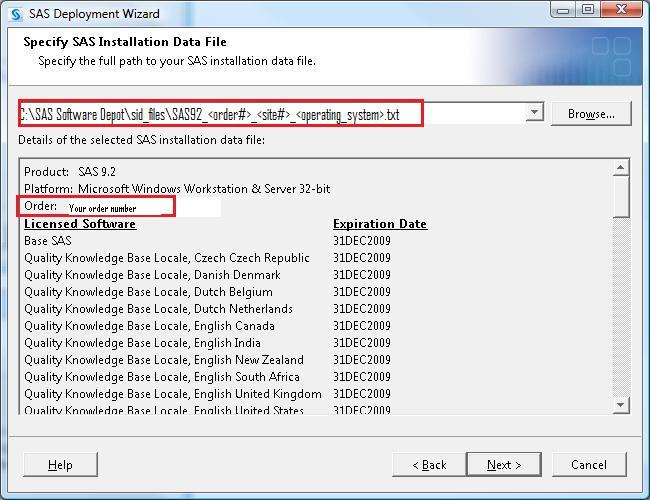
Click Next to display the Select Language Support screen, which shows all languages checked, as shown here:

In most cases, you can just click the Clear All button. When you click Clear All, SAS installs only the default languages that work with the locale on your operating system. The screen then shows just those languages selected, as shown here.

- Click Next to display the Deployment Summary panel. You should see SAS Foundation and SAS Enterprise Guide listed under Stage 2: Installation, as shown here:

Note: In Windows environments, if you do not have the required Java Run-Time Environment (JRE) installed, you will also see Java Platform Standard Edition Run-Time Environment listed as the first item under Stage 2: Installation.
Click Start to display the System Requirements Wizard.
- In the wizard, click Next.

-
As the System Requirements Wizard runs, accept the default options and click Next for each option that is offered. If you do not install the system requirements, your software installation will fail.
For details on the system requirements for Windows environments, see the following documentation:
- System Requirements for SAS® 9.2 Foundation for Microsoft Windows
- System Requirements for SAS® 9.2 Foundation for Microsoft Windows for x64
- After accepting all of the default options in the wizard, click Finish.

You should see a screen similar to the following showing that the deployment is complete. A check mark appears next to each software product indicating that the installation completed successfully.

-
Click Next, which displays the Select Support Option screen.

Select your support option and click Next. This displays the Additional Resources screen, which provide links to additional resources you can use for your deployment.

To complete the process, click Finish.
Use the Install Additional Software Button
You can install SAS Foundation 9.2 (TS2M0) and SAS Enterprise Guide 4.2 for local use by selecting the Install Additional Software, as illustrated in the following steps.
- Start the installation and select the language in which you want to view the SAS Deployment Wizard.

Then click OK to display the SAS Deployment Wizard 9.2.

- Select Install SAS Software.

Then click Next to display the Select SAS Software Order screen.
- Select your SAS software order from the list that is displayed and then verify the items in the SAS Products to Install text box.

Then click Next to display the Select Deployment Type screen.
- Select Install Additional Software.
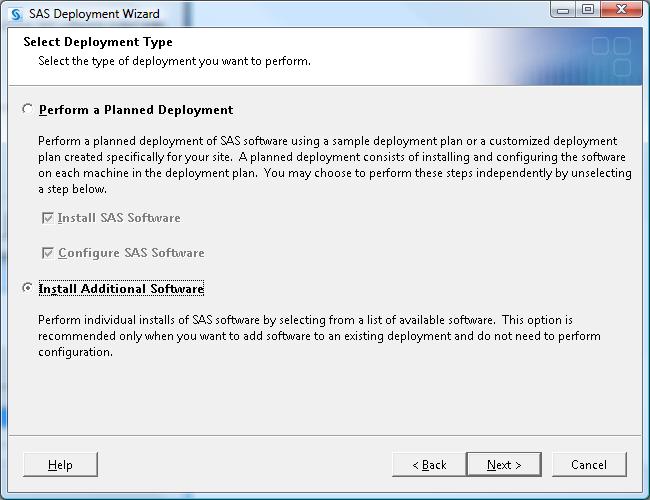
Click Next to display the Select Products to Install screen.
- Select both SAS Enterprise Guide and SAS Foundation.

Click Next to display the Specify SAS Installation Data File screen.
- Specify the path to your SAS installation data (SID) file.

Click Next to display the Select Language Support screen.

In most cases, you can just click the Clear All button. When you click the button, SAS installs only the default languages that work with the locale on your operating system. The screen then shows just those languages selected, as shown here:

- Click Next to display the Deployment Summary screen. You should see SAS Foundation and SAS Enterprise Guide under Stage 2: Installation, as shown here:

Note: In Windows environments, if you do not have the required Java Run-Time Environment (JRE) installed, you will also see Java Platform Standard Edition Run-Time Environment listed as the first item under Stage 2: Installation.
Click Start to display the System Requirements Wizard.
- In the wizard, click Next.
-
As the System Requirements Wizard runs, accept the default options and click Next for each option that is offered. If you do not install the system requirements, your software installation will fail.
For details on the system requirements for Windows environments, see the following documentation:
- System Requirements for SAS® 9.2 Foundation for Microsoft Windows
- System Requirements for SAS® 9.2 Foundation for Microsoft Windows for x64
- After accepting all of the default options in the wizard, click Finish.

You should see a screen similar to the following showing that the deployment is complete. A check mark appears next to each software product indicating that the installation completed successfully.

-
Click Next, which displays the Select Support Option screen.

Select your support option and click Next. This displays the Additional Resources screen, which provide links to additional resources you can use for your deployment.

To complete the process, click Finish.
Operating System and Release Information
| Product Family | Product | System | SAS Release | |
| Reported | Fixed* | |||
| SAS System | Base SAS | Microsoft® Windows® for 64-Bit Itanium-based Systems | 9.2 TS2M0 | |
| Microsoft Windows Server 2003 Datacenter 64-bit Edition | 9.2 TS2M0 | |||
| Microsoft Windows Server 2003 Enterprise 64-bit Edition | 9.2 TS2M0 | |||
| Microsoft® Windows® for x64 | 9.2 TS2M0 | |||
| Microsoft Windows Server 2003 Datacenter Edition | 9.2 TS2M0 | |||
| Microsoft Windows Server 2003 Enterprise Edition | 9.2 TS2M0 | |||
| Microsoft Windows Server 2003 Standard Edition | 9.2 TS2M0 | |||
| Microsoft Windows XP Professional | 9.2 TS2M0 | |||
| Windows Vista | 9.2 TS2M0 | |||
| OpenVMS on HP Integrity | 9.2 TS2M0 | |||
| Linux for x64 | 9.2 TS2M0 | |||
| Linux | 9.2 TS2M0 | |||
| HP-UX IPF | 9.2 TS2M0 | |||
| 64-bit Enabled Solaris | 9.2 TS2M0 | |||
| 64-bit Enabled HP-UX | 9.2 TS2M0 | |||
| 64-bit Enabled AIX | 9.2 TS2M0 | |||
| Solaris for x64 | 9.2 TS2M0 | |||
| Type: | Installation Note |
| Priority: | high |
| Date Modified: | 2009-09-15 16:18:38 |
| Date Created: | 2009-04-21 07:57:57 |