-
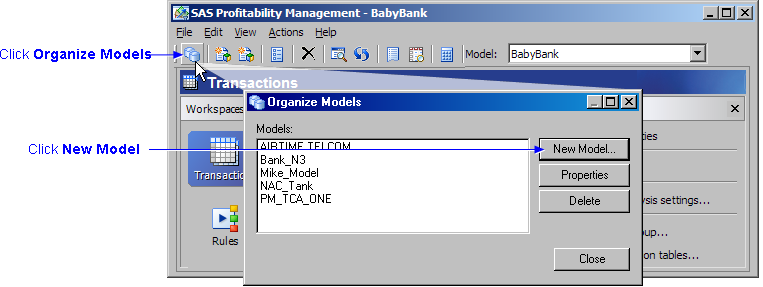
Click the Organize Models icon (or select
File
 Organize Models
).
Organize Models
).
- Click New Model. The Model wizard opens.
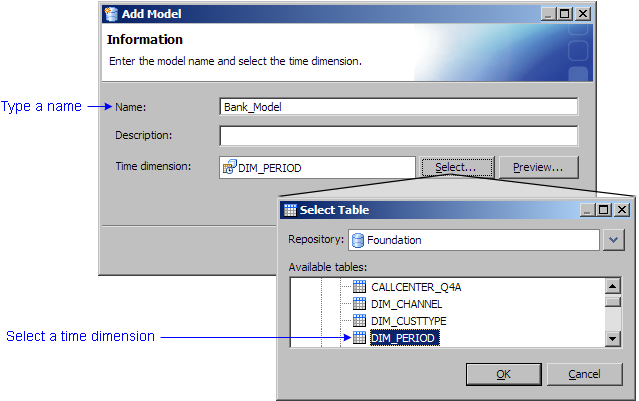
- On the Information page, name the model.
- Click Select to select the time dimension for the model.
- To preview the data in the time dimension table, click Preview.
- Click OK, and then click Next.
-
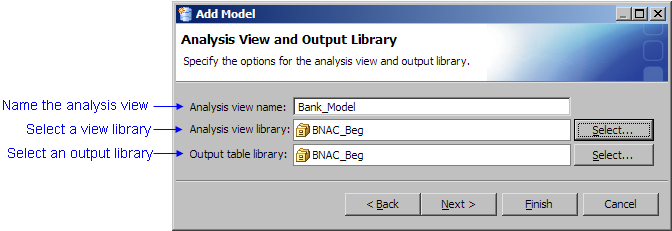
On the Analysis View and Output Library page, name the analysis view.
The analysis view name is used as the name of the database view that is created to join the transaction output tables into a single virtual fact table that the OLAP cube is built from. By default, its name is the same as the model name. -
Click Select to select the analysis view library (the library in which the analysis view is stored).
-
Click Select to select the output
library for analysis results. The output library can be the same as the analysis view library, but doesn't have to be.
Note: To use a non-SAS database for the output library, you must specify its DBMS type.
-
Click Next.
-
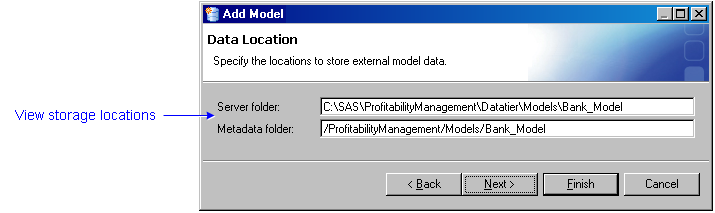
On the Data Location page, verify storage locations for external data.
Note: The storage locations were established during installation. You do not have to change them now.
- Click Next
- On the Behavior table page, select a behavior table.
-
To preview the data in the behavior table, click Preview.
-
Identify each of its required fields, and click Next.

-
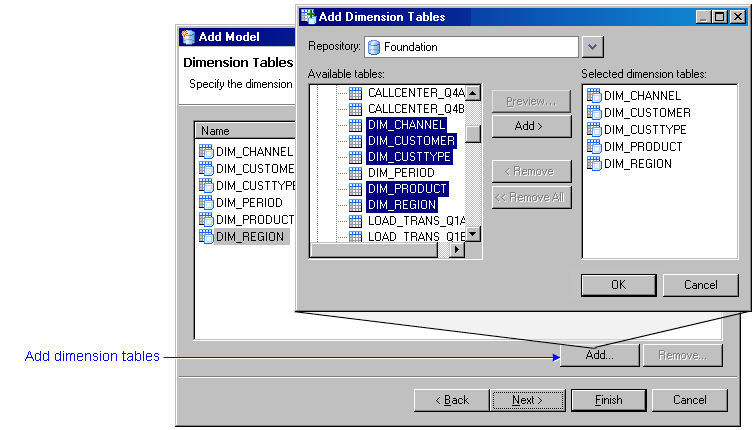
On the Dimension Tables page, select the dimension
tables.
Note: It is not necessary to add the time dimension because it has already been identified as such in step 2. -
To preview a dimension table, select one either from the Add Dimension
Tables window or from the Dimension Tables page, and click Preview.
- Click Next.
- On the Report Tables page, select the report hierarchy.
- Select the report layout.
-
To preview the data in either the report hierarchy table or the report layout
table, click Preview.


Related Topics: