Preparing to Install and to Configure
SAS Deployment Wizard Options
The SAS Deployment Wizard is
a cross-platform utility that installs and configures many SAS products.
Using a SAS installation data file (SID file) and a deployment plan
(plan.xml) for its initial input, the wizard is designed to prompt
the customer for all of the remaining input at the start of the session
so that the customer does not have to monitor an entire deployment.
-
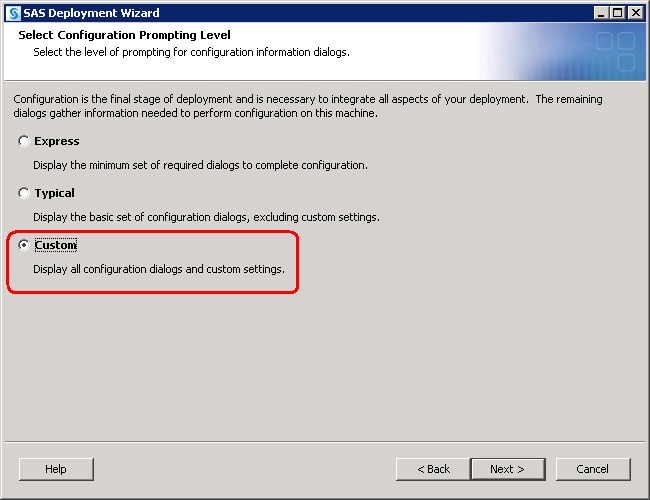
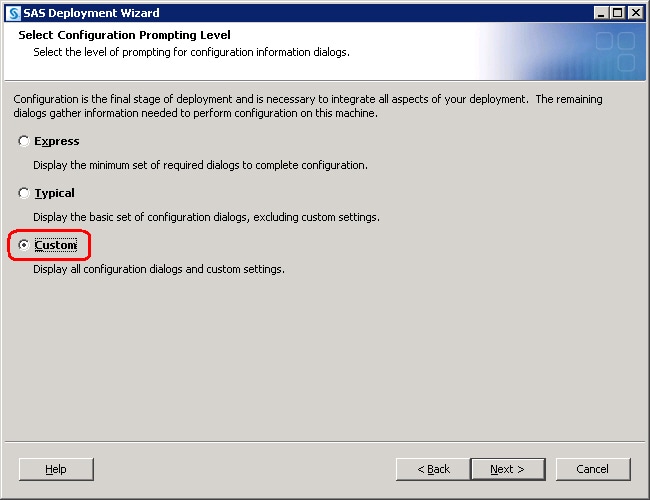
This is a standard method of providing input via fields on wizard pages with a Back and Next button navigation method. You can choose from three levels of configuration prompting: Express (minimum set of prompts), Typical (basic set of prompts), and Custom (all prompts). For more information, see Install and Configure SAS Interactively.
-
A record and playback feature enables you to automate a SAS installation for use on multiple machines. This feature is designed for large-scale enterprise deployments to prevent users from having to manually provide input on every page each time the SAS Deployment Wizard is run on a machine. For more information, see Automating the SAS Installation on Multiple Machines.
About Deployment Plans
A deployment
plan describes what software should be installed
and configured on each machine in a SAS deployment. A deployment plan
is an XML file that is used as input to the SAS Deployment Wizard.
There are two types of deployment plans: standard and custom. A standard
deployment plan describes a common configuration. Standard deployment
plans are included in the SAS Software Depot. A custom deployment
plan is created by a SAS representative specifically for a site.
At the end of the SAS deployment, the SAS Deployment
Wizard makes a copy of the deployment plan that it used. The deployment
plan can be helpful when you want to add another SAS product or change
your SAS configuration. The wizard stores a copy of the deployment
plan in the SAS configuration directory in the utilities directory,
and inserts a date and time stamp to the deployment plan filename.
For example:
-
If your SAS representative recommended that you use a standard deployment plan, you just need the name of the plan that you will use; the actual deployment plan is downloaded with your SAS custom order (or included in your custom media that is shipped to you). During the installation, the standard deployment plan will be available from a drop-down list in the SAS installation program.
To download the latest
SAS 9.3 standard deployment plans that also contain a corresponding
architectural diagram and pre-installation checklist, go to http://support.sas.com/installcenter/plans.
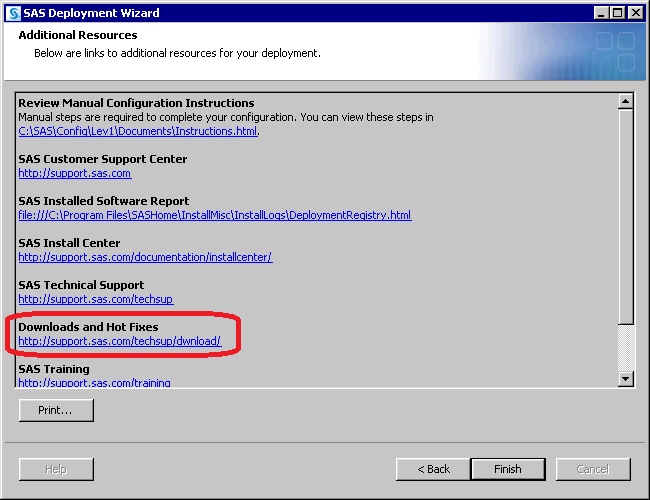
About SAS Hot Fixes
In the second maintenance release for SAS 9.3, the
SAS Download Manager automatically downloads the necessary SAS hot
fixes required by the SAS products in your initial order. This enhancement
makes the following possible:
For a list of the hot fixes that the deployment wizard
installs, click the link on the wizard's Additional Resources
page.
Installing SAS on z/OS
-
For more information, see Start Up Commands for the SAS Deployment Wizard.
Note: If you are updating a deployment
that runs on z/OS, you must update the deployment in the same order
that you installed SAS in your initial deployment. Before you can
start the SAS Deployment Wizard, the cell where you are going to perform
the software upgrade must be running.
For more information,
see: http://support.sas.com/documentation/installcenter/93/mvs/index.html.
Starting with the March
2012 release of SAS 9.3, the deployment wizard can be run on operating
systems that do not have windowing systems. For more information,
see the SAS Deployment Wizard and SAS Deployment Manager
User's Guide, available at: http://support.sas.com/documentation/installcenter/en/ikdeploywizug/64204/PDF/default/user.pdf.
Installation Order Rules for Multiple Machine Deployments
SAS Installation Directory (SAS Home) Considerations
Although your SAS Home
and SAS configuration directories can share the same parent directory,
one directory should not reside inside another. Defining the configuration
directory under the SAS Home directory, or vice versa, can lead to
file permission issues arising from the need to manage installed files
differently than site-specific configurations.
SAS Metadata Server Recommendation
Content Repository Considerations
-
If you are deploying the SAS Framework Data Server, then the SAS configuration path should be a path local to the machine. The configuration path should not be on an NFS shared disk. If you want to put your configuration path on a shared disk, then you must make sure that you specify a local path for the data framework server content directory. Setting the data framework server content directory path is possible only on the SAS Deployment Wizard custom configuration prompting level. For more information, see Overview of Configuration Options by Prompt Level.
-
We recommend that your metadata repositories reside either on a local file system or a high-performance, high-availability network file system. For more information about metadata repositories, see About SAS Metadata Repositories in SAS Intelligence Platform: System Administration Guide.
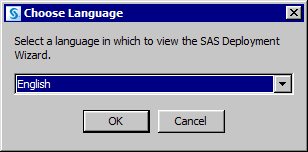
Locale and Encoding Considerations
The SAS Deployment Wizard
enables you to select the default locale and languages for the SAS
Deployment Wizard and for SAS 9.3. (A separate tool, the SAS Locale
Setup Manager, enables you to configure the locale of SAS Java clients.
For more information, see Locale Setup Manager.)
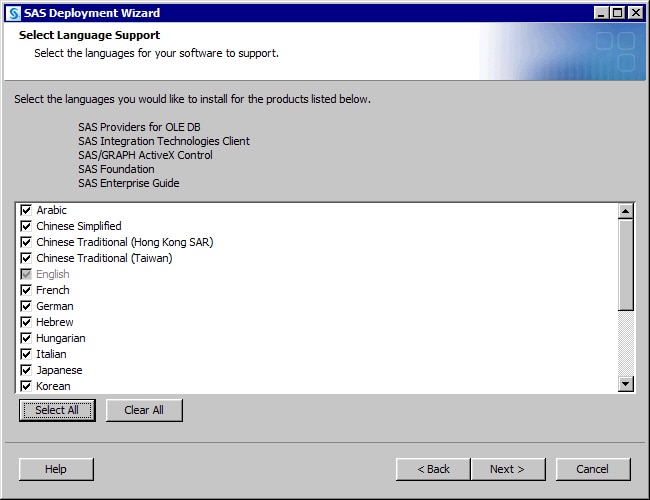
Further into the deployment
wizard, you have an opportunity to set the language that your SAS
9.3 products support.

On Windows and UNIX
machines, you can choose to configure SAS 9.3 as a Unicode server.
Unicode can be particularly useful when your SAS deployment supports
multiple languages. Choosing to make SAS a Unicode server means that
SAS writes all of its data sets, catalogs, and text files in UTF-8
encoding. UTF-8 encoding supports both single- and double-byte character
sets. However, UTF-8 can make data sharing with SAS sites that use
default encodings problematic.
CAUTION:
The SAS
automated deployment tools do not support changing locale after SAS
is initially deployed. For example, you cannot initially deploy SAS
as English (US), and then reconfigure SAS with the SAS Deployment
Manager and change the locale to French.
For single-byte character
set languages, the chosen locale is set in the configuration file
that matches the default language and also in the English configuration
file. For example, if you choose fr_FR, this value is added to both
the French and English configuration files.
For double-byte character
set languages, the chosen locale is set in the configuration file
that matches the default language and English (US) is set as the default
locale for English (SBCS), with some exceptions.
For more information
about locales and encodings, see the SAS National Language Support (NLS): Reference Guide.
Locale Setup Manager
On Windows machines,
you can use the SAS Locale Setup Manager (LSM), to configure the locale
of SAS Java clients. With the LSM, you can do the following:
You run the LSM from
the Windows Start menu (Start All ProgramsSASSAS
Locale Setup Manager 3.1). For more information
about how to use the LSM, see its online Help.
All ProgramsSASSAS
Locale Setup Manager 3.1). For more information
about how to use the LSM, see its online Help.
For more information
about locales, see Locale and Encoding Considerations.
How the Deployment Wizard Names SAS Web Application Servers
The SAS Deployment Wizard
creates multiple SAS Web application servers as needed, based on the
products in your SAS order. By default, each SAS Web application is
assigned to a specific server for deployment. This distribution helps
balance the load on each server, and defines a recommended number
of servers based on the products in each configuration.
Reviewing Third-Party Database Requirements
SAS enables you to
use a database other than the SAS Framework Data Server to store SAS
Web Infrastructure Platform data. (The SAS Deployment Wizard gives
you this option when you choose the Typical or Custom prompting levels.)
In SAS 9.3, the following third-party databases are supported:
Third-party databases
often have particular requirements that you need to know about, such
as database name limits, minimum tablespace sizes, and so on. If you
have not already, make sure that you review “Configuring an
Alternative Database for SAS Web Infrastructure Platform Services,”
available at: http://support.sas.com/resources/thirdpartysupport/v93/appservers/SharedServicesAlternativeDatabase.pdf.
IPv6 Windows Machines That Communicate with SAS Foundation Servers
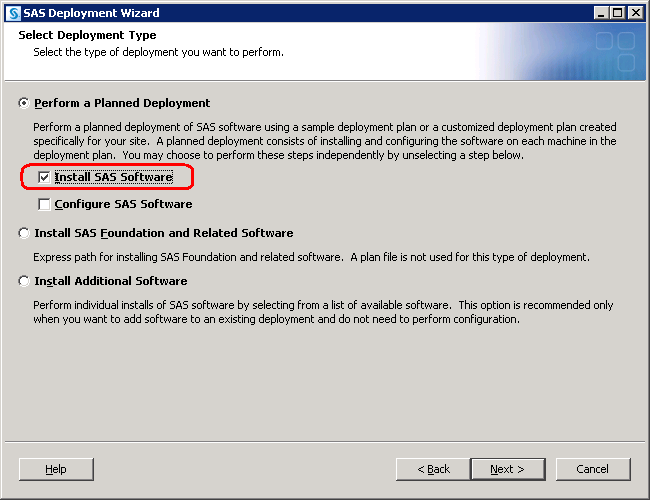
-
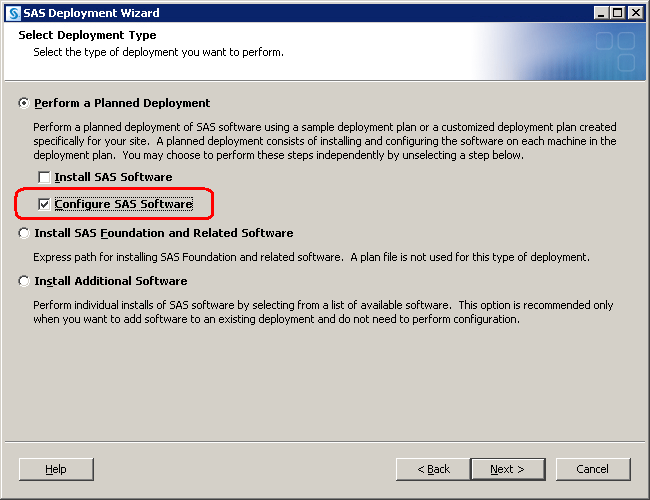
Begin following the directions for running the wizard. Early in the process, when the Select Deployment Type page appears, make sure that the Configure SAS Software check box is not selected. For more information, see Install and Configure SAS Interactively.
-
By default, the script is named
SASServer1.batand resides in your Web application server configuration directory. For information about how to manually configure your Web application server for SAS Web applications, go to the Third-Party Software Downloads site at: http://support.sas.com/resources/thirdpartysupport/v93/appservers/index.html and select the product name of your Web application server. -
Begin following the directions for running the wizard. Early in the process, when the Select Deployment Type page appears, make sure that the Install SAS Software check box is not selected. For more information, see Install and Configure SAS Interactively.
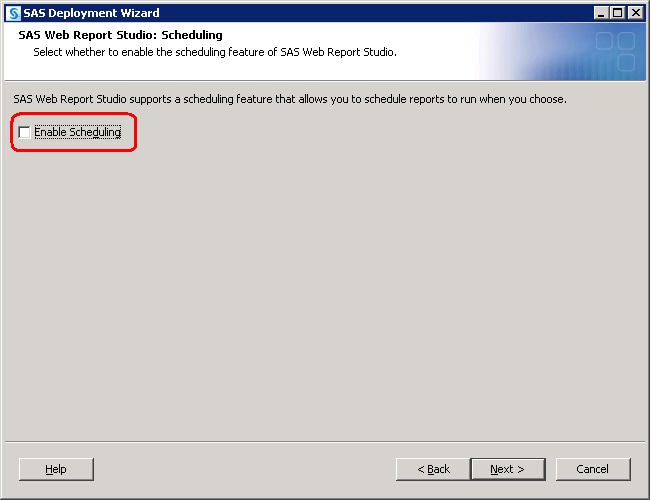
Deploy SAS BI Lineage When LSF Scheduler Is on a Separate Machine from the Workspace Server
The most common topology
involving the Load Sharing Facility Scheduler (LSF Scheduler) is to
locate it on the same machine as the SAS workspace server.
To achieve this configuration,
you run the deployment wizard twice: first on machine 1 and then on
machine 2.
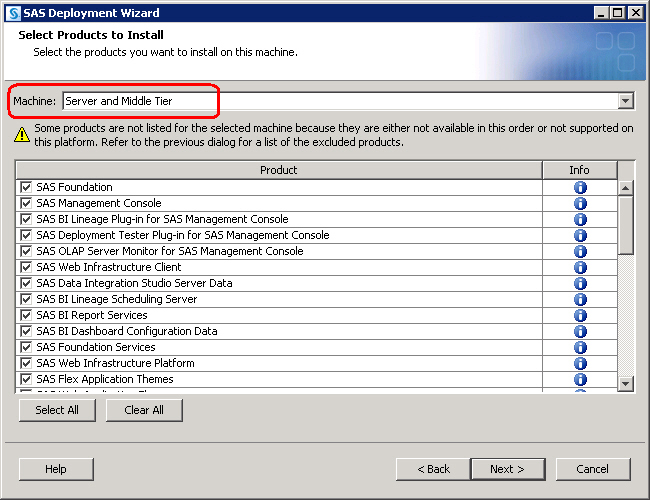
To deploy the SAS BI
Lineage Scheduling Server when the LSF Scheduler is installed on a
separate machine from the SAS workspace server, follow these steps:
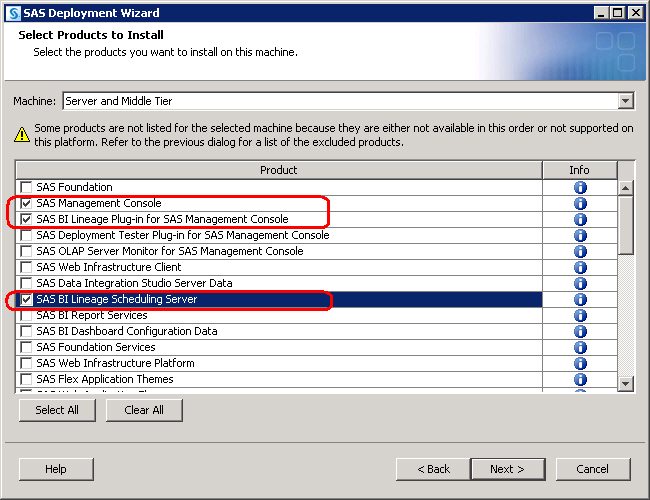
-
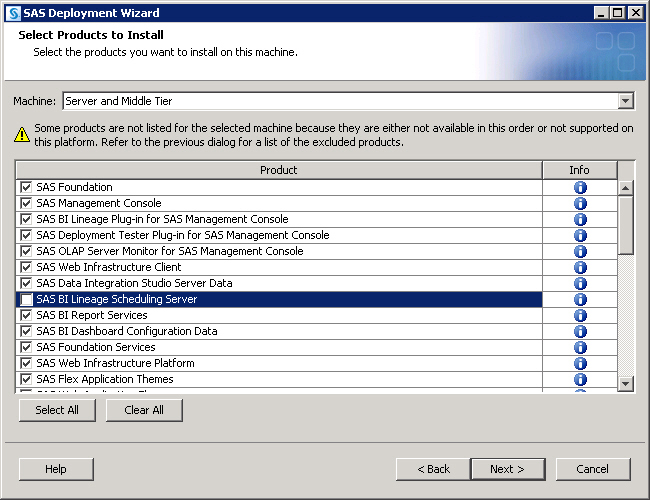
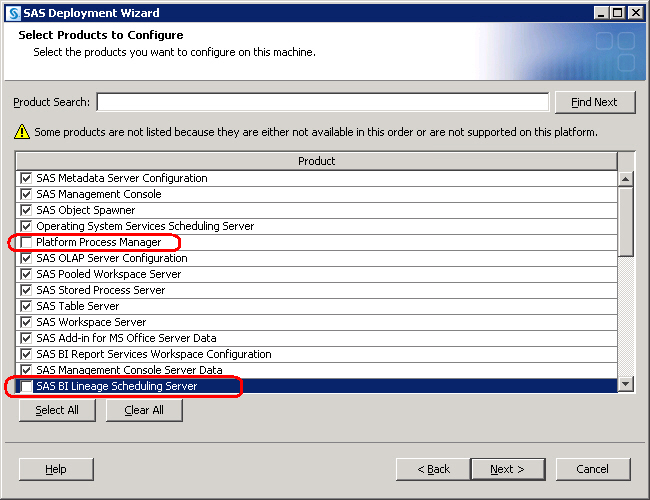
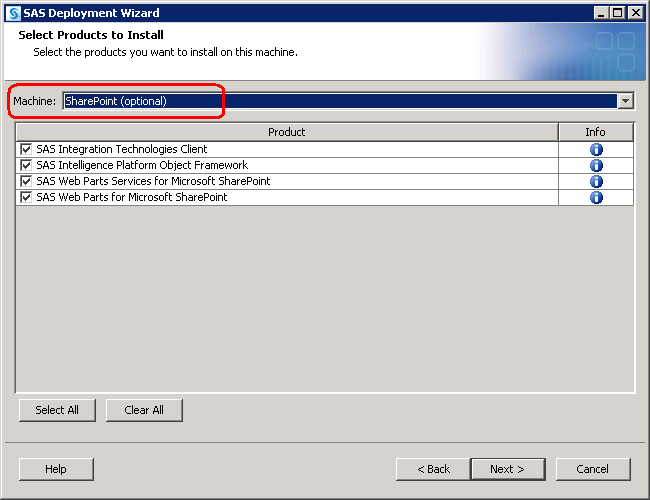
When running the SAS Deployment Wizard on machine 1, the metadata and workspace server machine, make sure that you deselect SAS BI Lineage Scheduling Server on the Select Product to Install page.For information about how to run the deployment wizard, see Install and Configure SAS Interactively.
-
After the wizard completes running on machine 1, back up your metadata repository and your SAS configuration directory before you run the SAS Deployment Wizard on the next machine called for by your deployment plan.
-
Back up your metadata repository and repository manager on the SAS Metadata Server machine. For more information, see Best Practices for Backing Up and Restoring Your SAS Content in SAS Intelligence Platform: System Administration Guide.
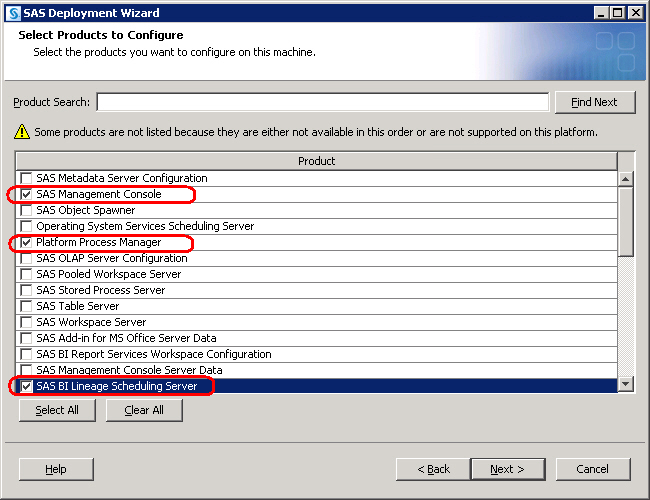
-
When you are finished completing any manual configuration tasks called for in Instructions.html, and you have made the necessary backups, log on to machine 2 (the BI Lineage Scheduling and LSF Scheduler servers machine) and launch the wizard a second time.For information about how to run the deployment wizard, see Install and Configure SAS Interactively.
-
If you are deploying a middle-tier machine and opted not to automatically deploy your SAS Web applications, then you must manually deploy them. For more information, go to the Third-Party Software Downloads site at http://support.sas.com/resources/thirdpartysupport/v93/appservers/index.html and select the product name of your Web application server.
-
When you are finished installing and configuring SAS on each machine called for in your deployment plan, proceed to the section Validate the SAS 9.3 Servers.
Installing SAS Web Parts for Microsoft SharePoint
Overview of Installing SAS Web Parts for Microsoft SharePoint
What Is SAS Web Parts for Microsoft SharePoint?
SAS Web Parts for Microsoft SharePoint Architecture
SAS Web Parts for Microsoft
SharePoint consists of the following components:
-
This service runs in a separate Microsoft Internet Information Server (IIS) application from SharePoint, and can be installed on the same machine where SharePoint resides or on a separate machine. SAS Web Parts Service for Microsoft SharePoint provides communication between SAS Web Parts and your SAS servers. This Web service can be hosted on your SharePoint server or another Microsoft Windows machine that is running Microsoft Internet Information Server.The SAS Web Parts Service must be able to connect to your SAS servers via SAS Integration Technologies. Therefore, a firewall cannot exist between the SAS Web Parts Service and the SAS servers. Because the SAS Web Parts connect to the service via SOAP over HTTPS, a firewall can exist between the SAS Web Parts Service and SharePoint. In the most common and simple deployments, this service runs on the SharePoint server.
Automatically Deploy SAS Web Parts for Microsoft SharePoint
This topic provides
an overview for how you use the SAS Deployment Wizard to automatically
install and configure SAS Web Parts for Microsoft SharePoint. For
more information about automatically deploying SAS Web Parts, see Install and Configure SAS Interactively.
Note: If you want to avoid installing
a Java Runtime Environment (JRE), a dependency for the deployment
wizard, you can manually deploy SAS Web Parts on a machine that contains
a JRE and move the SAS Web Parts deployment to another machine. For
more information, see Manually Deploy SAS Web Parts for Microsoft SharePoint and Move It.
-
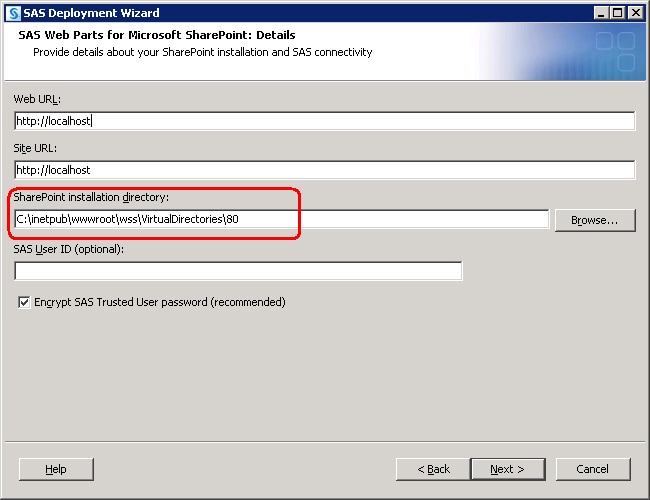
If your SharePoint installation is not in the default location (
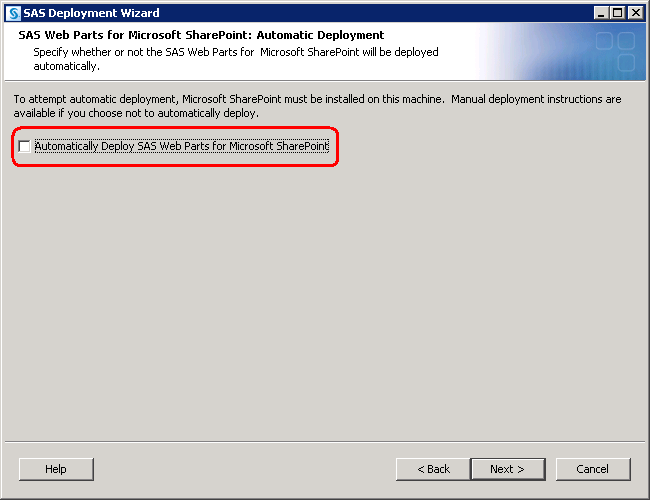
C:\inetpub\wwwroot\wss\VirtualDirectories\80), you have to select the Custom option for the prompting level in the deployment wizard:If you choose the option Automatically Deploy SAS Web Parts for Microsoft SharePoint in the SAS Deployment Wizard, SAS Web Parts is deployed and configured automatically.For more information about automatically deploying SAS Web Parts, see Install and Configure SAS Interactively. -
For more information, see Configure HTTPS Connections for SAS Web Parts for Microsoft SharePoint.

Manually Deploy SAS Web Parts for Microsoft SharePoint and Move It
The SAS deployment and
configuration tools rely on a Java Runtime Environment (JRE) that
is not a dependency for SAS Web Parts. To avoid installing a JRE on
your Microsoft SharePoint server, you can deploy SAS Web Parts on
a machine which does contain a JRE and then move your deployment to
your SharePoint server later.
To manually deploy SAS
Web Parts for Microsoft and then move it to a different machine, follow
these steps:
-
For more information, see Install and Configure SAS Interactively.
-
For more information, see Configure HTTPS Connections for SAS Web Parts for Microsoft SharePoint.
Configure HTTPS Connections for SAS Web Parts for Microsoft SharePoint
The connection between
SAS Web Parts and the SAS Web Parts Service requires Hypertext Transfer
Protocol Secure (HTTPS) to encrypt the communication. HTTPS uses Secure
Socket Layer (SSL) and public key cryptography, which is based on
the implementation of a public and private key pair.
To enable HTTPS, an
SSL server certificate must be attached to the SAS Web Parts Service.
If your organization has a standard procedure for obtaining an SSL
server certificate, follow those guidelines and attach that certificate
to the service.
Another alternative
is to use a self-signed SSL certificate for the SAS Web Parts Service.
Because the secure communication occurs only between SAS Web Parts
and SAS Web Parts Service, the self-signed certificate needs to be
imported only into the Microsoft SharePoint machine’s certificate
store. Refer to your Microsoft Internet Information Server (IIS) documentation
for instructions on how to create and install the self-signed certificate,
and complete the following steps:
Configure User Access for SAS Web Parts for Microsoft SharePoint
Users of SAS Web Parts
for Microsoft SharePoint can access content in the SAS servers in
one of two modes:
Actual identity controls
user access to SAS Web Parts explicitly through a SAS metadata identity
and the permissions associated with that identity. Users might have
permissions in SharePoint to view a page, but they can be denied access
to the Web part’s content if they are not granted permission
to access the dashboard or stored process in SAS metadata. For information
about creating metadata identities and assigning permissions, see About User Administration in SAS Intelligence Platform: Security Administration Guide.
Shared identity controls
user access to SAS Web Parts through a single identity defined in
SAS metadata that all users share. Authentication of the individual
user is managed by SharePoint.
CAUTION:
When using
shared identity, it is important in SharePoint to grant access to
only those users who are allowed to view SAS content.
CAUTION:
In addition
to storing a possible shared metadata identity, web.config also contains
connection information to the SAS Web Parts service plus an encrypted
form of the SAS Trusted User ID and password. As a best practice,
we recommend that you limit access to web.config.
For more information
about user access and authentication domains, see the SAS Intelligence Platform: Security Administration Guide.
Copyright © SAS Institute Inc. All rights reserved.