SAS 9.1.3 Integration Technologies » Server Administrator's Guide


Using the SAS Integration Technologies Configuration Utility (ITConfig)
Using ITConfig to Create Metadata Configuration Files
Using ITConfig to Test Connections
COM/DCOM

Using ITConfig to Create Metadata Configuration Files

To access definitions on a metadata server, you must first connect to the metadata server. For COM connections to the metadata server, the Object Manager and SAS use a metadata configuration file called the system configuration file. The system configuration file contains information about how to access the metadata server.

Note: For COM connections to the SAS Metadata Server, it is not possible to specify user information.

To create a system configuration file

  1. Select Create Metadata Config File from the main ITConfig window. The Create SAS Metadata Config File window appears.

  2. Select SAS Metadata Server and click Next. The Configure Metadata Server window appears.

  3. Select COM for the connection type. For the configuration type, select Current user to create a user-specific configuration, or All users on this machine to create a configuration that is common to all users. Click Next. The Configure SAS Metadata Server window appears.

    SAS Metadata Server Parameters window

  4. If metadata configuration files already exist on your machine, the information from those files will be included in this window. You can edit the existing configuration parameters.

    Enter the following information:

    Machine Name
    specifies the fully-qualified name of the machine that the SAS Metadata Server runs on.

  5. Click Next. The application connects directly to the SAS metadata server, retrieves the list of available repositories, and displays the SAS Metadata Server Repository Selection window. Select the repository that will be used for the metadata configuration and click Next.

  6. The application writes the data to the metadata configuration file. The XML File Written dialog box appears.

  7. To return to the main ITConfig window, click OK.

Name and Location for the Configuration File

The metadata configuration file is always stored with a default filename and path. The path is dependent on the version of Windows that you are using.

Default Paths for Windows NT:

Common system configuration file
\WINNT\Profiles\All Users\Application Data\SAS\
   MetadataServer\oms_serverinfo.xml

User-specific system configuration file
\WINNT\Profiles\username\Application Data\SAS\
   MetadataServer\oms_serverinfo.xml

Default Paths for Windows 2000, Windows XP, and Windows Server 2003:

Common system configuration file
\Documents and Settings\All Users\Application Data\SAS\
   MetadataServer\oms_serverinfo.xml

User-specific system configuration file
\Documents and Settings\username\Application Data\SAS\
   MetadataServer\oms_serverinfo.xml

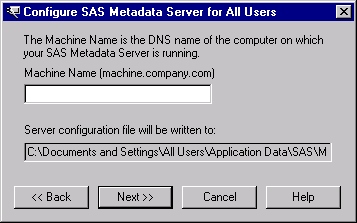
Note: The location and filename are displayed in the Configure SAS Metadata Server window and in the XML File Written dialog box.

Sample System Configuration File Format for a COM Connection

Use a text editor to edit your metadata configuration files. The following XML code shows a sample system configuration file for a COM connection to a SAS Metadata Server.

<?xml version="1.0" encoding="UTF-8" ?>
<Redirect>
   <LogicalServer Name="SAS Metadata Server"
          ClassIdentifier="2887E7D7-4780-11D4-879F-00C04F38F0DB">
      <UsingComponents>
         <ServerComponent Name="SAS Metadata Server"
                ClassIdentifier="2887E7D7-4780-11D4-879F-00C04F38F0DB">
            <SourceConnections>
               <COMConnection Name="SAS Metadata Server"
                      HostName="aintserv.us.sas.com">
                  <Properties>
                      <Property Name="Repository"
                            DefaultValue="Aintserv"
                            PropertyName="Repository">
                     </Property>
                  </Properties>
               </COMConnection>
            </SourceConnections>
         </ServerComponent>
      </UsingComponents>
   </LogicalServer>
</Redirect>