Cloning an Aggregation Table
Within an Aggregation
transformation, if you have defined an aggregation table, you might
want to create another one that is similar to it. To do so, you can
clone the existing table and modify it as needed. For example, you
might have an existing aggregation table for the WeekHourMachineCPU
aggregation. If you want to add an aggregation table for MonthHourMachineCPU,
it is more efficient to clone and edit the existing aggregation than
to create a new one using the Aggregation wizard.
To clone an aggregation
table, perform the following steps:
-
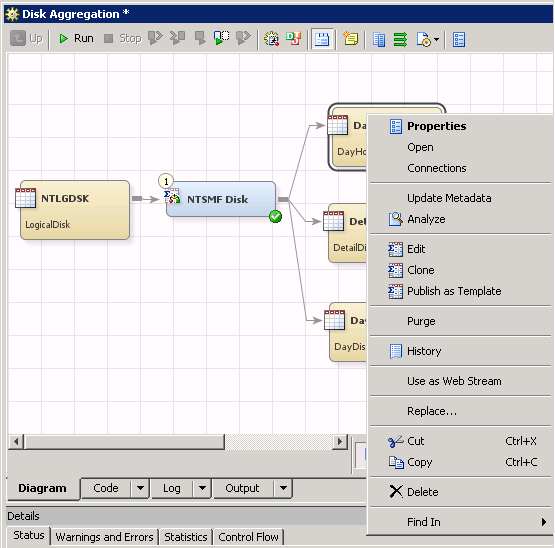
Locate the Aggregation transformation that generates the aggregation table that you want to clone. To do so, from the IT Data Marts tree, navigate to the IT data mart that contains the job where the Aggregation transformation is located. Double-click the job to open it on the Diagram tab of the Job Editor window.
-
From the drop-down list, select Clone. If you are cloning a summarized aggregation table, the Clone Summary Aggregation Table dialog box appears. If you are cloning a simple aggregation table, the Clone Simple Aggregation Table dialog box appears.Note: The dialog boxes contain the same fields and are specified the same way.
-
The dialog box displays the default values for the column to use for aging, its format, and whether the column represents the date or the datetime. (These values reflect the original table from which you created this cloned table.)To change the aging criteria for the cloned table, check the corresponding box. This action enables you to select a different Column to use for aging.
-
From the drop-down menu, select the column to use for aging.
-
The Format field displays the format for the selected column. It cannot be changed.
-
If possible, the system selects the appropriate Date or Datetime format.When you specify datetime values, one day of aging extends over 24 hours of data collection. This period might extend over one or more days.Note: If the system cannot determine whether the field represents a Date format or a Datetime format, both of these options are enabled so that you can select the appropriate one.
-
The SAS table name field displays the unique name of the physical file that is associated with this new cloned table. It can be changed. However, the new SAS table name must be unique within its associated SAS library.
-
In order for your
changes to take effect, you must redeploy the job. For information about
redeploying jobs, see Redeploy All Jobs on the Server.
Copyright © SAS Institute Inc. All rights reserved.
