Managing the Graphs in the Graph Gallery

Main Steps for Managing Graphs

Here are the main steps for managing the graphs that appear in the Graph Gallery:
  1. Open the Graph Gallery if it is not already open. For instructions, see Open and Use the Graph Gallery.
  2. Click Organize, and then Graphs. The Organize Graphs dialog box opens.
    Organize Graphs dialog box
  3. When you are finished with your management tasks, click OK to close the Organize Graphs dialog box.

Copy a Graph to a Custom Group

You can copy a graph from one of the predefined or custom groups to a custom group that you have created.
To copy a graph to a custom group:
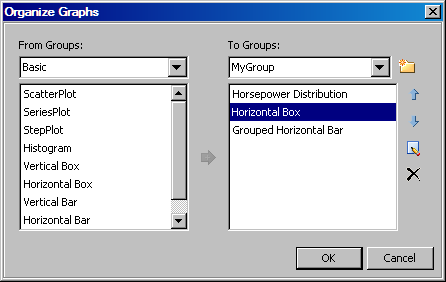
  1. In the From Groups area of the Organize Graphs dialog box, select the group that contains the graph that you want to copy. Then select the graph in the list. To select multiple graphs, press CTRL and make your selections. To select a block of contiguous graphs, select the first graph in the block, press SHIFT, and then select the last graph in the block.
  2. In the To Groups area of the Organize Graphs dialog box, select the target group for the graph(s).
    Note: To create a new group, click the New icon New icon. In the New Group dialog box, enter the name that you want for the group, and then click OK.
  3. Click the Copy arrow Copy arrow icon to copy the graph to the To Groups list.

Change the Order in Which the Graphs Appear in the Custom Tabs

Each group of graphs is represented as a tab in the Graph Gallery. Graphs are ordered in rows and columns on the tabs. A custom tab can contain custom graphs that you created as well as predefined graphs that have been moved to the tab.
To change the order in which the graphs appear on a custom tab:
  1. In the To Groups area of the Organize Graphs dialog box, select the custom group that you want to reorder. (Only custom groups are listed.) Then select a graph in the list.
  2. Click the up arrow Up arrow or the down arrow Down arrow to move the graph up or down in the list. The first graph in the list corresponds to the upper left corner of the tab in the gallery. Graph order starts in the upper left corner, continues across the first row, and wraps around to the second row.
  3. Repeat the previous step with other graphs in the list until the graphs are in the order that you want.

Rename a Graph in a Custom Group

You can change the names of graphs that appear in the tabs for your custom groups.
To rename a graph:
  1. In the To Groups area of the Organize Graphs dialog box, select the group that contains the graph that you want to rename. Then select the graph in the list.
  2. Click the Rename icon Rename icon. The graph name box becomes editable.
  3. Enter the name that you want for the graph.

Delete a Graph from a Custom Group

You can remove graphs that you have added to your custom groups.
To remove a graph:
  1. In the To Groups area of the Organize Graphs dialog box, select the group that contains the graph that you want to delete. Then select the graph in the list.
  2. Click the Delete icon Delete icon. The graph name is removed from the list.
As an alternative to this procedure, you can right-click the graph icon in the Graph Gallery and select Delete.