Organize the Model Hierarchy
In this exercise, you create a folder, project, version,
and a new workflow for the modeling project.
Define the Project Properties
Create a Version
Create a new version
in the HMEQ project in the Tutorial11 organizational
folder. The version folder contains life cycle information, auxiliary
version documents, candidate model files, reports, resource files,
scoring tasks, and model performance reports.
To create a new version:
Note: If you are not a SAS Model
Manager administrator, send a request to a SAS Model Manager administrator
to create a workflow to use for the tutorials. Include the project
name, version name, and UUID of the version with which you want the
workflow to be associated. If you are a SAS Model Manager administrator
you can perform the next execrcise, Create a Workflow.
Create a Workflow
Overview
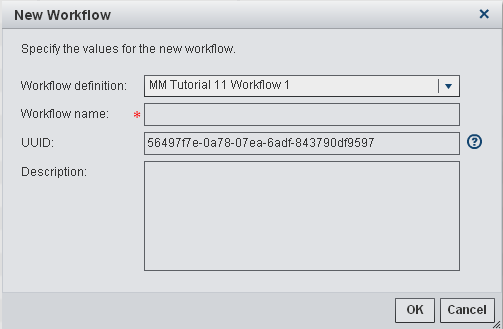
A workflow is
a copy of a workflow definition. Only a SAS Model Manager administrator
can create a new workflow. Each workflow consists of activities. Activities
can contain properties and comments so that you can share information
with other users, or make notes. The status that you select when completing
an activity determines the next activity in the workflow process.
Prerequisites
The exercises in this
tutorial require that you have made the workflow definition available
to SAS Model Manager. For more
information, see Prepare for Using SAS Workflow.
Create a New Workflow


The workflow definitions
that have been provided for the tutorials already have participants
assigned. The Model Manager Administrator Users group
is assigned to the business administrator workflow participant role,
and the Model Manager Advanced Users group
is assigned to the potential owner workflow participant role. For
information about how to assign additional participants to a workflow,
see Working with Workflow Participants in SAS Model Manager: User's Guide. You can also perform the exercise, Managing Workflows to learn how
to manage workflows.
Copyright © SAS Institute Inc. All rights reserved.