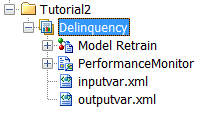
Organize the Model Hierarchy

In this exercise, you learn to use the Project Tree to create a modeling project.

Create a Folder

To provide an organizational folder to manage your modeling projects:
  1. Right-click MMRoot in the Project Tree. Select New Folder. The New Folder window appears.
  2. Specify values for the following folder properties and click OK.
    Name
    enter Tutorial2 for the folder name.
    Description
    enter an optional folder description.
The new folder appears in the Project Tree.

Create a New Project

To create a project and define the model function:
  1. Right-click Tutorial2 and select Newthen selectProject. The New Project wizard appears.
  2. Specify the following general and project properties and click Next:
    Name
    enter Delinquency for the project name.
    Description
    enter an optional description.
    Model Function
    select Classification.
  3. Specify the project input variables:
    1. Below the Project Input Variables table, click Import Variables. The Import Variables from Table window appears.
    2. On the SAS Metadata Repository tab, click the Look in box and navigate to the path Shared Datathen selectModel Managerthen selectTutorial2.
    3. Select DELINQUENCY_PROJECT_INPUT and click OK.
  4. Specify the project output variables:
    1. Below the Project Output Variables table, click Import Variables. The Import Variables from Table window appears.
    2. Select DELINQUENCY_PROJECT_OUTPUT, click OK, and click Finish.
      Here is the New Project wizard Step 2 of 2 after the project variables have been set.
      New Project Wizard Step 2
  5. Examine the Tutorial2 folder to verify that it contains the Delinquency project.
    The Delinquency project in the Project Tree

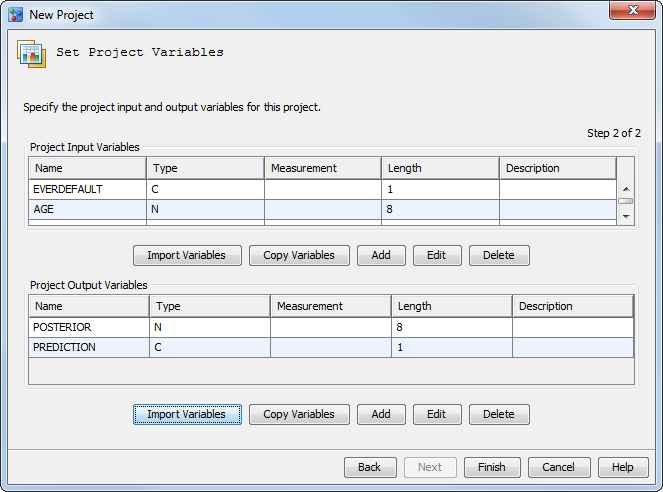
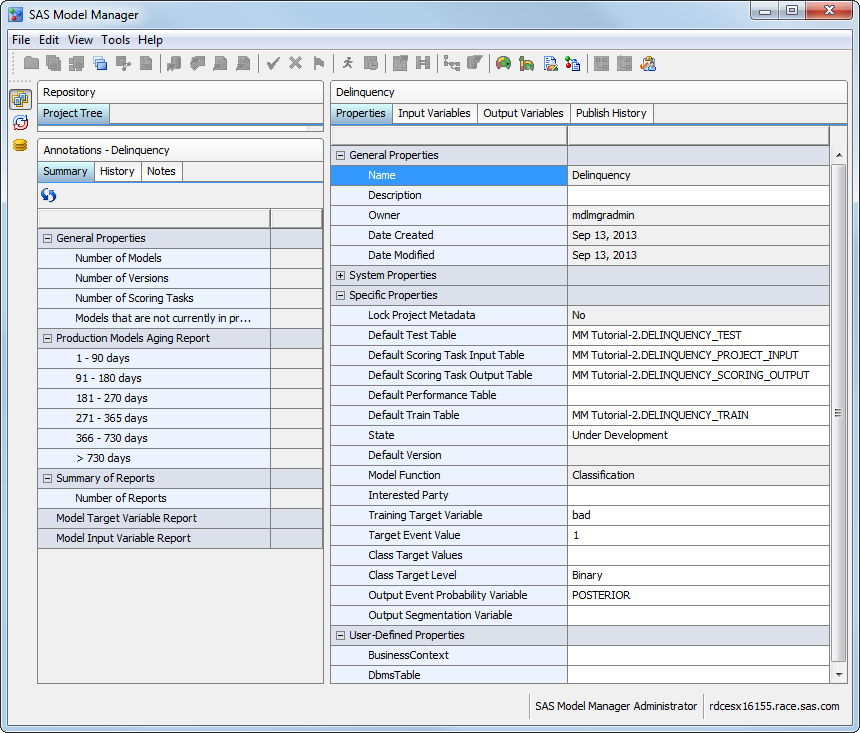
Define the Project Properties

To define the properties that SAS Model Manager uses to create reports and score models:
  1. Select the Delinquency project in the Tutorial2 folder and expand Specific Properties on the Properties tab.
  2. Enter values for these properties:
    Default Test Table
    Click the property value field and click Browse. In the Select Table window, select the table DELINQUENCY_TEST from the SAS Metadata Repository tab.
    Default Scoring Task Input Table
    Click the property value field and click Browse. In the Select Table window, select the table DELINQUENCY_SCORING_INPUT from the SAS Metadata Repository tab.
    Default Scoring Task Output Table
    Click the property value field and click Browse. In the Select Table window, select the table DELINQUENCY_SCORING_OUTPUT from the SAS Metadata Repository tab.
    Default Train Table
    Click the property value field and click Browse. In the Select Table window, select the table DELINQUENCY_TRAIN from the SAS Metadata Repository tab.
    Training Target Variable
    Enter bad.
    Target Event Value
    Enter 1.
    Class Target Level
    Click the property value field and select Binary.
    Output Event Probability Variable
    Click the property value field and select POSTERIOR.
Project tree display the Delinquency project properties

Create a Version

Create a version for the project. The version folder contains life cycle information, auxiliary version documents, candidate model files, model comparison reports, resource files, scoring tasks, and model performance reports. To create a new version:
  1. Right-click the Delinquency project and select Newthen selectVersion. The New Version dialog box appears.
  2. Specify the following version properties and click OK.
    Name
    Enter 2013 for the version name.
    Life Cycle Template
    select the user-defined template Tutorial Life Cycle.
    Note: If you are using a workflow process to track the progress of your project or version, you can select any life cycle template. You can then skip all tasks to update the life cycle.
  3. Examine the Delinquency project to verify that it contains one version called 2013. Select Life Cycle. Verify that the Name property is Tutorial Life Cycle.
    Expanded 2013 version folder for Delinquency project
Note: If you want to use a workflow to track the progress of your version, send a request to a SAS Model Manager administrator and ask the administrator to create a workflow to use for the tutorials. Include the name and UUID of the version with which you want the workflow to be associated.

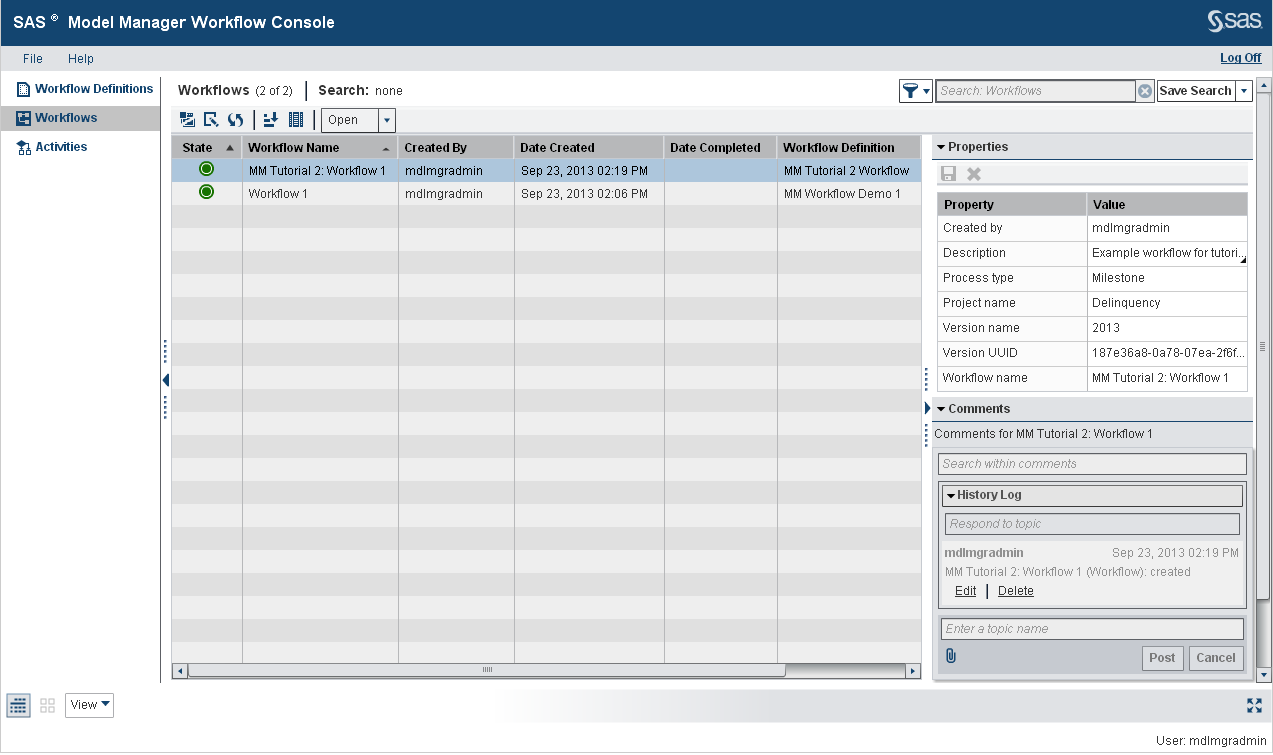
Create a Workflow (Optional)

Overview

A workflow is a copy of a workflow definition. Only a SAS Model Manager administrator can create a new workflow. Each workflow consists of activities. Activities can contain properties and comments so that you can share information with other users, or make notes. The status that you select when completing an activity determines the next activity in the workflow process.

Prerequisites

The exercises in this tutorial require that you have made the workflow definition available to SAS Model Manager. For more information, see Prepare for Using SAS Workflow.

Create a New Workflow

  1. Log on to SAS Model Manager as a member of the Model Manager Administrator Users group.
  2. From the SAS Model Manager main window, right-click a version and select New Workflow. Workflow Console is launched in a web browser and displays the New Workflow window.
    Note: If you are already logged on to Workflow Console, from the Workflow Definitions category view, select a process definition and click Create a new workflow.
    New Workflow
  3. Select the workflow definition that is associated with this tutorial (if you accessed the New Workflow window from the SAS Model Manager main window).
  4. Enter a name for the workflow.
  5. The UUID of the selected version is already populated.
    Note: If the UUID is not already populated, you can copy the UUID system property value for a version from the Properties view in the SAS Model Manager main window. The field label and other characters that precede the UUID value must be removed.
  6. (Optional) Enter a description for the workflow.
  7. Click OK. A message appears, indicating that the workflow has been successfully created.
  8. Click Close. The new workflow is now available in the Workflows category view.
  9. To view the new workflow, click Workflows category view button Workflows. The Workflows category view appears. Select the workflow to view information that is associated with the new workflow.
    Workflows category view
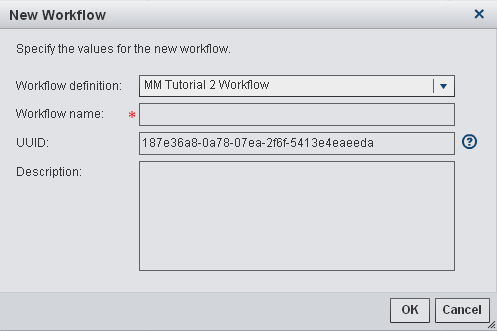
The workflow definitions that have been provided for the tutorials already have participants assigned. For information about how to assign additional participants to a workflow, see Working with Workflow Participants in SAS Model Manager: User's Guide. You can also see Tutorial 11: Using Workflow Console to learn how to manage workflows and work with activities.

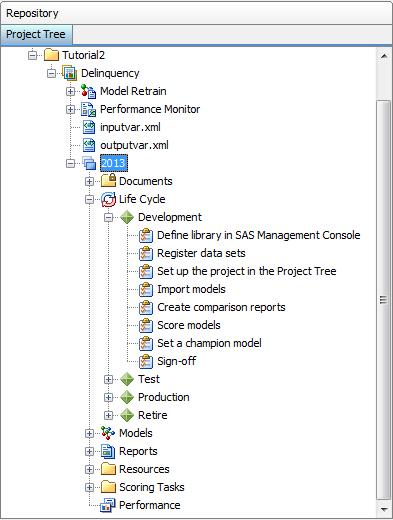
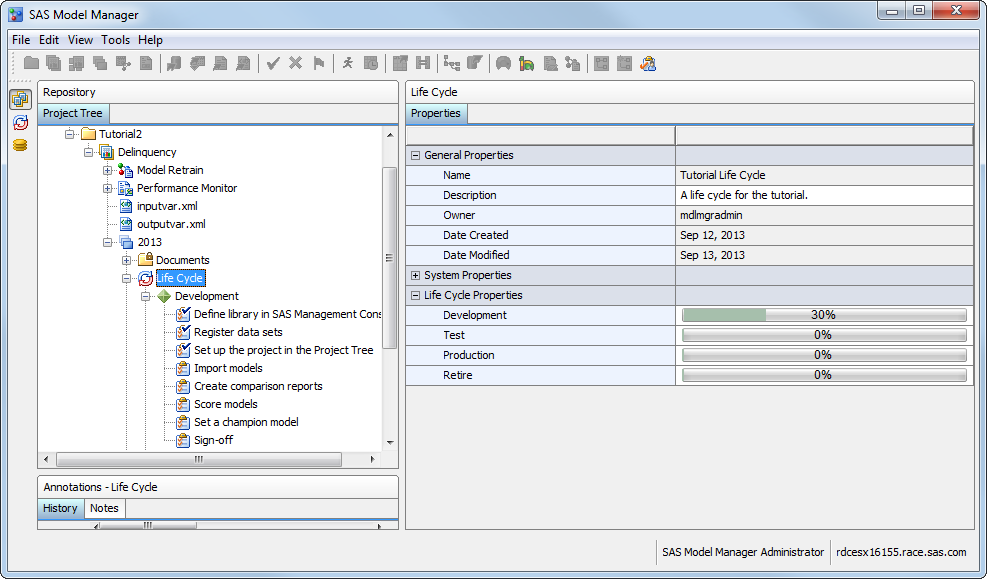
Update the Life Cycle (Optional)

To complete the milestone task of adding data sources and setting up the project in the Project Tree:
  1. In the Delinquency project, expand 2013then selectLife Cyclethen selectDevelopment.
  2. Select the Define library in SAS Management Console task and examine the task properties. The To Be Completed By property, assigned in the life cycle template, determines which users or user groups from the Participants list are responsible for this milestone task. Because you are a member of the MM Tutorial Assignees group, you are authorized to update the task status.
  3. Click the Status box and select Completed.
  4. Select the Register data sets task and examine the task properties. Click the Status box and select Completed.
  5. Select the Set up project in the Project Tree task. Click the Status box and select Completed.
  6. Select all of the tasks whose status you updated and examine the properties. Verify that the value of the Date Completed property is today and that the value of the Completed By property is your user ID.
  7. Select the Life Cycle node to examine its properties. The value for Date Modified is today's date. The Development property displays a bar chart that shows the percentage of completed tasks for this milestone.
    The Life Cycle status of the Development milestone.

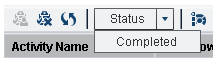
Update the Workflow (Optional)

To complete the activities in the associated workflow:
  1. Select Toolsthen selectMy Workflow Inbox or click My Workflow Inbox from the SAS Model Manager main window to view the workflow activities in your workflow inbox. Workflow Console is launched in a web browser, and displays the Activities category view.
    Note: The list displays only the activities for which you are the actual owner or are assigned as a potential owner, and that have the state of Started.
  2. From the Activities category view, select an activity name, and click Claim the activity.
    Note: You can select an activity name and click Release the activity to release an activity that you had previously claimed.
  3. (Optional) Enter a property value or change an existing property value in the Properties pane.
  4. (Optional) Double-click an activity to view the activity details. From the activity details view, you can modify activity properties or perform the model management tasks that are associated with the activity.
    Note: If you did not claim the activity from the Activities category view, you can select the Claim check box in the activity status bar.
  5. (Optional) Add a comment to the activity using the Comments pane.
  6. Select a status value to complete the activity. The workflow continues to the next activity.
    Activity Status Menu
  7. Repeat steps 2 through 6 for the activities that you completed during this tutorial.
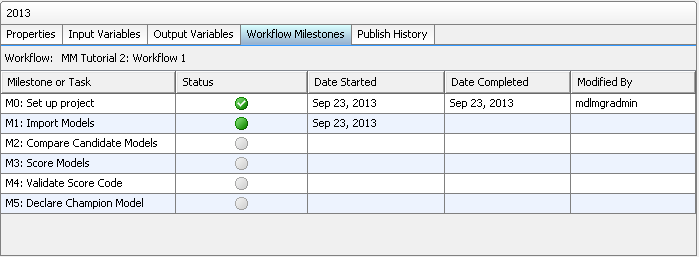
    Note: A workflow can be configured to display the activities that are associated with a milestone or task on the Workflow Milestones tab and in the Workflow Milestones report for a version in the SAS Model Manager client application. From the Workflow Milestones tab, you can view the status of milestones or tasks that are associated with activities in the workflow.
    Workflow Milestones tab
Note: For more information, see Tutorial 11: Using Workflow Console.