Import Models

In this exercise you import models into SAS Model Manager, set model properties, and map the model variables.

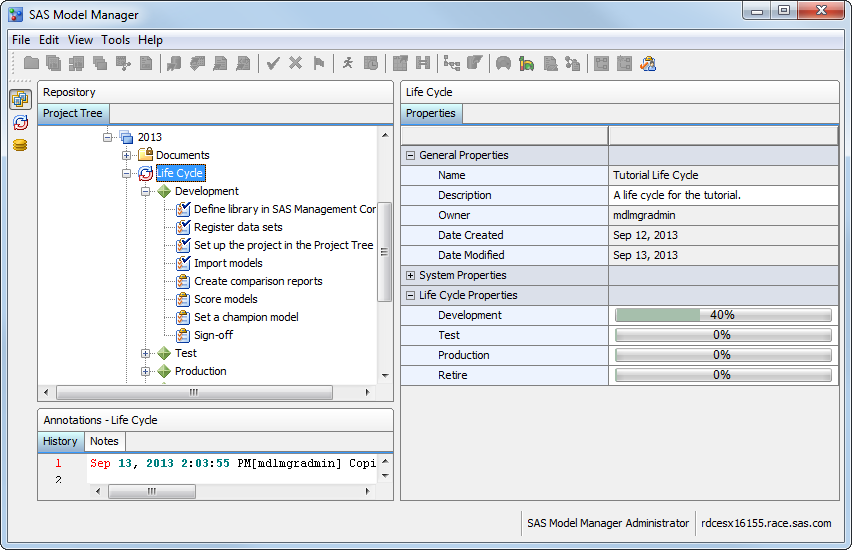
About Tutorial 2 Models

The imported models are SAS code models. SAS code models are models that were not created and exported from SAS Enterprise Miner. SAS code models consist of the SAS code and the model component files (metadata) that are used to process a model in SAS Model Manager.
The SAS code for the first model is the LOGISTICS procedure, whereas the SAS code for the second and third models consists of DATA step fragments. To import a SAS code file, at least three component files are required: the model score code, the model input file, and the model output file. For prediction or classification models, you also must prepare model target files.
Note: This document imports two models that use the LOGISTICS procedure. In Tutorial 2, the model is a SAS code model, which consists of individual model component files. In Tutorial 3, the model component files were created by the LOGISTICS procedure and bundled as a model package file (.spk). SAS code models and model package files use different model import methods.

Import SAS Code Models

  1. Expand the 2013 version in the Delinquency project and right-click Models. Then select Import fromthen selectLocal Files. The Local Files window appears.
  2. Import Model 1.
    1. In the left pane, expand the Desktop folder and select <drive>:\Tutorial2\Samples\model1.
    2. In the Choose a model template box, select Classification.
    3. Type Model 1 in the Name box. For each filename in the Object column, click the filename and drag it to the corresponding option box. This action maps the tutorial model component filenames to the SAS Model Manager model component filenames.
      Object
      Option
      modelin1.sas7bdat
      modelinput.sas7bdat
      modelout1.sas7bdat
      modeloutput.sas7bdat
      om.sas7bdat
      outmodel.sas7bdat
      score1.sas
      score.sas
      target1.sas7bdat
      target.sas7bdat
      Note: If the same variables appear in your modelinput.sas7bdat file and your modeloutput.sas7bdat file, SAS Model Manager removes the duplicate variables from the outputvar.xml file when you import the model.
      Here is the Local Files window after the files have been mapped.
      Local Files window to import model 1
    4. Click OK.
  3. Import Model 2.
    1. Open the Local Files window. In the left pane, expand the Desktop folder and select <drive>:\Tutorial2\Samples\model2.
    2. In the Choose a model template box, select Classification.
    3. Type Model 2 in the Name box. For each filename in the Object column, click the filename and drag it to the corresponding option box. This action maps the tutorial model component filenames to the SAS Model Manager model component filenames.
      Object
      Option
      modelin2.sas7bdat
      modelinput.sas7bdat
      modelout2.sas7bdat
      modeloutput.sas7bdat
      ot.sas7bdat
      outmodel.sas7bdat
      score2.sas
      score.sas
      target2.sas7bdat
      target.sas7bdat
    4. Click OK.
  4. Import Model 3.
    1. Open the Local Files window. In the left pane, expand the Desktop folder and select <drive>:\Tutorial2\Samples\model3.
    2. In the Choose a model template box, select Classification.
    3. Type Model 3 in the Name box. For each filename in the Object column, click the filename and drag it to the corresponding option box. This action maps the tutorial model component filenames to the SAS Model Manager model component filenames.
      Object
      Option
      modelin3.sas7bdat
      modelinput.sas7bdat
      modelout3.sas7bdat
      modeloutput.sas7bdat
      score3.sas
      score.sas
      target3.sas7bdat
      target.sas7bdat
    4. Click OK.
  5. Examine the Models folder to verify that it contains the three models. Right-click the folder and select Expand All to examine the model files.

Set Model Properties

Set the properties for the model. SAS Model Manager requires that the Score Code Type be set to DATA step if the score code is a DATA step fragment, or be set to SAS Program if the score code is a SAS procedure. Follow these steps.
  1. Select Model 1. Click the Description field and enter first model for tutorial 2.
  2. Select Model 2. Click the Score Code Type box and select DATA step.
  3. Select Model 3. Click the Score Code Type box and select DATA step.

Map Model Variables to Project Variables

When the names of the model output variable are not identical to the names of the project output variables, you must map the variables. To map model output variables to project output variables:
  1. Map model variables for the first model. Right-click Model 1 in the Models folder and then select Set Model Output Mapping. Ensure that the following model variables are mapped to their respective project variables. To map a model variable to a project variable, click in the box in the Model Variables column, select a variable, and click OK.
    Project Variables
    Model Variables
    POSTERIOR
    P_1
    PREDICTION
    I_BAD
  2. Map model variables for the second model. Select Model 2 in the Models folder and then click the Model Mapping tab in the right pane. Click Edit. Ensure that the following model variables are mapped to their respective project variables. To map a model variable to a project variable, click the box in the Model Variables column and select a variable. Click OK when you are finished.
    Project Variables
    Model Variables
    POSTERIOR
    PROB2
    PREDICTION
    PREDICTION
  3. Map model variables for the third model. Select Model 3 in the Models folder and then click the Model Mapping tab in the right pane. Click Edit. Ensure that the following model variables are mapped to their respective project variables. To map a model variable to a project variable, click the box in the Model Variables column and select a variable. Click OK when you are finished.
    Project Variables
    Model Variables
    POSTERIOR
    P_BAD1
    PREDICTION
    PREDICTION

Update the Life Cycle (Optional)

To update the Development milestone:
  1. In the Delinquency project, expand 2013then selectLife Cyclethen selectDevelopment.
  2. Select the Import models task. Click the Status box and select Completed.
  3. Select the Development milestone to refresh the property values. Select Import models. The Date Completed and Completed By fields have been updated with today's date and your user ID.
  4. Click the Life Cycle node to examine its properties. The value for Date Modified is today's date. The Develop property displays a bar chart that shows the percentage of completed tasks for this milestone.
    The life cycle status of the Develop milestone.

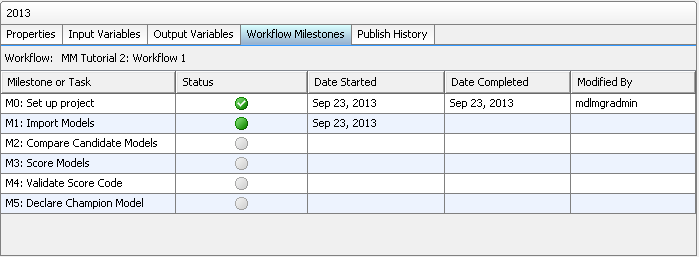
Update the Workflow Process (Optional)

To complete the activities in the associated workflow:
  1. Select Toolsthen selectMy Workflow Inbox or click My Workflow Inbox from the SAS Model Manager main window to view the workflow activities in your workflow inbox. Workflow Console is launched in a web browser, and displays the Activities category view.
    Note: The list displays only the activities for which you are the actual owner or are assigned as a potential owner, and that have the state of Started.
  2. From the Activities category view, select an activity name, and click Claim the activity.
    Note: You can select an activity name and click Release the activity to release an activity that you had previously claimed.
  3. (Optional) Enter a property value or change an existing property value in the Properties pane.
  4. (Optional) Double-click an activity to view the activity details. From the activity details view, you can modify activity properties or perform the model management tasks that are associated with the activity.
    Note: If you did not claim the activity from the Activities category view, you can select the Claim check box in the activity status bar.
  5. (Optional) Add a comment to the activity using the Comments pane.
  6. Select a status value to complete the activity. The workflow continues to the next activity.
    Activity Status Menu
  7. Repeat steps 2 through 6 for the activities that you completed during this tutorial.
    Note: A workflow can be configured to display the activities that are associated with a milestone or task on the Workflow Milestones tab and in the Workflow Milestones report for a version in the SAS Model Manager client application. From the Workflow Milestones tab, you can view the status of milestones or tasks that are associated with activities in the workflow.
    Workflow Milestones tab
Note: For more information, see Tutorial 11: Using Workflow Console.