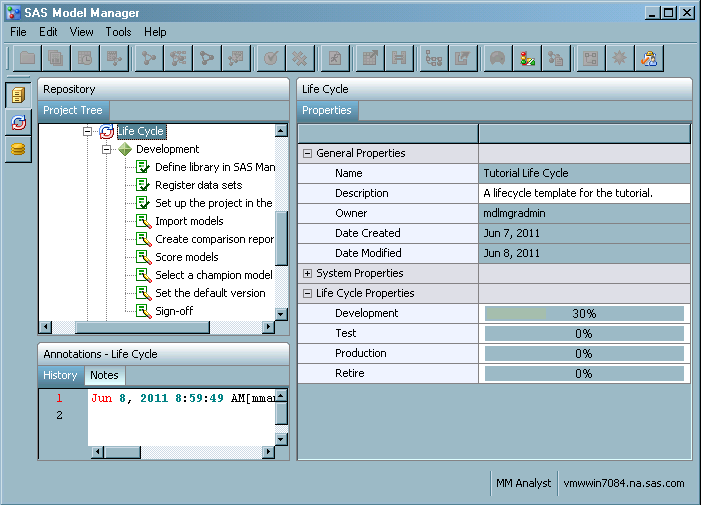
Organize the Model Hierarchy

In this exercise, you learn to use the Project Tree to create a modeling project.

Create a Folder

To provide an organizational folder to manage your modeling projects, follow these steps:
  1. Click the Project perspective button Projects Perspective button and right-click MMRoot in the Project Tree. Select Newthen selectNew Folder. The New Folder dialog box appears.
  2. Specify values for the following folder properties and click OK.
    Name
    enter Tutorial2 for the folder name.
    Description
    enter an optional folder description.
The new folder appears in the Project Tree.

Create a New Project

To create a project and define the model function, follow these steps:
  1. Right-click Tutorial2 and select then selectNewthen selectNew Project. The New Project wizard appears.
  2. Specify the following project properties and click Next:
    Name
    enter Delinquency for the project name.
    Description
    enter an optional description.
    Model Function
    select classification.
  3. Specify the project input variables:
    1. Below the Project Input Variables table, click Import Variables. The Import Variables from Table window appears.
    2. Double-click these folders: Shared Datathen selectModel Managerthen selectTutorial2.
    3. Select DELINQUENCY_PROJECT_INPUT and click OK.
  4. Specify the project output variables:
    1. Below the Project Output Variables table, click Import Variables. The Import Variables from Table window appears.
    2. Select DELINQUENCY_PROJECT_OUTPUT, click OK, and click Finish.
      New Project Wizard Step 2 of 2 after the project variables have been set.
      New Project Wizard Step 2
  5. Examine the Tutorial2 folder to verify that it contains the Delinquency project.
    The Delinquency project in the Project Tree

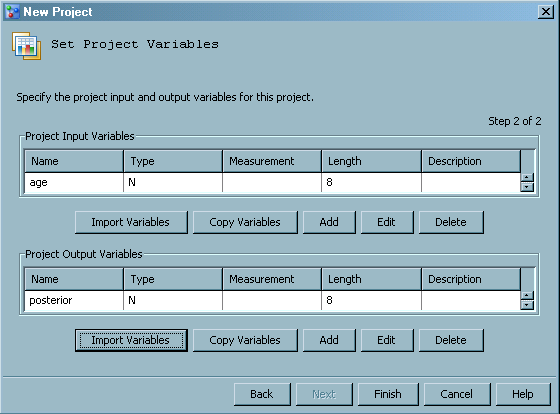
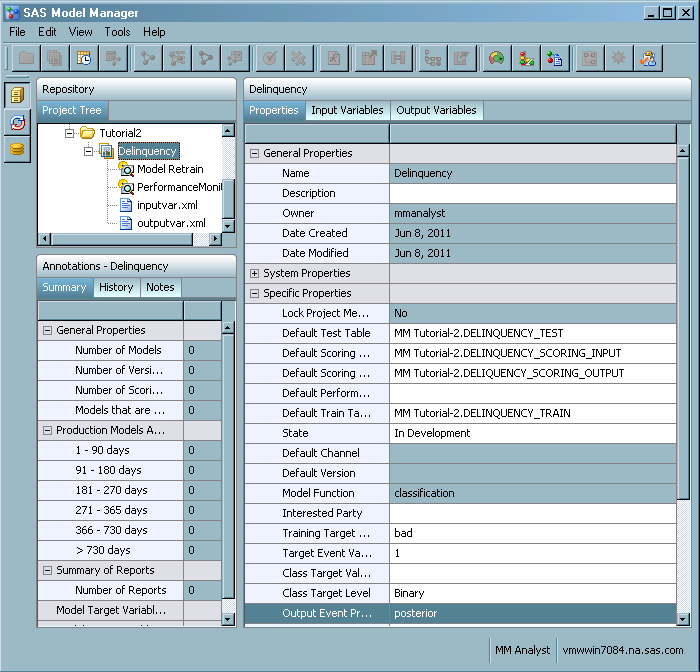
Define the Project Properties

To define the properties that SAS Model Manager uses to create reports and score models, follow these steps:
  1. Select the Delinquency project in the Tutorial2 folder and expand Specific Properties in the right pane.
  2. Specify the default data tables and model variables for the project, right-click Delinquency.
    Default Test Table
    select DELINQUENCY_TEST.
    Default Scoring Task Input Table
    select DELINQUENCY_SCORING_INPUT.
    Default Scoring Task Output Table
    select DELINQUENCY_SCORING_OUTPUT.
    Default Train Table
    select DELINQUENCY_TRAIN.
    Training Target Variable
    enter bad.
    Target Event Value
    enter 1.
    Class Target Level
    select Binary.
    Output Event Probability Variable
    select posterior.
Project tree display the Delinquency project properties

Create a Version

Create a version for the project. The version folder contains life cycle information, auxiliary version documents, candidate model files, model comparison reports, resource files, scoring tasks, and model performance reports. To create a new version, follow these steps:
  1. Right-click the Delinquency project and select Newthen selectNew Version. The New Version dialog box appears.
  2. Specify the following version properties and click OK.
    Name
    enter 2011 for the version name.
    Life Cycle Template
    select the user-defined template Tutorial Life Cycle.
    Note: If you are using a workflow process to track the progress of your project or version, you can select any life cycle template. You can then skip all tasks to update the life cycle.
  3. Examine the Delinquency project to verify that it contains one version called 2011. Select Life Cycle. Verify that the Name property is Tutorial Life Cycle.
    Expanded 2011 version folder for Delinquency project
Note: If you want to use a workflow process to track the progress of your project or version, send a request to a SAS Model Manager administrator and ask the administrator to create an instance of a workflow process definition to use for the tutorials. Include the name and UUID of the project or version with which you want to workflow process instance to be associated.

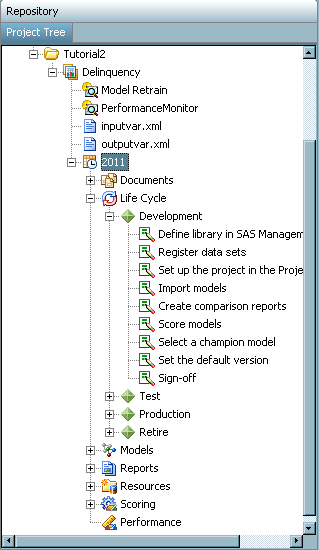
Update the Life Cycle (Optional)

To complete the milestone task of adding data sources and setting up the project in the Project Tree, follow these steps:
  1. In the Delinquency project, expand 2011then selectLife Cyclethen selectDevelopment.
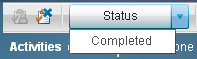
  2. Select the Define library in SAS Management Console task and examine the task properties. The To Be Completed By property, assigned in the life cycle template, determines which users or user groups from the Participants list are responsible for this milestone task. Because you are a member of the MM Tutorial Assignees group, you are authorized to update the task status.
  3. Click the Status box and select Completed.
  4. Select the Register data sets task and examine the task properties. Click the Status box and select Completed.
  5. Select the Set up project in the Project Tree task. Click the Status box and select Completed.
  6. Select all of the tasks whose status you updated and examine the properties. Verify that the value of the Completed Date property is today and that the value of the Completed By property is your user ID.
  7. Select the Life Cycle node to examine its properties. The value for Date Modified is today's date. The Development property displays a bar chart that shows the percentage of completed tasks for this milestone.
    The Life Cycle status of the Development milestone.

Update the Workflow Process (Optional)

To complete the activities in the associated workflow process, follow these steps:
  1. Click My Workflow Inbox from the SAS Model Manager main window to view the workflow process activities in your workflow inbox. Workflow Console is launched in a Web browser, and displays the Activities category view.
    Note: The list displays only the activities for which you are the actual owner or are assigned as a potential owner, and that have the state of Started.
  2. From the Activities category view, select an activity name, and click Claim the activity to claim an activity.
    Note: You can select an activity name and click Release the activity to release an activity that you had previously claimed.
  3. (Optional) Enter a property value or change an existing property value in the Properties pane.
  4. (Optional) Add a comment to the activity using the Comments pane.
  5. Select a status value to complete the activity. The workflow process continues to the next activity.
    Activity Status Menu
  6. Repeat steps 2 through 5 for the activities that you completed during this tutorial.
Note: For more information, see Tutorial 10: Using Workflow Console.