Many IT organizations
establish separate IT data marts for different IT resources based
on their use by different business organizations or for use in support
of production, testing, or development. The cloning feature is useful
because it allows Aggregation transformation definitions to be created
once and then copied and reused across other IT data marts.
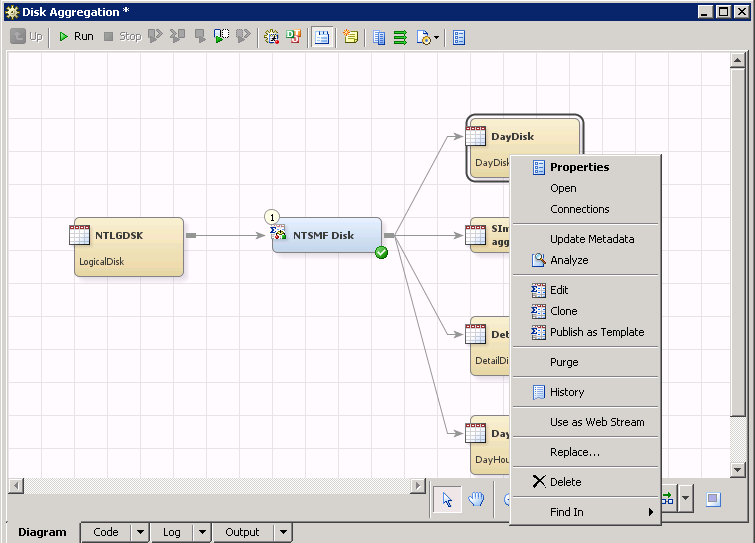
To clone an aggregation
table, perform the following steps:
-
Locate the Aggregation
transformation that generates the aggregation table that you want
to clone. To do so, from the
IT Data Marts tree,
navigate to the IT data mart that contains the job where the Aggregation
transformation is located. Double-click the job to open it on the
Diagram tab
of the
Job Editor window.
-
Right-click the aggregation
table that you want to clone.
Aggregation Table Properties
-
From the drop-down list,
select
Clone. If you are cloning a summarized
aggregation table, the
Clone Summary Aggregation Table dialog
box appears. If you are cloning a simple aggregation table, the
Clone
Simple Aggregation Table dialog box appears.
Note: The dialog boxes contain
the same fields and are specified the same way.
-
The
Name field
contains the following text by default: “
the
name of the original table_Clonen”,
where
n is the
nth table
that is cloned from the original aggregation table.
(Optional) Enter a name
and a description that are more meaningful to you.
-
The dialog box displays
the default values for the column to use for aging, its format, and
whether the column represents the date or the datetime. (These values
reflect the original table from which you created this cloned table.)
To change the aging
criteria for the cloned table, check the corresponding box. This action
enables you to select a different
Column to use for aging.
-
From the drop-down menu, select
the column to use for aging.
-
The
Format field
displays the format for the selected column. It cannot be changed.
-
If possible, the system selects
the appropriate
Date or
Datetime format.
When you specify datetime
values, one day of aging extends over 24 hours of data collection.
This period might extend over one or more days.
Note: If the system cannot determine
whether the field represents a
Date or a
Datetime format,
both of these options are enabled so that you can select the appropriate
one.
-
The
SAS table name field
displays the unique name of the physical file that is associated with
this new cloned table. It can be changed; however, the new SAS table
name must be unique within its associated SAS library.
-
Click
OK to
create the cloned table.
Note: If you changed the column
used for aging, a message appears that asks whether you are sure that
you selected the correct
Date or
Datetime format.
If your selection is correct, click
Yes.
Otherwise, click
No and correct the
Format field.
-