Modifying Aggregation Tables
Delete an Aggregation Table from an Aggregation Transformation
-
Locate the Aggregation transformation that generates the aggregation table that you want to delete. To do so, from the IT Data Marts tree, navigate to the IT data mart that contains the job where the Aggregation transformation is located. Double-click the job to open it on the Diagram tab of the Job Editor window.
-
From the drop-down list, select Delete. The table is removed from the Aggregation transformation that is displayed in the process flow diagram. However, the metadata for that table and the library are not deleted from the IT data mart. For information about this topic, see Delete an Aggregation Table from the IT Data Mart.
In order for your changes
to take effect, you must redeploy the job. For information about
redeploying jobs, see Redeploy All Jobs on the Server.
Erase an Aggregation Table
Erasing an aggregation
table deletes the physical table, its contents, and its metadata.
To erase an aggregation table, perform the following steps:
CAUTION:
If you
erase an aggregation table that serves as a source table in other
jobs, then these associated jobs might not execute because they are
missing a source table.
Simply
erasing an aggregation table does not affect the metadata of the associated
aggregation or information map jobs. However, if you erase an aggregation
table and then rerun the aggregation job, then the data for the deleted
aggregation table is not created and the jobs that used that table
will fail due to a missing source table.
Modify a Simple or a Summarized Aggregation Table
If you need to modify
an aggregation table, for best results do so from within the aggregation
job. (If you want to edit an aggregation table that was created by
the Simple Aggregation Table wizard or the Summarized Aggregation Table wizard, you must first save the job that created
that aggregation table.) To modify a simple or a summarized aggregation
table, perform the following steps:
-
Locate the Aggregation transformation that generates the aggregation table that you want to modify. To do so, from the IT Data Marts tree, navigate to the IT data mart that contains the job where the Aggregation transformation is located. Double-click the job to open it on the Diagram tab of the Job Editor window.
-
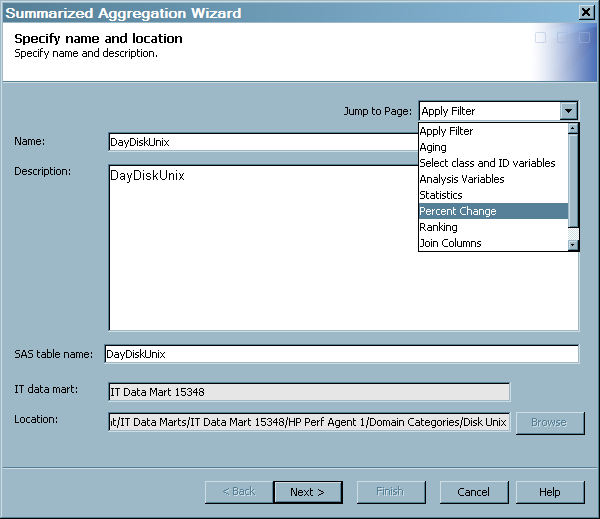
Right-click the aggregation table that you want to modify. From the list that displays, select Edit table type Aggregation Table.Note: If the table is a simple aggregation table, the list displays Edit Simple Aggregation Table. If the table is a summarized aggregation table, the list displays Edit Summarized Aggregation Table. However, if the aggregation table is not associated with an Aggregation transformation, then the Edit table type Aggregation Table option will not be available.
-
Modify the contents of the page that you selected. (For information about which fields can be changed, follow the instructions that apply to the creation of the type of table that you want to modify.)
-
For information about creating summarized aggregation tables, see Creating Aggregation Tables with the Summarized Aggregation Table Wizard.
-
For information about creating simple aggregation tables, see Creating an Aggregation Table with the Simple Aggregation Table Wizard.
Note: If you try to delete a column that is used to create a statistic, percent change, rank, or join column, a message is displayed that lists the column, where it is used, and its table name. If a column was deleted by means of the Columns tab of the Properties dialog box, then the next time the aggregation wizard is opened on that table, a message is displayed that indicates any columns whose source column is no longer available. Click Yes to delete the columns from the table and continue to edit the table. Click No to keep the columns. In that case, the wizard is not opened. -
In order for your
changes take effect, you must redeploy the job. For information about
redeploying jobs, see Redeploy All Jobs on the Server.
Purging the Content of an Aggregation Table
Purge Data from an Aggregation Table from the Process Flow Diagram
-
Locate the Aggregation transformation that generates the aggregation table that you want to modify. To do so, from the IT Data Marts tree, navigate to the IT data mart that contains the job where the Aggregation transformation is located. Double-click the job to open it on the Diagram tab of the Job Editor window.
Renaming an Aggregation Table
CAUTION:
You can
change the name of the physical aggregation table only by using the
Edit Aggregation wizard.
-
Locate the Aggregation transformation that generates the aggregation table that you want to modify. To do so, from the IT Data Marts tree, navigate to the IT data mart that contains the job where the Aggregation transformation is located. Double-click the job to open it on the Diagram tab of the Job Editor window.
Note: This task changes the name
of the table in the metadata. The name of the physical SAS data set
is changed when you click Finish. In order for your changes to take effect, you must redeploy the
aggregation job. In addition, even though the metadata linkage to
that renamed table still exists, it is advisable to redeploy the information
map job that uses the renamed table as input. For more information
about redeploying jobs, see Redeploy All Jobs on the Server.