| Specifying Forecasting Models |
Editing the Model Selection List
Now that you know how to specify new models that are not included in the system default model selection list, you can edit the model selection list to add models that you expect to use in the future or to delete models that you do not expect to use. When you save the forecasting project to a SAS catalog, the edited model selection list is saved with the project file, and the list is restored when you load the project.
There are two reasons why you would add a model to the model selection list. First, by adding the model to the list, you can fit the model to different time series by selecting it through the Fit Models from List action. You do not need to specify the model again every time you use it.
Second, once the model is added to the model selection list, it is available to the automatic model selection process. The model is then considered automatically whenever you use the automatic model selection feature for any series.
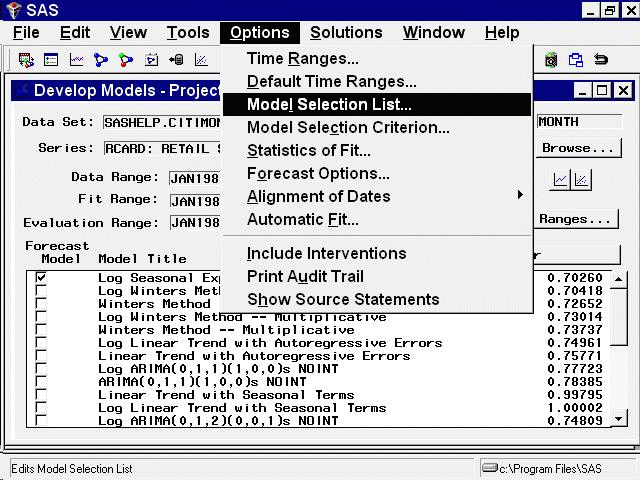
To edit the model selection list, select "Model Selection List" from the Options menu as shown in Figure 39.25, or select the Edit Model List toolbar icon.
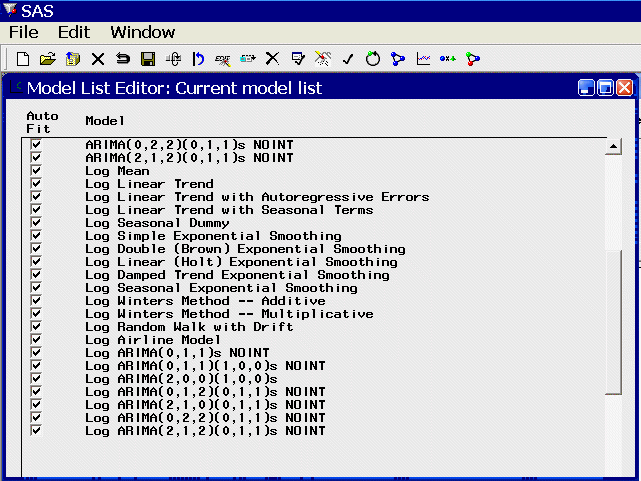
This selection brings up the Model Selection List editor window, as shown in Figure 39.26. This window consists of the model selection list and an "Auto Fit" column, which controls for each model whether the model is included in the list of models used by the automatic model selection process.
To add a model to the list, select "Add Model" from the Edit menu and then select "Smoothing Model," "ARIMA Model," "Factored ARIMA Model," or "Custom Model" from the submenu. Alternatively, click the corresponding icon on the toolbar.
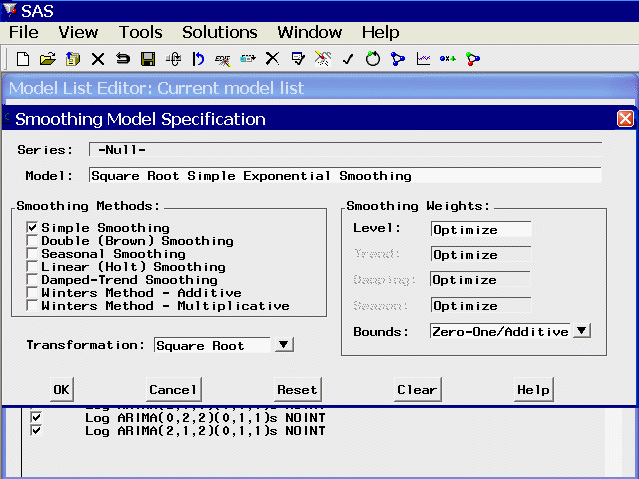
As an example, select "Smoothing Model." This brings up the Smoothing Model Specification window. Note that the series name is "-Null-." This means that you are not specifying a model to be fit to a particular series, but are specifying a model to be added to the selection list for later reference.
Specify a smoothing model. For example, select "Simple Smoothing" and then select the Square Root transformation. The window appears as shown in Figure 39.27.
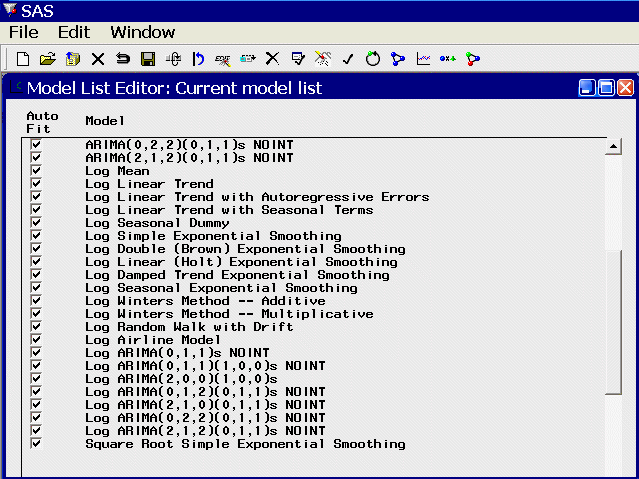
Select the OK button to add the model to the end of the model selection list and return you to the Model Selection List window, as shown in Figure 39.28. You can now select the Fit Models from List model-fitting option to use the edited selection list.
If you want to delete one or more models from the list, select the model labels to highlight them in the list. Click a second time to clear a selected model. Then select "Delete" from the Edit pull-down menu, or the corresponding toolbar icon. As an example, delete the Square Root Simple Exponential Smoothing model that you just added.
The Model Selection List editor window gives you a lot of flexibility for managing multiple model lists, as explained in the section Model Selection List Editor Window. For example, you can create your own model lists from scratch or modify or combine previously saved model lists and those provided with the software, and you can save them and designate one as the default for future projects.
Now select "Close" from the File menu (or the Close icon) to close the Model Selection List editor window.
Copyright © 2008 by SAS Institute Inc., Cary, NC, USA. All rights reserved.