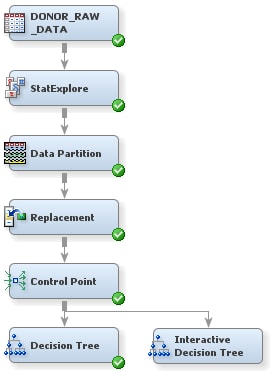
Interactively Train a Decision Tree
To use the Decision
Tree node to interactively train and prune a decision tree:
-
Select the Interactive Decision Tree node. In the Properties Panel, in the Train properties group, click on the ellipses that represent the value of Interactive. The Interactive Decision Tree window appears.
-
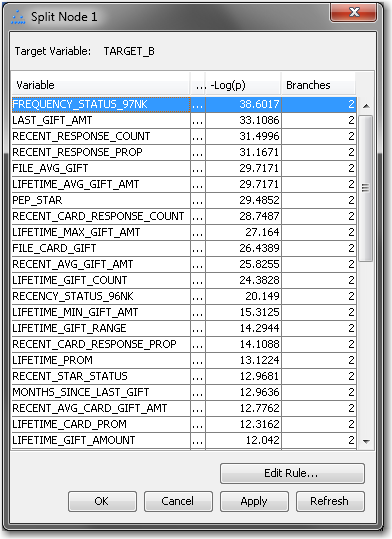
Select the root node (at this point, the only node in the tree), and then from the Action menu, select Split Node. The Split Node window appears that lists the candidate splitting rules ranked by logworth (-Log(p)). The FREQUENCY_STATUS_97NK rule has the highest logworth. Ensure that this row is selected, and click OK.
-
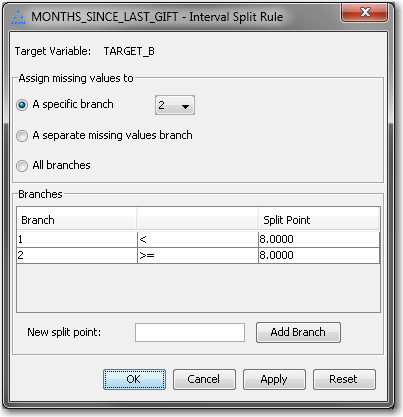
The tree now has two additional nodes. Select the lower left node (where FREQUENCY_STATUS_97NK is 3 or 4), and then from the Action menu, select Split Node. In the Split Node window that opens, select MONTHS_SINCE_LAST_GIFT, which ranks second in logworth, and click Edit Rule to manually specify the split point for this rule. The Interval Split Rule window appears.Enter
8as the New split point, and click Add Branch. Then, select Branch 3 (>= 8.5) and click Remove Branch. Click OK.Ensure that MONTHS_SINCE_LAST_GIFT is selected in the Split Node window, and click OK. -
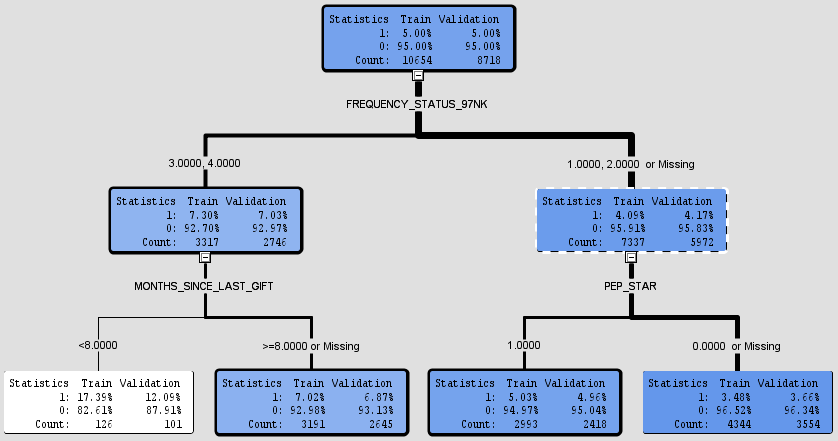
Select the first generation node that you have not yet split (where FREQUENCY_STATUS_97NK is 1, 2, or Missing). From the Action menu, select Split Node. In the Split Node window that opens, ensure that PEP_STAR is selected, and click OK.The tree now has seven nodes, four of which are leaf nodes. The nodes are colored from light to dark, corresponding to low to high percentages of correctly classified observations.
-
Select the lower right node (where FREQUENCY_STATUS_97NK is 1, 2, or Missing and PEP_STAR is 0 or Missing). From the Action menu, select Train Node. This selection causes SAS Enterprise Miner to continue adding generations of this node until a stopping criterion is met. For more information about stopping criteria for decision trees, see the SAS Enterprise Miner Help.Note: In the Interactive Decision Tree window, you can prune decision trees. However, in this example, you will leave the tree in its current state.
-
Copyright © SAS Institute Inc. All rights reserved.