Automatically Train and Prune a Decision Tree
Decision tree models are advantageous because they are conceptually easy to understand,
yet they readily accommodate nonlinear associations between input variables and one
or more target variables. They also handle missing values without the need for imputation. Therefore, you decide to first model the data using decision trees. You will compare decision tree models to other models
later in the example.
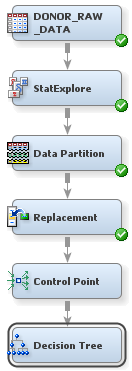
However, before you add and run the Decision Tree node, you will add a Control Point
node. The Control Point node is used to simplify a process flow diagram by reducing the number of connections between multiple interconnected nodes. By the
end of this example, you will have created five different models of the input data set, and two Control Point nodes to connect these nodes. The first Control Point node,
added here, will distribute the input data to each of these models. The second Control
Point node will collect the models and send them to evaluation nodes.
To use the Control
Point node:
SAS Enterprise Miner
enables you to build a decision tree in two ways: automatically and
interactively. You will begin by letting SAS Enterprise Miner automatically
train and prune a tree.
To use the Decision
Tree node to automatically train and prune a
decision tree:
-
Select the Decision Tree node. In the Properties Panel, scroll down to view the Train properties:
-
Click on the value of the Leaf Size node property, and enter
8. This specification constrains the minimum number of training observations in any leaf to eight. -
Click on the value of the Number of Surrogate Rules node property, and enter
4. This specification enables SAS Enterprise Miner to use up to four surrogate rules in each non-leaf node if the main splitting rule relies on an input whose value is missing.
Note: The Assessment Measure subtree property is automatically set to Decision because you defined a profit matrix in Create a Data Source. Accordingly, the Decision Tree node will build a tree that maximizes profit in the validation data. -
-
Expand the Node Rules window. This window contains the IF-THEN logic that distributes observations into each leaf node of the decision tree.In the Output window, the Tree Leaf Report indicates that there are seven leaf nodes in this tree. For each leaf node, the following information is listed:
-
node number
-
number of training observations in the node
-
percentage of training observations in the node with TARGET_B=1 (did donate), adjusted for prior probabilities
-
percentage of training observations in the node with TARGET_B=0 (did not donate), adjusted for prior probabilities
This tree has been automatically pruned to an optimal size. Therefore, the node numbers that appear in the final tree are not sequential. In fact, they reflect the positions of the nodes in the full tree, before pruning. -

Copyright © SAS Institute Inc. All rights reserved.