Sort and De-Duplicate Data
Introduction
Use the Sort and De-Duplicate
Data directive to create jobs that include some or all of the following
steps:
-
Group rows based on selected columns and then summarize numeric columns for each group and subgroup.
-
If not summarizing, specify the removal of duplicate rows and filter rows from the target.
-
Remove, reposition, and rename the columns in the target table. Add columns that receive the results of SQL expressions.
-
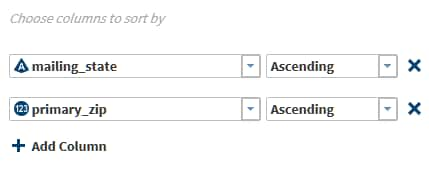
Sort target rows by selecting one or more columns for ascending or descending values.
Enable the Impala SQL Environment
Support for the Cloudera
Impala SQL environment is enabled in the Hadoop Configuration panel
of the Configuration window. When Impala
is enabled, new instances of the following directives use the Cloudera
Impala SQL environment by default:
The default SQL environment can be overridden using
the Settings menu. To learn more about SQL
environments, see Enable Support for Impala and Spark.
-
Sort and De-Duplicate
-
Query or Join
-
Run a Hadoop SQL Program
Note: Changing the default SQL
environment does not change the SQL environment for saved directives.
Saved directives continue to run with their existing SQL environment
unless they are opened, reconfigured, and saved.
Example
Follow these steps to
use the Sort and De-Duplicate directive:
-
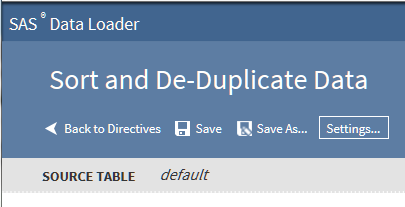
On the SAS Data Loader directives page, click Sort and De-Duplicate Data. The Source Table task is displayed. For more information about data sources and tables, see Viewing Data Sources and Tables.
-
In the Source Table task, click a table in your default data source and click Next. To select a source table from another data source, click
 .
.
-
Use the Summarize Rows task to group rows in the target according to column values, and then summarize numeric values for each group or subgroup.If you do not want to generate summary values for groups of rows, or if you want to remove duplicate rows, click Next to display the Filter task.Note: If your source data is in Hive 13 (0.13.0) or lower, the Summarize Rows task will not handle special characters in column names. To resolve the issue, either rename the columns or ask your Hadoop administrator to upgrade to Hive 14 (0.14.0 or higher).Follow these steps to use the Summarize Rows task:
-
Click Group rows by and select a column. To generate nested groups with additional summary values, click Add Column.

-
Click Summarize column and select a column that will be used to generate summary values for each group. The summarized values will appear in a new column in the target.
-
Click Aggregation and select the summary type. The available summary types are defined as follows:Countspecifies the number of rows that contain values in each group.Count Distinctspecifies the number of rows that contain distinct (or unique) values in each group.Maxspecifies the largest value in each group.Minspecifies the smallest value in each group.Sumspecifies the total of the values in each group.
-
Click New column name to change the default column name for new target column that will receive summarized data. The new target column will contain a summary value for each group and subgroup.
-
Click Add Column to specify a second summary and target column.

-
When your groups and summaries are complete, click Next to display the Filter task.
-
-
The Filter task enables you to remove duplicate rows and filter (remove) rows from the target.If you specify summaries or if you do not need to filter rows from the target, then click Next to display the Columns task.Follow these steps to use the Filter task:
-
To remove from the target any rows that are identical to another row, click No duplicate rows.
-
To filter rows from the target using one or more rules, click Specify rules.To filter rows using an SQL expression, click Specify expression.
-
To filter rows by specifying one or more rules, follow these steps:
-
Click Column and choose the source column that forms the basis of your rule.
-
Click and select a logical Operator. The operators that are available depend on the type of the data in the source column. For example, the following image shows the operators that are available for the character data type:
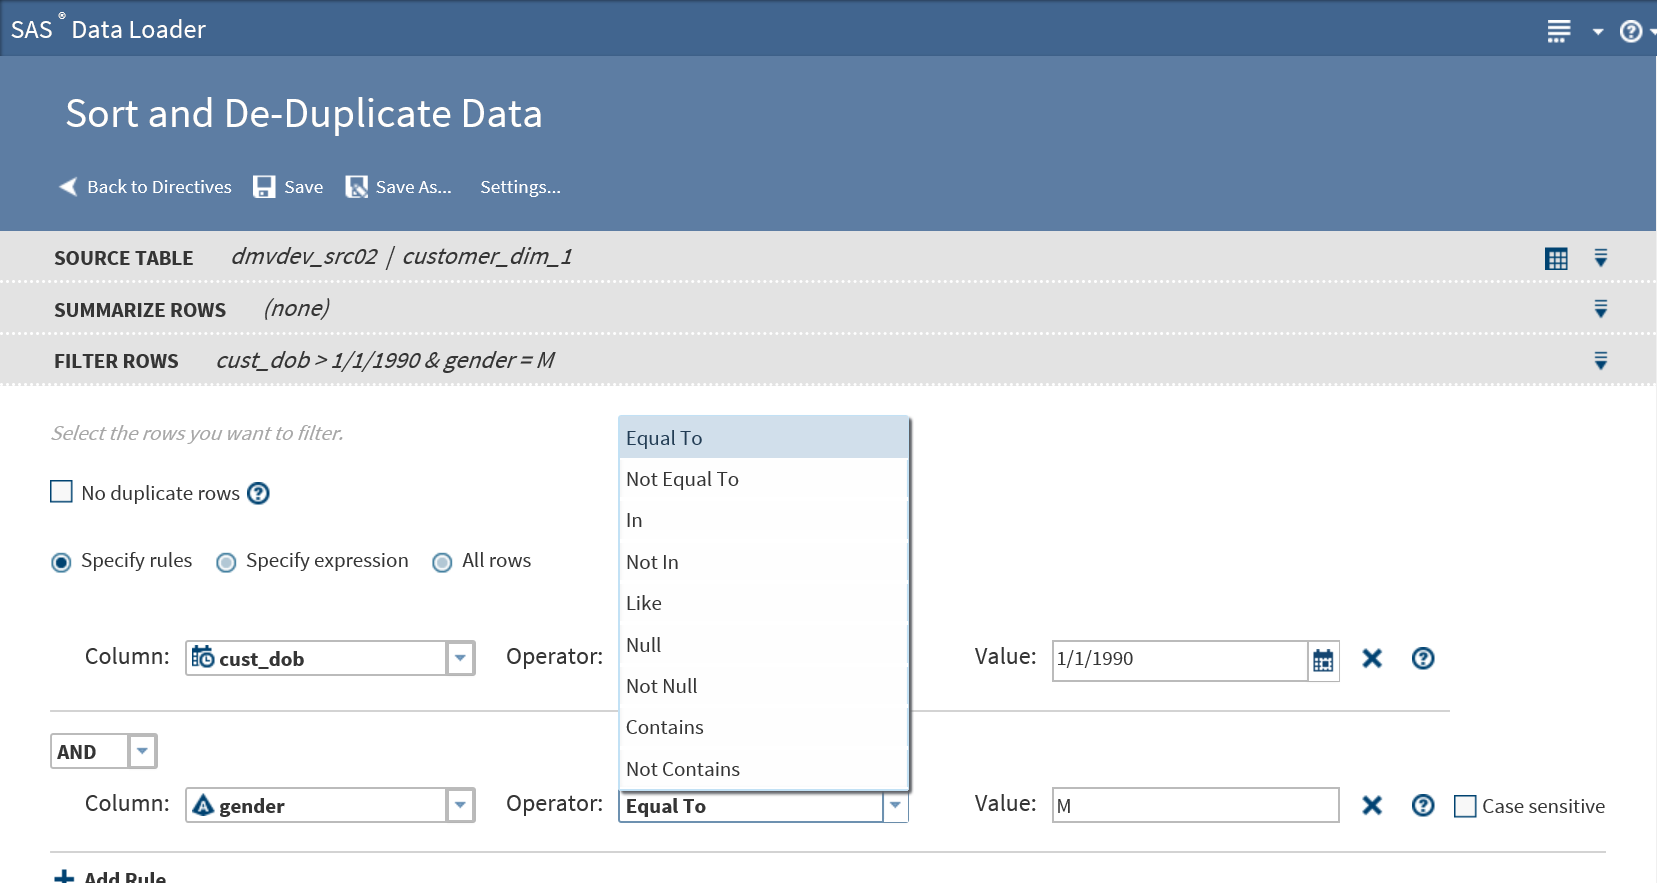
-
In the Value field, add the source column value that completes the expression. In the preceding example, the two rules combine to read “Filter from the target all male contacts who were born on or after January 1, 1990.”
-
Click Add Rule as needed to add another rule. Select a different column, operator, and value. To associate a new rule with the previous rules, either retain the default AND operator or click AND and select OR.
-
-
-
To filter rows using a user-written expression, follow these steps:
-
In the SQL Code text box, either type or paste an expression using HiveQL or Impala SQL.Your expression can use either HiveQL functions or Cloudera Impala SQL. Click Settings to display the selected SQL environment.To learn about the requirements for expressions, see Back Up Directives.
-
To add functions to your expression, click Functions in the Resources box, expand a category, select a function, and click
 .
.
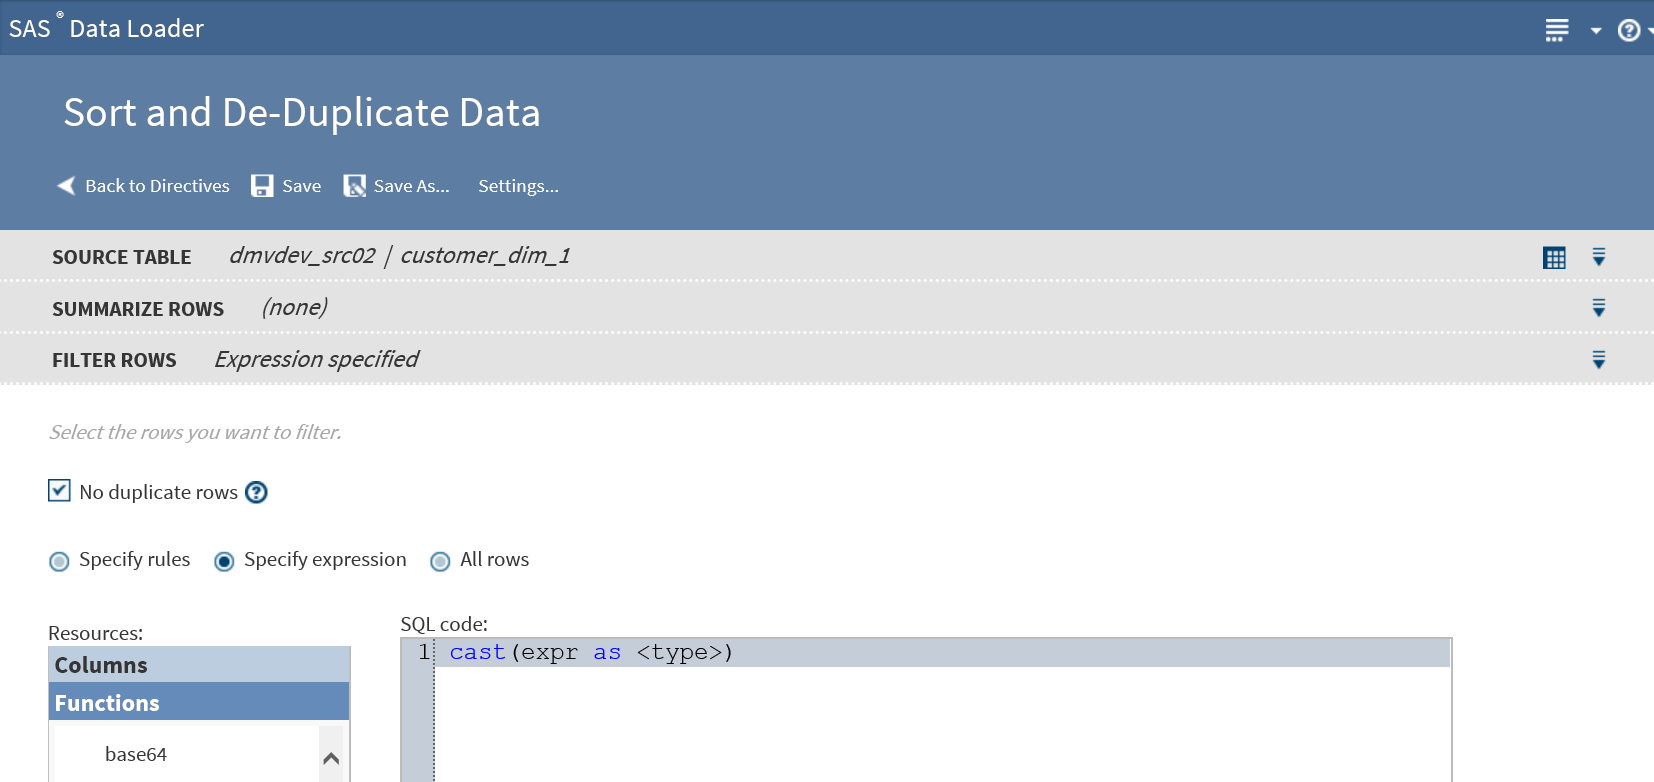 To add column names to your expression, position the cursor in the SQL code text box, click Columns in the Resources box, click a source column, and then click.
-
When your expression is complete, click Next to open the Columns task.
-
-
-
Use the Columns task when you have not defined summaries to remove, reorder, rename, modify target column data, or add a column of newly calculated data. New data is generated by user-written expressions.If you defined summaries in the Summarize Rows task, or if you do not need to modify columns, then click Next to display the Sort task and go to Step 6.Follow these steps to use the Columns task:
-
Click Specify Columns to display the Selected Columns and Available Columns.
-
In Selected Columns, click icons to perform the following tasks:
-
To rename columns, click
 , or click and type in the Target Name column.
-
To rearrange or reorder columns, click the up and down arrow icons. Note that the top row in Selected Columns is the first column position (full-left.)
-
To remove columns from the target, click the trash can icon or the left arrow icons.
-
To add a new target column that will be populated with data returned from a user-written expression, click
 .
.
-
To add a new column and develop an expression to add data to that column, click
 . To learn how to use the Advanced Editor, see Using the Advanced Editor for Expressions.
 -
To modify column data using a new expression, click
 .
.
-
To modify or add column data, click the Expression column, and either paste an existing expression or enter an expression.
-
-
When your columns are complete, click Next to display the Sort task.
-
-
If you have not defined any summaries in the Summarize Rows task, then the Sort task enables you to group rows based on ascending or descending values.If you defined summaries, click Next to display the Target task and go to the next step.
-
In the Target Table task, select a location for the target table. When the table list appears, either select an existing target or click New Table. To generate a temporary table that is not saved to disk, select Save as a View. Click Next.
-
In the Code task, review and edit the generated code for the directive. Note that you will lose any edits you make if you change a task and regenerate code. Click Next.
-
In the Result task, click Save or Save As to save your job. You can then access that job in Saved Directives. Click Start querying data to run your job.
Using the Advanced Editor for Expressions
In the directive Sort
and De-Duplicate Data, in the Columns task,
you can use the Advanced Editor to add or
edit user-written expressions. Each expression returns one value per
row to either modify existing data or to add data to a new column.
The Advanced
Editor enables you to insert column names and SQL function
syntax and column names into your expressions. Syntax descriptions
are provided for the supported SQL functions.
Follow these steps to
use the Advanced Editor:
-
As needed in the Columns task, click or to open the Advanced Editor.
-
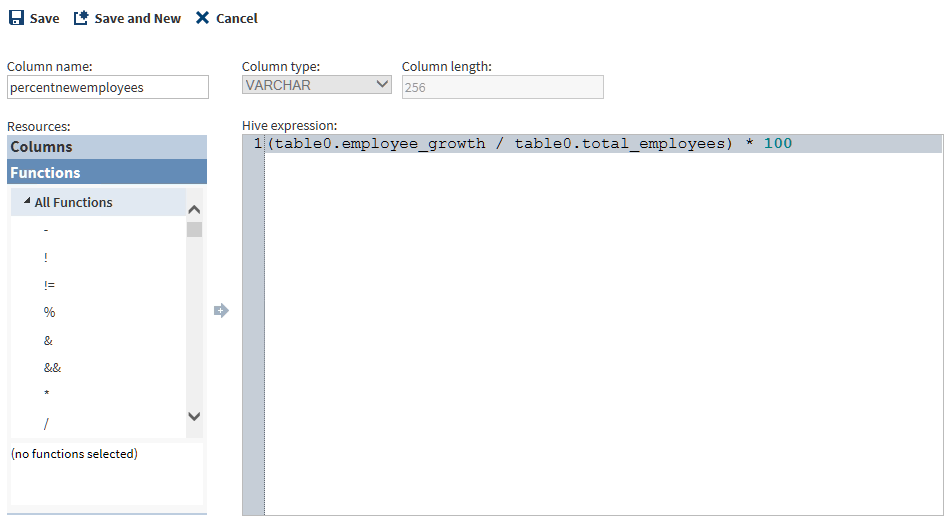
In the Advanced Editor, in the Column Name field, enter a name for a new column or rename an existing column. The fields Column type and Column length describe the selected column.
-
To build an expression, you can start by pasting expression code from your clipboard, or you can select and add function syntax from the Resources box.To learn about the requirements for expressions, see Develop Expressions for Directives.
-
To save your expression and return to the Columns task, click Save. To save and create another new column and expression, click Save and New. In the Columns task, new columns are displayed at the bottom of the Selected Columns box.
Copyright © SAS Institute Inc. All Rights Reserved.