Copy Data to Hadoop
Example
Follow these steps to
copy data into Hadoop from a database:
-
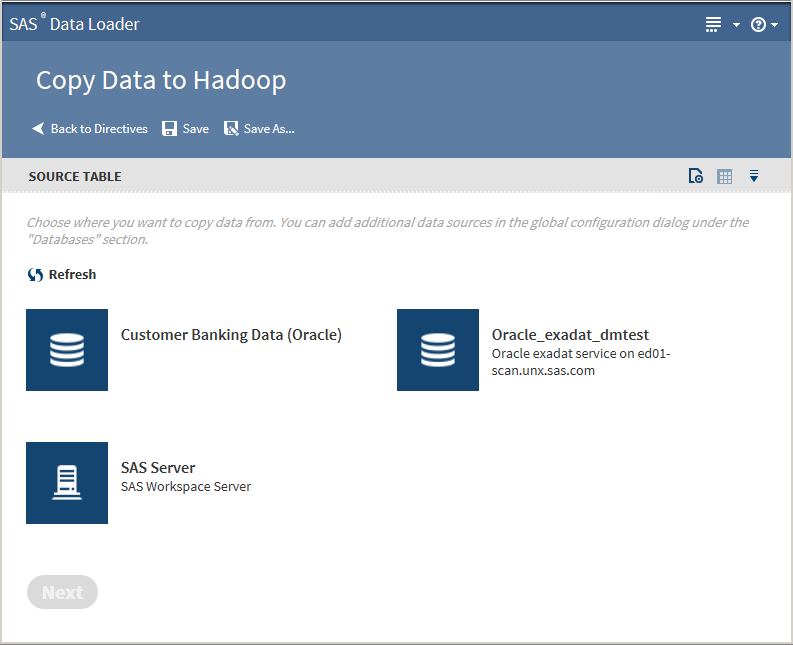
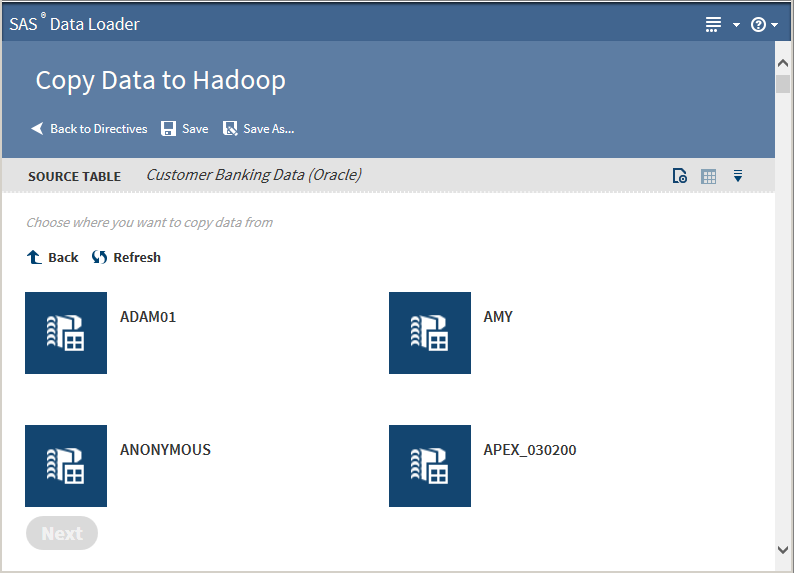
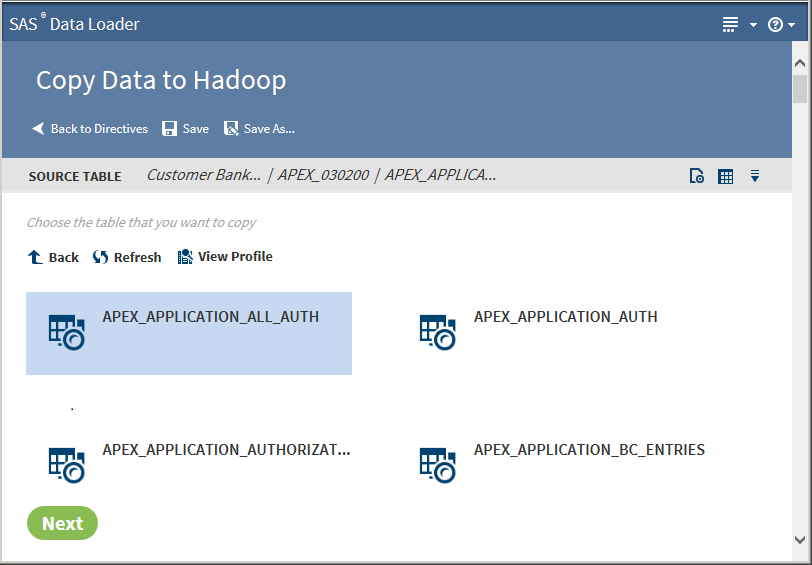
On the SAS Data Loader page, click the Copy Data to Hadoop directive. The Source Table page that lists available databases is displayed:Note that the SAS Server data source points to the following location on the vApp host:
vApp-shared-folder/SASData/SAS
                                 Data Location
. To copy SAS data to Hadoop, all source tables must first be copied to this location. -
TipIf a profile already exists for a table, PROFILED appears beneath the table name. You can view the existing profile by selecting the table and clicking View Profile.Clicking the Action menu
 enables the following actions:
Openopens the current directive page.Table Viewerenables you to view sample data from a table. Select the table, and then click
enables the following actions:
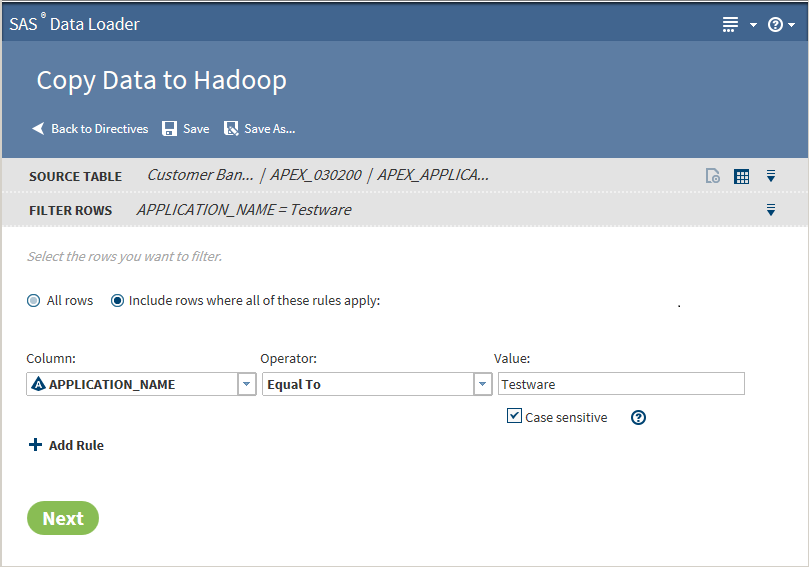
Openopens the current directive page.Table Viewerenables you to view sample data from a table. Select the table, and then click to display the SAS Table Viewer.Advanced Optionsopens a dialog box that enables you to modify the advanced options. The advanced options enable additional character variable length to accommodate converted non-UTF8 encoding.TipIt is recommended that you use UTF8 encoding in SAS data when copying data from SAS to Hadoop. The vApp always uses UTF8 encoding. If you copy a non-UTF8 encoded data set from elsewhere, then the Hadoop target table is not able to accommodate all the characters. This limitation is due to the increased number of bytes when the data is converted to UTF8 encoding.Note: Modify only one of the following two advanced options. If you fill in both fields, then the value in the multiplier field is ignored.Number of bytes to add to length of character variables (0 to 32766)Enter an integer value from 0 to 32766.Multiplier to expand the length of character variables (1 to 5)Enter an integer value from 1 to 5.Click Next. The Filter Rows page is displayed:
 -
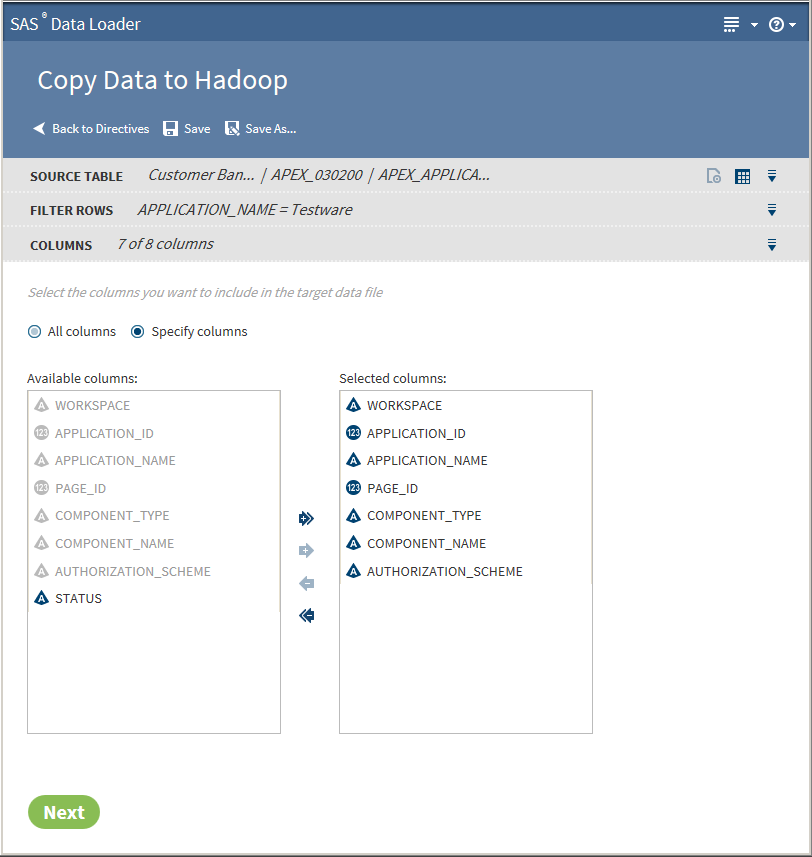
The Columns page enables you to choose the columns to be copied. You can select All columns or Specify columns.The columns in the Selected columns pane are copied to Hadoop. Select an individual column name and click
 or
or  to move the column name between the Available
columns pane and the Selected columns pane until the
correct list of names appears in the Selected columns pane.
Click
to move the column name between the Available
columns pane and the Selected columns pane until the
correct list of names appears in the Selected columns pane.
Click  or
or  to move all column names at once.
When the column selection is complete, click Next. The Options page is displayed:
to move all column names at once.
When the column selection is complete, click Next. The Options page is displayed: -
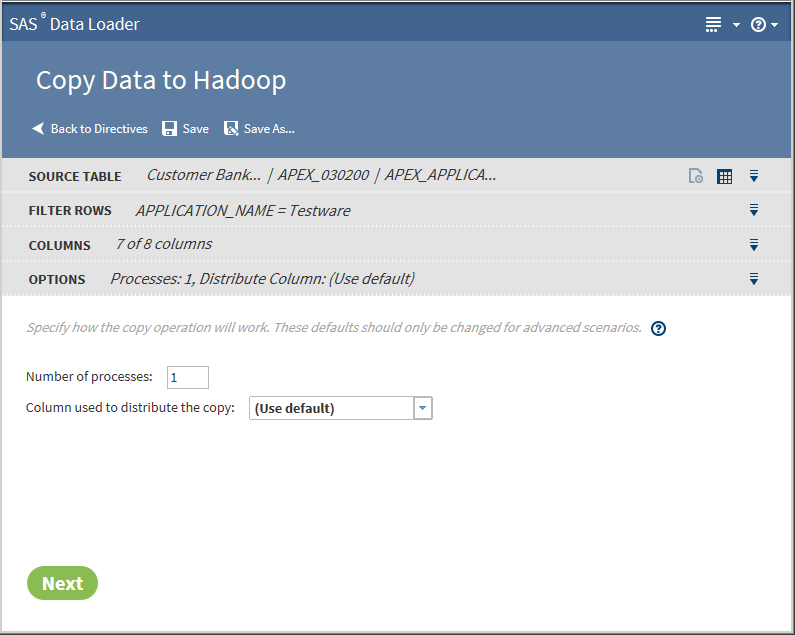
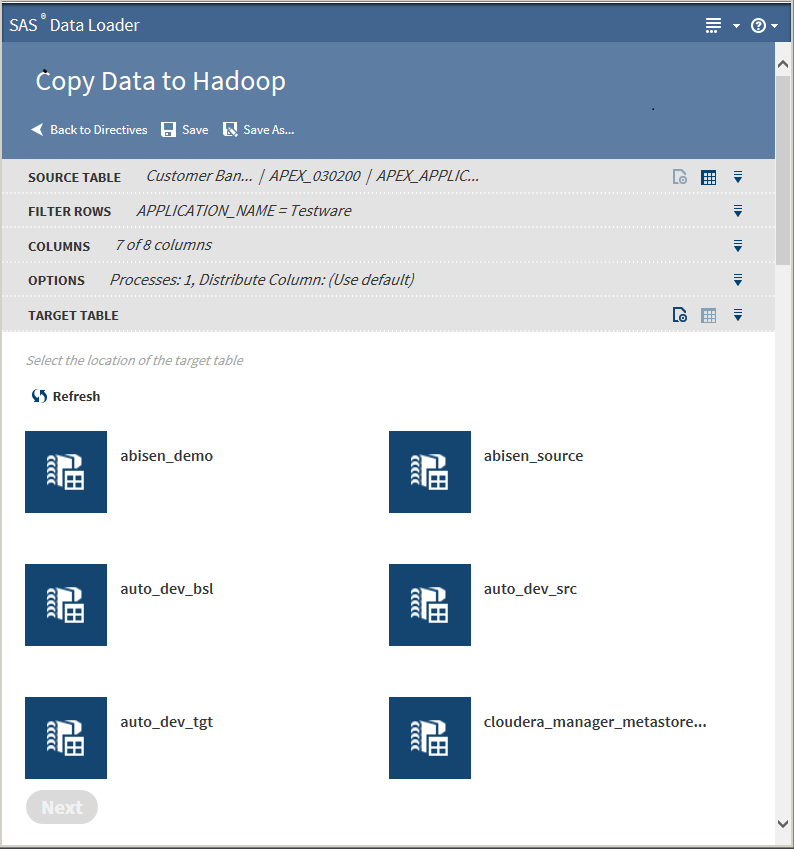
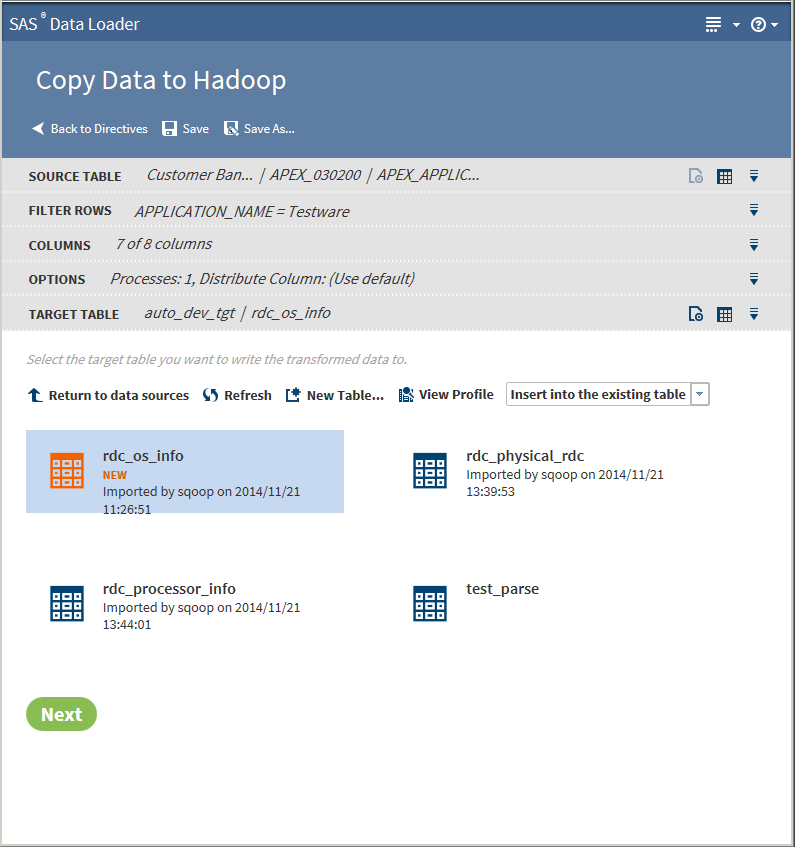
The values on the Options page should not be changed unless you have advanced knowledge of database operations.Note: Changing the number of processes to greater than one expands the number of processes and source data connections that are used to import data. When running in this mode, a column must be identified in order to distribute the data across the parallel processes. This column is typically the primary key or index of the table in the data source. Only single columns are allowed. Numeric integer values that are evenly distributed in the data are recommended.Click Next. The Target Table page is displayed with data sources:
-
Tip
-
You can create a new table by clicking New Table
-
If a profile already exists for a table, PROFILED appears next the table icon. You can view the existing profile by selecting the table and clicking View Profile.
Clicking the Action menu enables the following actions:
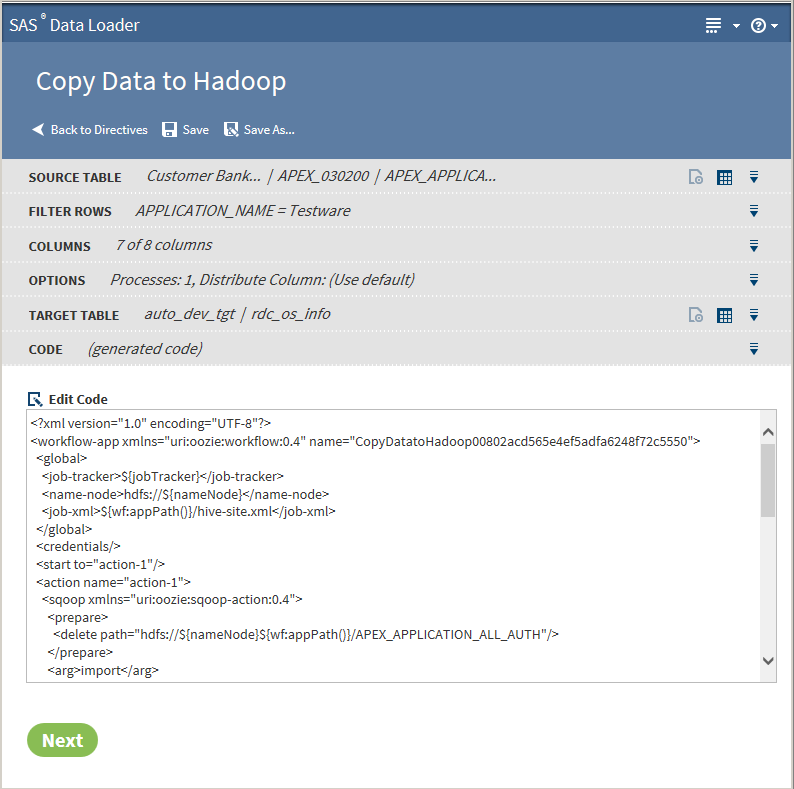
Openopens the current directive page.Table Viewerenables you to view sample data from a table. Select the table, and then click to display the SAS Table Viewer.See
Advanced Optionsopens a dialog box that enables you to modify the following advanced options:Output table formatUse the drop-down list to select one of five output table formats: Hive default, Text, Parquet, Orc, or Sequence.DelimiterUse the drop-down list to select one of five output table formats: Hive default, Comma, Tab, Space, or Other.Click Next. The Code page is displayed: -
-
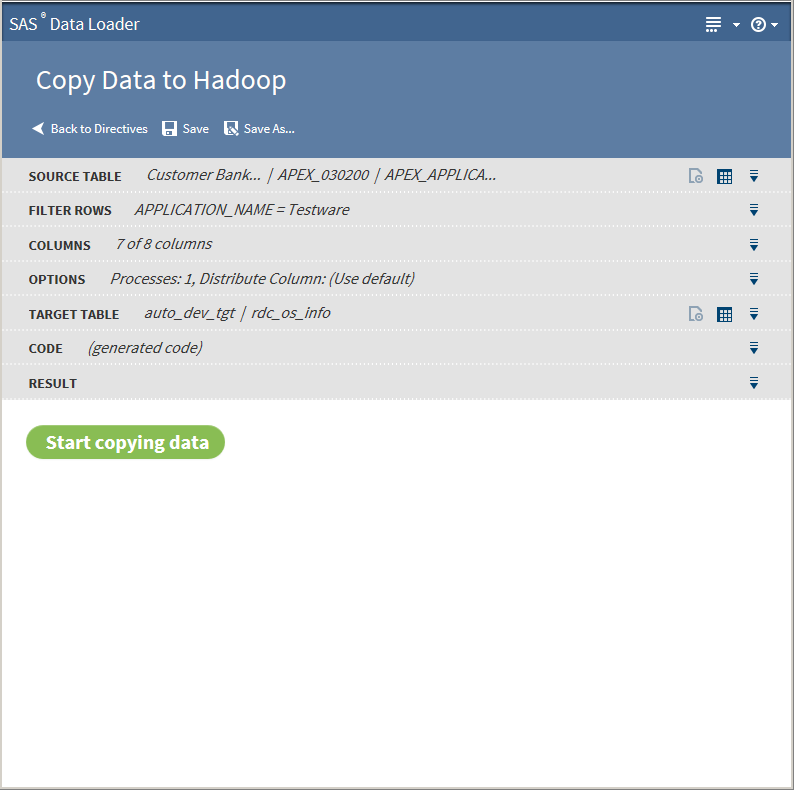
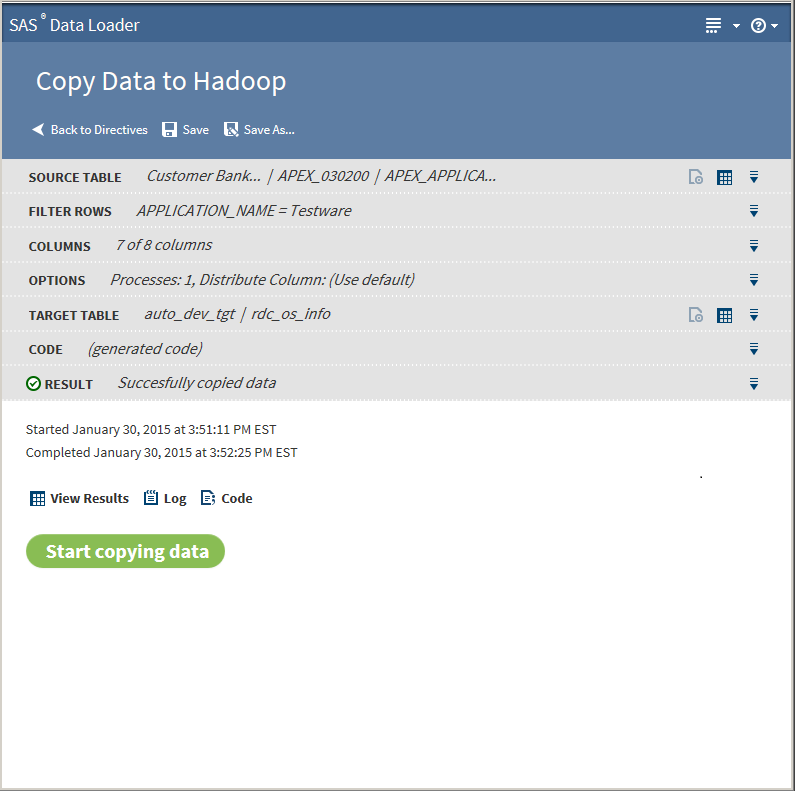
The following actions are available:View Resultsenables you to view the results of the copy process in the SAS Table Viewer.Logdisplays the SAS log that is generated during the copy process.Codedisplays the SAS code that copies the data.
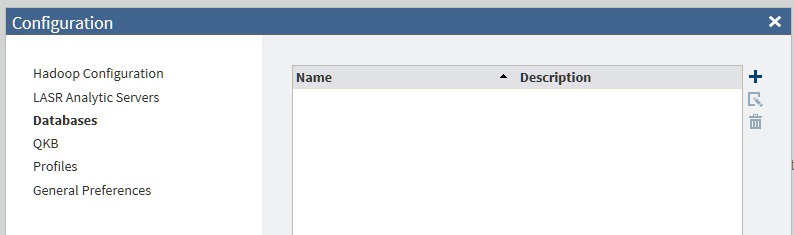
Install JDBC Drivers and Add Database Connections
The directives Copy
Data to Hadoop and Copy Data from Hadoop use JDBC drivers to connect
your vApp host to databases such as Oracle. The JDBC drivers that
are installed in the shared folder of the vApp must be the same as
those that are installed on the Hadoop cluster. The process of copying
drivers to your vApp host was part of the initial vApp configuration
process, as addressed in the SAS Data Loader for Hadoop:
vApp Deployment Guide.
Follow these steps to
add a new JDBC driver, and to add a database connection for that new
driver.
-
In Windows Explorer, open the directory that is designated as the Shared Folder for your vApp. Here is a typical path to the Shared Folder:
C:\Program Files\SAS Data Loader\2.2\SASWorkspace\JDBCDrivers
To find the path to your Shared Folder, open the VMware Player Pro window and select Player ManageVirtual Machine Settings. In
the Virtual Machine Settings window, click
the Options tab, and then click Shared
Folders (in the Settings list.)
On the right side, the path to the Shared Folder is provided in the Host
Path column.
ManageVirtual Machine Settings. In
the Virtual Machine Settings window, click
the Options tab, and then click Shared
Folders (in the Settings list.)
On the right side, the path to the Shared Folder is provided in the Host
Path column.
-
Check the Run Status directive to ensure that all jobs are stopped and saved.In VMware Player Pro , select PlayerPowerRestart Guest. Wait for the
vApp to restart.
-
Open SAS Data Loader for Hadoop, as described in Get Started.
-
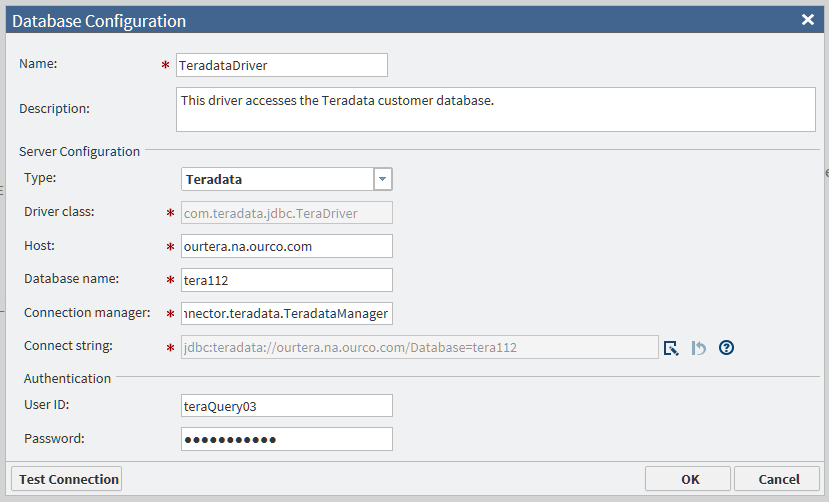
Contact your Hadoop administrator as needed to enter values into the Database Configuration window. The values of Driver class and Connect string are generated automatically when you select either Teradata or Oracle in the Type field. For an Oracle connection that requires a Service ID (SID), enter the SID in the Database name field. If you select Other, you must obtain these values from the JDBC driver provider.
-
If the test fails for a new Oracle connection, then examine the Connect string field. If the string has either of the following formats, then change the string to the other format and test the connection again.
jdbc:oracle:thin:@raintree.us.ourco.com:1521:oadev

jdbc:oracle:thin:@raintree.us.ourco.com:1521/oadev
One version uses a final colon character. The other version uses a final slash character.To edit the Connect string field, click Edit .
.


Usage Notes
-
See the usage note Changing the Default Maximum Length for SAS Character Columns.
-
The dfs.permissions.enabled entry in the hdfs-site.xml file on the target Hadoop cluster must be set to False. If not, you might see an error message in the job history log. If you encounter an error, contact your Hadoop administrator.
-
Error messages and log files that are produced by the Copy Data to Hadoop directive include the URL of the Oozie log file. Oozie is a job scheduling application that is used to execute Copy Data to Hadoop jobs. Refer to the Oozie log for additional troubleshooting information.
-
If using Cloudera 5.2 or later with Teradata, the source Teradata table must have a primary key defined, or you must specify a column in Column used to distribute the copy on the Optionspage.
-
SQL Server does not support the SQL standard syntax for specifying a Date literal, which is:
DATE
                                    ‘date_literal’
. Edit the generated code and remove the word DATE that appears prior to the quoted date literal. For example, you would change( table0.BEGDATE >= DATE '1990-01-01' )to( table0.BEGDATE >= '1990-01-01' ). See Step 10 for information about the Code page. -
If using Hortonworks 2.1 or later with Teradata, creating a new table in Hadoop is not supported. You can insert only Teradata data into an existing table. See Step 9for more information.
-
When copying Oracle tables to Hadoop, Oracle table names must be uppercase.
-
Data Loader directives will not create or replace hive tables when you are copying tables from Teradata into HortonWorks 2.1. This is due to a limitation in the HortonWorks Sqoop connector. One workaround is to ask your Hadoop administrator to drop any existing table, and then create an empty table with the desired schema. At that point, you could use the APPEND option in the Copy to Hadoop directive to copy a Teradata table into the empty table in Hortonworks 2.1.
Copyright © SAS Institute Inc. All rights reserved.