Example Usage Scenario for Export SAS Package and Import SAS Package Wizards
Description of Scenario
In this example, a set
of objects has been developed in Environment 1 and will be promoted
to a different metadata server in Environment 2. The objects to be
promoted are as follows:
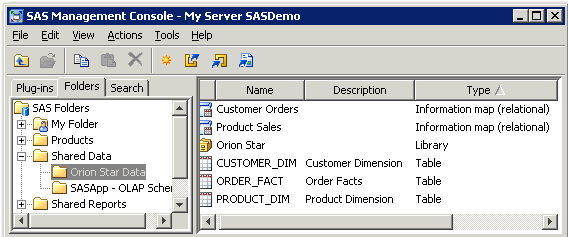
The metadata for the
library, the tables, and the information maps is stored in
/Shared
                     Data/Orion Star Data
, as shown here:
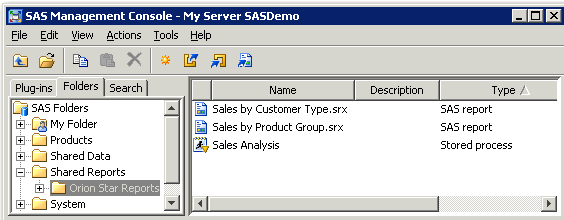
The metadata for the
reports and the stored process is stored in
Shared
                     Reports/Orion Star Reports
, as shown here:
Note: This example scenario uses
SAS Management Console to perform the promotion. If you use SAS Data
Integration Studio or SAS OLAP Cube Studio, the procedure is the same
except where noted.
Before promoting these
objects, it is important to understand their associations with one
another, as well as their associations with other objects and entities
that do not appear in the tree. The following table describes the
associations that are involved in the example scenario, as well as
the actions that must be taken to ensure that the objects will function
properly in the target environment.
Step 1: Export the Folders and Objects
For the scenario that
is described in the previous topics, you would follow these steps
to export the folders and objects from the source environment:
-
Make sure that you have prepared the source environment as described in Preparing to Use the Promotion Tools.
-
-
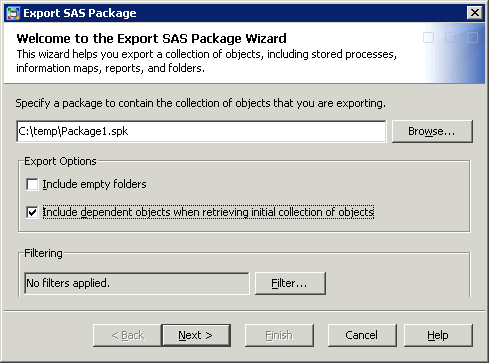
Select Include dependent objects when retrieving initial collection of objects, as shown in the following example. This option helps ensure that all objects on which the exported objects depend are included in the export operation.Note: On this page, you can click Filter to select objects based on the object name, the object type, or the time period during which the object was created or last modified. You can also use the Advanced Filter Options to select objects based on keywords, notes, extended attributes, and responsibilities fields. (This scenario does not use the filter features.)
-
-
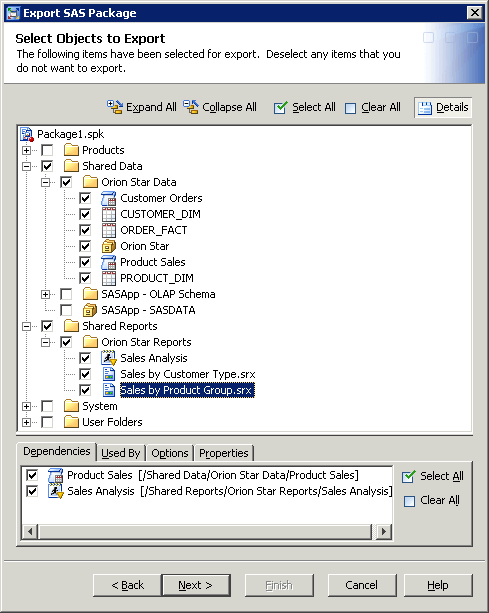
Highlight each information map, report, and library object that you have selected. As you highlight each object, view the Dependencies tab to ensure that you have included the objects that the highlighted object depends on.In the preceding example, the report Sales by Product Group is highlighted. The Dependencies tab lists the Product Sales information map and the Sales Analysis stored process, which are used by this report. Both objects have been selected to export.You can also display the Used By tab to identify objects that make use of the objects that you have selected.Note:
-
The Include dependent objects when retrieving initial collection of objects option (selected on the first wizard page) identifies dependencies only for the objects that are initially selected on this wizard page. If you click Next to go to the next wizard page, and you then click Back to return to this page and select additional objects, you must use the Dependencies tab to identify dependencies for the additional objects.
-
-
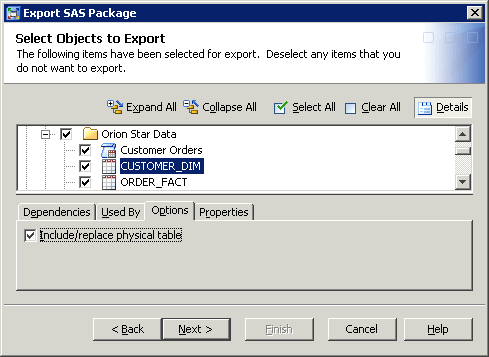
Highlight each of the table objects, and use the Options tab to specify whether the associated physical table is to be exported with the metadata.In the following example, the
CUSTOMER_DIMtable is highlighted. On the Options tab, the Include/replace physical table check box has been selected to indicate that the physical table is to be included in the export.
-
As the export process begins, the wizard might display a prompt asking you to log on to the SAS Application Server. Be sure to log on as a user who has the appropriate credentials. See Requirements for Accessing a Standard Workspace Server. If you are already logged on to SAS Management Console, SAS Data Integration Studio, or SAS OLAP Cube Studio with the correct credentials, then the prompt does not appear.
-
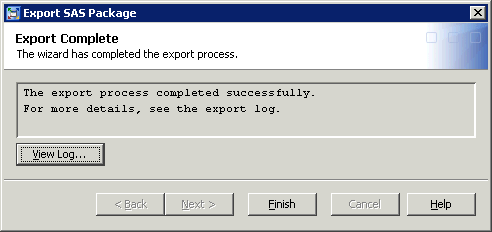
When the export process finishes, a log with a date-and-time stamp is saved in your user directory and a message like the following is displayed:If errors or warnings are present, you can click View Log to view explanatory messages. For assistance in resolving errors, see Special Considerations for Promoting Content to SAS 9.3 from an Earlier SAS Version.
Step 2: Import the SPK File
Follow these
steps to import the folders and objects from the SPK file into the
target environment. These steps assume that you have completed the
export without errors.
-
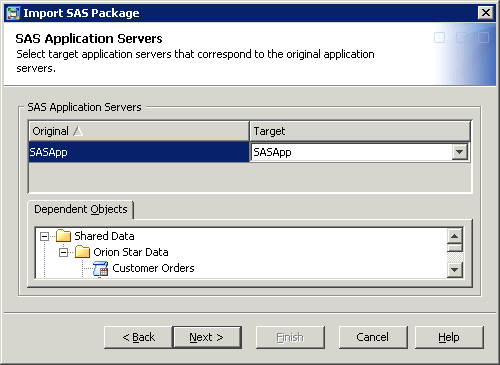
Make sure that you have completed all of the necessary actions to prepare the target environment. See Preparing to Use the Promotion Tools and the Action Needed column of Example Scenario: Objects to Be Promoted and Their Associations.
-
-
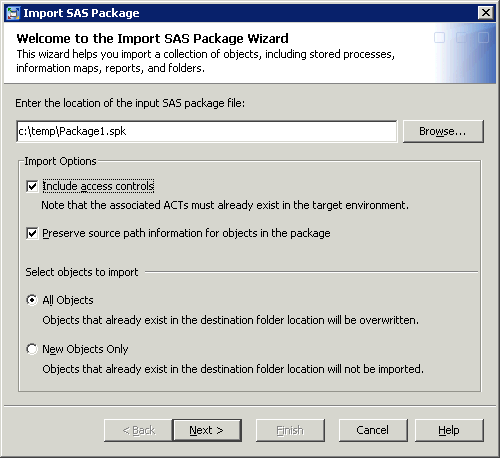
Select Preserve source path information for objects in the package. This option places objects and folders in the same path where they were located in the source environment. If the folders that are included in the path do not exist, they are created. (You can select this option only if you are importing to the SAS Folders level.)
-
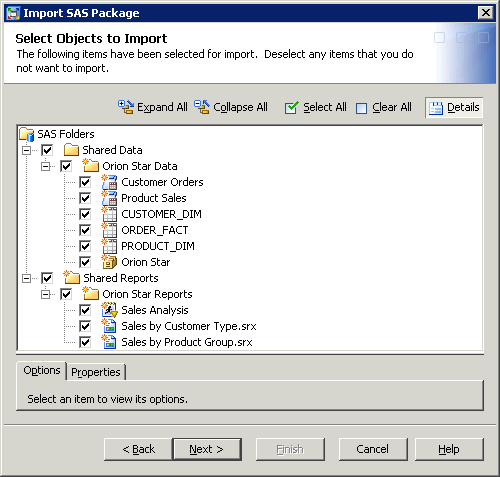
The next Import SAS Package page displays a tree that shows the objects that are included in the package.The icons indicate whether each folder or object is new (
 ) or already existing (
 ) in the target environment.
On this page, you can highlight one or more table objects, and then use the Options tab to indicate whether the physical tables are to be imported along with the metadata. You can also edit the table names. (These options are available only if you exported the physical tables.)If the tables already exist on the target system, the Options tab also enables you to specify how differences in column metadata are to be handled. You can use the Change Analysis feature to resolve individual column differences.
 -
As the import process begins, the import wizard might display a prompt asking you to log on to the SAS Application Server. Be sure to log on as a user who has the appropriate credentials. See Requirements for Accessing a Standard Workspace Server. If you are already logged on to SAS Management Console, SAS Data Integration Studio, or SAS OLAP Cube Studio with the correct credentials, then the prompt does not appear.
-
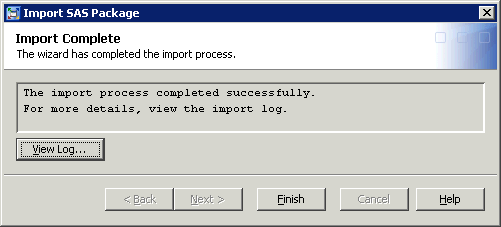
When the import process finishes, a log with a date-and-time stamp is saved in your user directory, and a message like the following is displayed:If errors or warnings are present, you can click View Log to view explanatory messages. For assistance in resolving errors, see Special Considerations for Promoting Content to SAS 9.3 from an Earlier SAS Version.
Note: The preceding steps are for
the example scenario. Additional wizard pages might appear, depending
on which types of objects you are promoting. For complete step-by-step
instructions for using the import wizard, see the product Help for
SAS Management Console, SAS Data Integration Studio, or SAS OLAP Cube
Studio.
