Using Advanced Features of the Import and Export Wizards
Move Objects to Different Folders When Using the Import Wizard
In
SAS 9.3, the import wizard and the batch import tool enable you to
reorganize content as part of the promotion process. You can do so
by specifying new folder locations for individual objects that you
are importing. The connections among objects are maintained.
To use this feature,
select an object (for example, an information map) on the Select
Objects to Import wizard page. Then select the Properties tab,
as shown here:
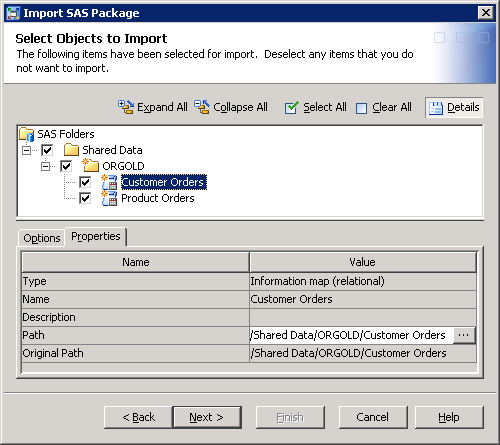
In the Value column
of the Path field, click the Browse button
( ). When the Select a Location dialog
box appears, select a target location in the SAS Folders tree. You
can use the New Folder button (
). When the Select a Location dialog
box appears, select a target location in the SAS Folders tree. You
can use the New Folder button ( ) in this dialog box to create a new folder.
). When the Select a Location dialog
box appears, select a target location in the SAS Folders tree. You
can use the New Folder button () in this dialog box to create a new folder.
Note:
-
In the batch import tool, you can change the location of an object by specifying a new property for the object in the substitution properties file. For details, see Use the Substitution Properties File to Specify New Folder Locations for Objects.
Use the Import Wizard’s Change Analysis Feature to Resolve Column Differences in Tables and External Files
When you import metadata for a table or external file,
and a table or external file of the same name already exists in the
target folder, you can use the Change Analysis feature of the import
wizard to identify and resolve differences in column metadata. This
feature is new with SAS 9.3. Use the feature to control column handling
on either a global or a fine-grained basis, as follows:
Note: This feature applies only
if you are overwriting existing objects as a result of selecting the All
Objects option on the first wizard page. In addition,
the feature is available only if you are importing content from SAS
9.2 or 9.3. It is not available when you import content from SAS 9.1.3.
-
On the Options tab, you can select or deselect the following check boxes to specify how column differences are to be handled by default for this import:
-
Keep target columns not found in the source is selected by default. This option retains columns in the target table if the columns are not present in the imported table. Deselect this check box if you want to delete columns from the target table if the columns are not also in the imported table. (In the next step, you will be able to override this action for individual columns.)
-
Include source columns not found in the target is selected by default. This option adds columns from the imported table if the columns are not present in the target table. Deselect this check box if you do not want to add any new columns to the target table. (In the next step, you will be able to override this action for individual columns.)
-
-
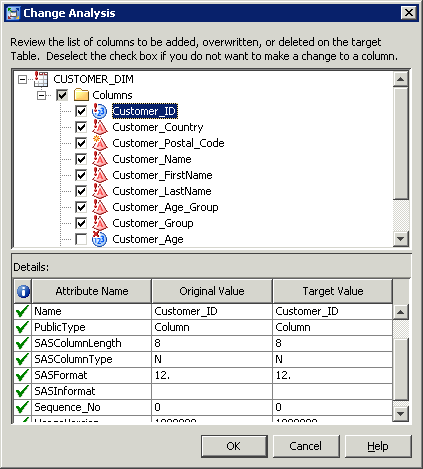
Click the Change Analysis button to view column information for each table that you are importing. In the Change Analysis dialog box, you can update the check boxes as needed to specify how each column is to be handled during the import. Select a column to view its change analysis information, as shown in this example:The following table explains the meaning of the icons and check boxes in the Change Analysis dialog box:


See Also
For
information about controlling the handling of column differences in
the batch import tool, see Set Global Options for the Batch Export and Import Tools.