Adding, Updating, and Upgrading SAS Software
What Is Adding, Updating, and Upgrading?
-
“Updating” refers to installing and configuring a SAS product with a maintenance release. Information related to updates resides mainly in SAS 9.3 Guide to Software Updates.
-
“Upgrading” refers to installing and configuring new versions of SAS products that are already deployed on your system (for example, upgrading to SAS Web Report Studio 4.3 from version 4.2). Upgrading should not be confused with migration or promotion.For more information, see SAS 9.3 Guide to Software Updates.
Summary of Adding, Updating, and Upgrading SAS Software
When you are adding,
updating, or upgrading your SAS 9.3 deployment, the SAS Deployment
Wizard is able to determine whether the order from which you are running
the wizard contains SAS software with a newer, older, or identical
release level than what is already deployed in the SAS installation
directory (commonly referred to as SAS Home).
If the wizard determines
that there is newer SAS software in the current order than what is
already deployed, then the wizard automatically goes into Update
mode. Update mode forces you to install updates
to your software before you can perform any other deployment task.
For example, if you are adding new products or language support to
an existing SAS deployment, you will install those in an additional
SAS Deployment Wizard session, after the wizard (in Update mode) has
first updated the products on your machine to match the versions contained
in your SAS order.
How the SAS Deployment Wizard Adds, Updates, and Upgrades Software
This topic describes
in greater detail how the SAS Deployment Wizard adds, updates, and
upgrades SAS software.
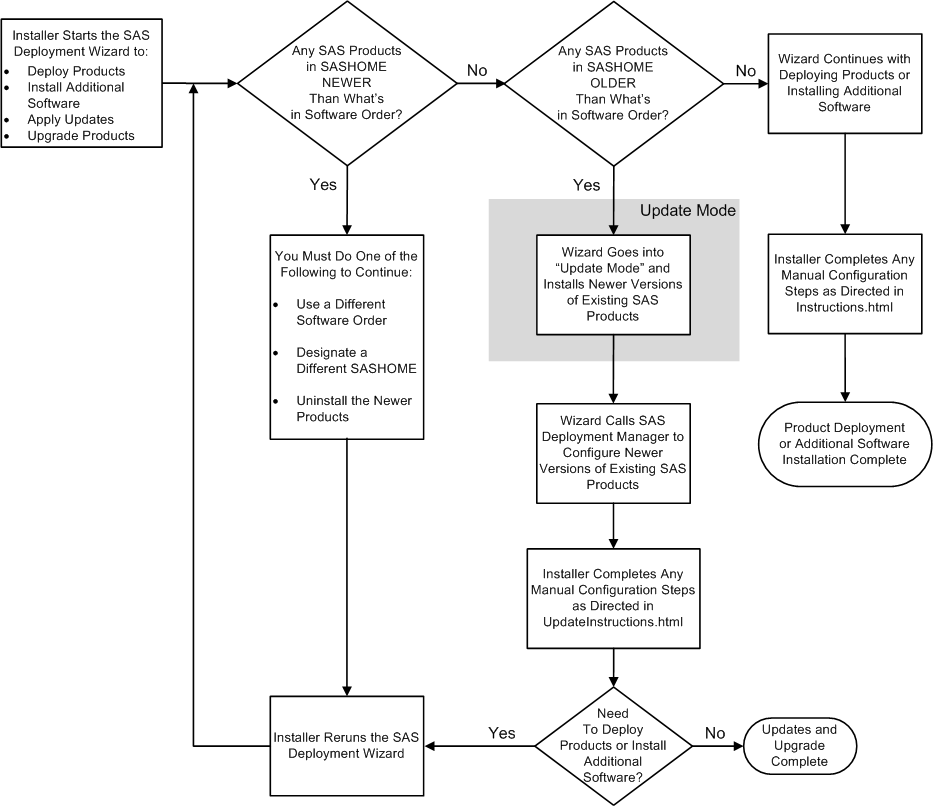
The wizard compares
the release version of the SAS software in the current order to the
SAS software that is deployed on the machine. Three possibilities
exist:
Upgrades and updates
consist of a new version or an incremental delta update (also referred
to as maintenance) to an installed product. If the deployment wizard
detects that one or more products in the order have a newer release
level than any products deployed in the specified SAS Home on the
machine, the wizard goes into Update mode. (SAS Home is shorthand
for the SAS installation directory (for example,
C:\Program
                     Files\SAS
). The wizard displays an updates page of
all the products deployed on the machine for which there are updates
in the current order.
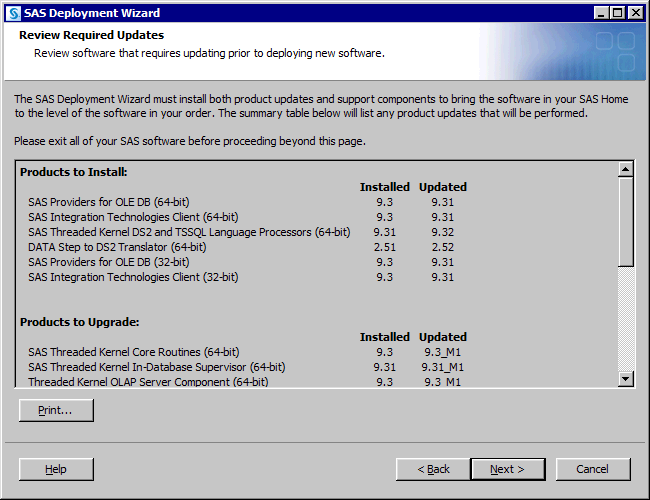
The deployment wizard
updates page is broken into two sections that list new product versions
and new product delta updates (or maintenance). In the example of
the updates page shown earlier, SAS Providers for OLE DB (64–bit)
represents a new product version (for example, 9.3 to 9.31). SAS Threaded
Kernel Core Routines (64–bit) represents a delta update (for
example, 9.3 to 9.31_M1). If you choose to proceed with your deployment
from this order, to the specified SAS Home, the wizard requires that
you install these updates to bring your existing deployment to the
release level from which your new order was mastered. When you click Next,
the wizard automatically upgrades the products to the release levels
that are shown on the updates page.
When running in Update
mode, the wizard displays no deployment plan, SAS installation data
file, or language pages down this path. The wizard simply installs
the newest versions and delta updates of the product set already deployed
in the specified SAS Home. If the update contains updated language
support for a specific product (such as, SAS, SAS Enterprise Guide,
and SAS Add-In for Microsoft Office), the wizard installs only the
update for the languages previously installed. If you are adding new
products or language support to an existing SAS deployment, you will
install those in an additional SAS Deployment Wizard session, after
the update is installed and any customization or validation is performed.
If the deployment wizard
detects that one or more products in the software order has an older release
level than any products deployed in the specified SAS Home on the
machine, the wizard does not go
into Update mode. Instead, the wizard presents you with an alert box
listing those products in your order that are older than the ones
deployed on your machine.
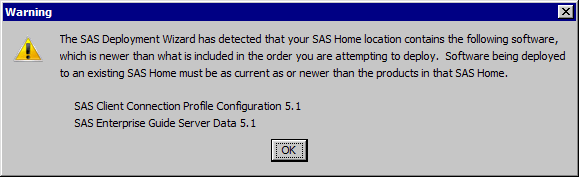
SAS wants to make sure
that you are always installing software from an order corresponding
to a release level that is identical to or newer than the one used
to originally deploy your SAS software. Your options are to use a
different software order, designate a different SAS Home directory,
or uninstall the products that are newer.
If the deployment wizard
detects that all the products in the order have an identical release
level to all products deployed in the specified SAS Home on the machine,
the wizard does not go into
Update mode. Instead, the wizard presents pages that enable you to
perform normal deployment tasks such as deploying products, installing
additional software, and so on.
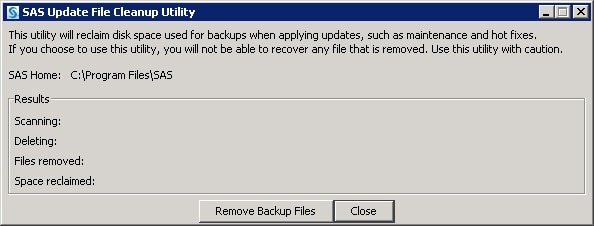
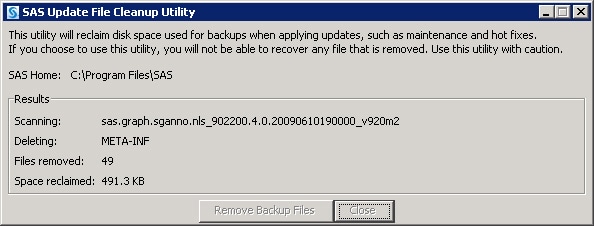
Remove Update Backup Files
Whenever the SAS Deployment
Wizard upgrades or updates software on a machine, it creates a backup
copy of the software being updated. After you apply the updates, you
can use the SAS Update File Cleanup Utility to remove the backup copies
to reclaim disk space. To remove update backup files, follow these
steps:

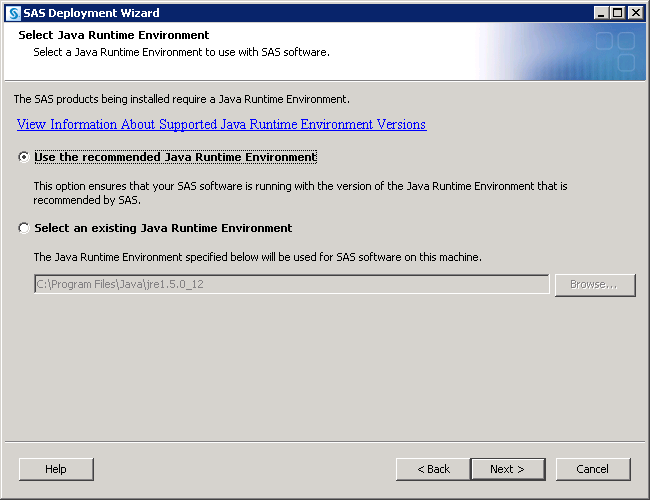
Specify a Different JRE
During a first-time
SAS 9.3 deployment, the SAS Deployment Wizard prompts you for the
version of the Java Runtime Environment (JRE) that you want to use
with the SAS Java applications. Your options are to have the deployment
wizard install a JRE that SAS has certified to run with SAS 9.3, or
to point to a JRE that you have already installed.
In most situations where
you are updating or adding a product to SAS 9.3, the deployment wizard
does not prompt you for a JRE.
However, you can override this behavior. To specify a different JRE
with which to run SAS Java applications, follow these steps:
-
For more information, see Required External User Accounts for SAS.
-
Run the deployment wizard using its command line invocation and add the option
-forcejreprompt(for example,setup.exe -forcejreprompt).For more information, see Step 9 in the topic, “Install and Configure SAS Interactively.” -
There are additional steps that should be performed when changing the JRE to ensure that all affected areas are updated appropriately. Fore more information, see the “Configuring SAS 9.3 to Use an Alternative Java Runtime Environment or Java Development Kit ” Web page at: http://support.sas.com/resources/thirdpartysupport/v93/AlternateJRE.html.
Copyright © SAS Institute Inc. All rights reserved.