Part III: Add a Welcome Page and Run the Application
Add a Welcome Page Template
To help make testing
as easy as possible, the Welcome Page template defines a starting
point in the web application that is suitable for integration with
the SAS Web Infrastructure Platform. The Welcome Page template works
in conjunction with the web application example templates that add
data about the example to
\WEB-INF\sas_examples.xml.
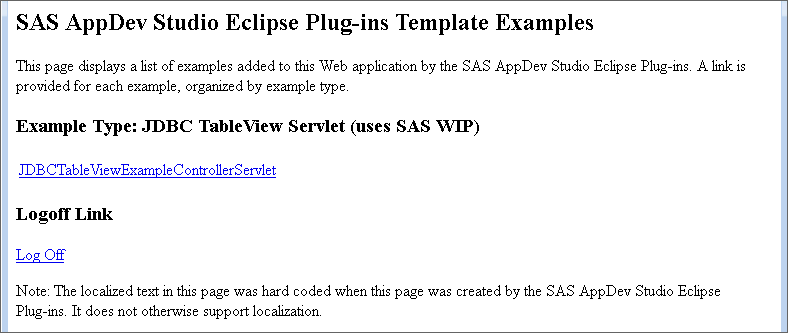
The Welcome Page template
adds a JSP file (default name
sas_examples.jsp)
to the project, and appends the filename to the welcome-file-list
declaration in \WebContent\WEB-INF\web.xml.
At run time, after successfully
logging on to the SAS Web Infrastructure Platform Logon Manager, this
JSP is displayed provided that it is the first resource in the welcome-file-list
that exists in the web application. When the Welcome Page is displayed,
a link is available for each SAS web application template added to
the project.
If other resources in
the welcome-file-list exist in the web application, you might need
to move the
sas_examples.jsp entry
to the top of the list to ensure that it is executed immediately after
logon. Because the Examples Welcome Page is not a production entry
point, you can move it to the top of the list when you want to use
its features and move it down or remove it when you want a different
welcome file served.
Copyright © SAS Institute Inc. All rights reserved.