Attaching a SAS Model to a Viewer

Overview of Model/Viewer Connections

Introduction

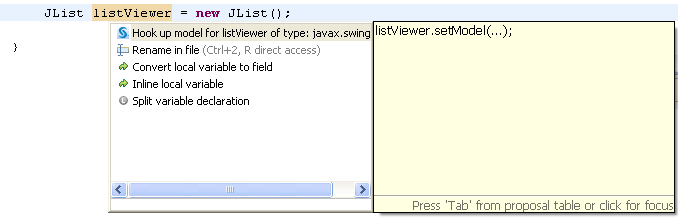
SAS AppDev Studio 4.4 does not support attaching models to viewers using drag-and-drop, but there is an editor Quick Assist that facilitates model/viewer connections.
Note that the Quick Assist cannot determine whether you have already attached a model to a viewer. You can run the Quick Assist multiple times on the same viewer instantiation, each time attaching it to a different model. To determine which attachment is in effect, you must examine the code and identify the last attachment called.

Enabling the Quick Assist Icons

Eclipse uses a lightbulb icon in the editor gutter to notify you when a Quick Assist is available. By default, the Quick Assist icons are not displayed. To enable the Quick Assist icons, follow these steps:
  1. Select Windowthen selectPreferences.
  2. Expand Java.
  3. Select the Editor item.
  4. Select the Light bulb for quick assists check box.

Supported Viewers for Model/Viewer Connection Quick Assist

The Connection Quick Assist supports viewers that have a setModel method that takes as an argument one of the following types:
  • javax.swing.ComboBoxModel
  • javax.swing.ListModel
  • com.sas.table.StaticRowTemplateTableInterface
  • com.sas.table.StaticTableInterface
  • javax.swing.table.TableModel
  • javax.swing.tree.TreeModel

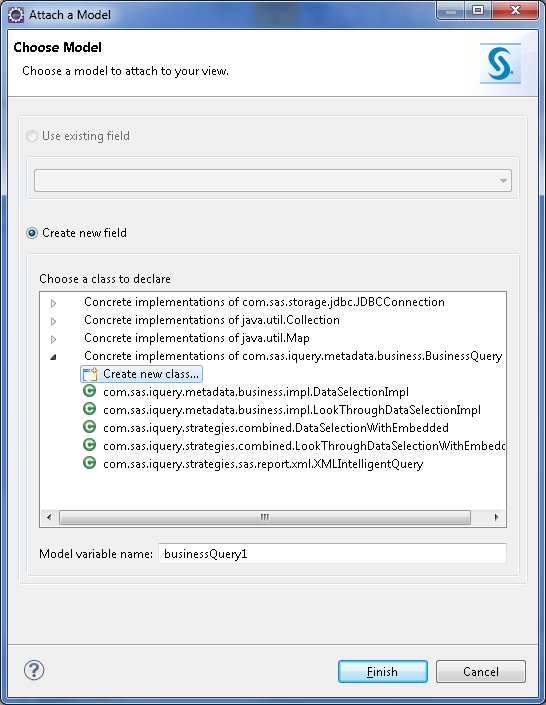
Using the SAS Model/Viewer Connection Quick Assist

To use the SAS Model/Viewer Connection Quick Assist, follow these steps:
  1. Place the cursor on a statement that contains a variable instantiation of a viewer type (for example, javax.swing.JList). The Quick Assist will not function if you place the cursor on a static method.
  2. Press Ctrl+1.
    From the list of Quick Assist choices, select Hook up model.
    You can also access the connection Quick Assist by right-clicking and selecting Sourcethen selectAdd SAS Attachments.
    Quick Assist
  3. Specify how you want to create and link a model to the viewer:
    • Use existing field
    • Create new field
    If you selected Use existing field:
    1. Select the field to use.
      Only the models declared as fields that are within the same scope as the cursor location and match the available model type(s) are listed. If there are no available fields, the Use existing field option is disabled.
    2. Click Finish to generate the code that creates the model and attaches it to the viewer.
    If you selected Create new field:
    1. Select the model to attach to the viewer from the Choose a class to declare list.
      When you expand an available class, the child nodes represent the classes in the current classpath that extend or implement the expanded class.
    2. Enter the Model variable name.
      This variable name is used in the declaration in the source file. The variable is declared in the top-most enclosing class.
      A default variable name is supplied, based on the currently selected class. If you modify this name, it will not change when you select a different class.
    3. Click Finish to add an initialization method to the source file with statements that instantiate the appropriate type for this variable (multiple fields are written with the same initialization method).
      A secondary dialog box appears, giving you the opportunity to name and adjust other creation options for the new class before the initialization method is created.
    Attach a model dialog box