DataFlux Data Management Studio 2.6: User Guide
DataFlux Data Management Studio and DataFlux Data Management Server are installed with repositories that use an SQLite file for the repository database. File-based repositories are not recommended for multi-user access, however, due to locking issues. Sites typically create DBMS-based repositories for production systems.
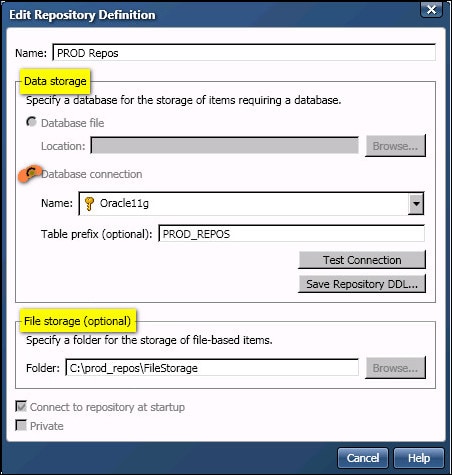
This topic describes how to add a DBMS repository for DataFlux Data Management Studio. This repository can be shared with DataFlux Data Management Server, as described in Accessing a DBMS Repository from the Server. The next display shows some example values for PROD Repos, a DBMS repository definition.
In the example above, the Data storage section specifies a database connection named Oracle11g. The Oracle database is used to store the repository database for metadata such as business rules, tasks, and profiles. A table prefix (PROD_REPOS) is specified so that tables for this repository can be distinguished from other tables in the specified database. The File storage section specifies a folder that is used to store jobs and other file-based objects that are created in DataFlux Data Management Studio.
To create a DBMS repository, you must select a folder on the file system where jobs and other file-based objects will be saved (the File storage area). If an appropriate folder has not been created, you must create one. The next display shows an example folder structure for the PROD Repos repository.
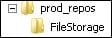
In the previous display, the prod_repos folder is the root folder for the repository. The FileStorage subfolder is the location where DataFlux Data Management Studio will store new jobs and other file-based objects. A file path can be almost any physical path that is accessible by DataFlux Data Management Studio. It is possible to specify a location that is remote from the DataFlux Data Management Studio host. However, the client might perform best when the files are local to DataFlux Data Management Studio.
To create a DBMS repository, you must select a ODBC DSN connection or a SAS Federation Server connection to the database where the tables for the repository are created. If a data connection for the target DBMS has not been defined, you must create one. For the current example, assume that an ODBC DSN connection named Oracle11g was created in the ODBC Data Source Administrator on the client host, as shown in the next display.
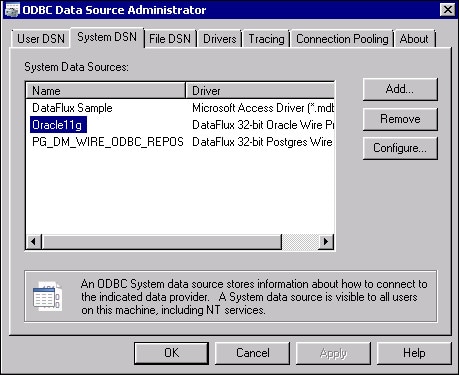
DataFlux Data Management Studio is a 32-bit application, so its ODBC DSNs must reference 32-bit drivers, as shown in the previous display.
Assume also that the Oracle11g connection from ODBC Data Source Administrator was registered on the Data riser for DataFlux Data Management Studio, as shown in the next display.
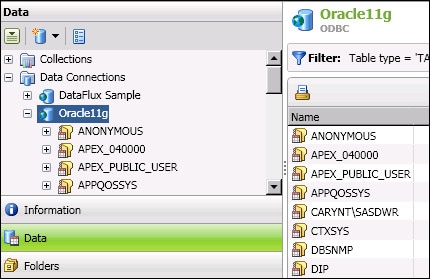
The Oracle11g connection can then selected in the repository definition window. See Database Storage for Repositories for a list of the supported databases. To create your own connections, see Working with Data Connections for a description of how to create DBMS connections in DataFlux Data Management Studio.
The DSN connection that you specify in a repository definition must include the user name and password for a DBMS user with appropriate privilege to create and update the tables that are required by the repository. Otherwise the connection will fail. One good way to retrieve user credentials with a connection is to use a domain-enabled data connection. For a description of this method and other methods, see Saving User Credentials for a Connection. For more information about the database permissions that are required to create and update repositories, see the description of the Save Repository DDL control in Understanding Repository Definitions.
Perform the following steps to create a new DBMS-based repository for DataFlux Data Management Studio.
See Understanding Repository Definitions or the online help for more information about the fields in the repository definition dialog.
|
Documentation Feedback: yourturn@sas.com
|
Doc ID: dfU_T_ReposAdd_dbms.html |