Working with Data Set Entries
For data sets that are not
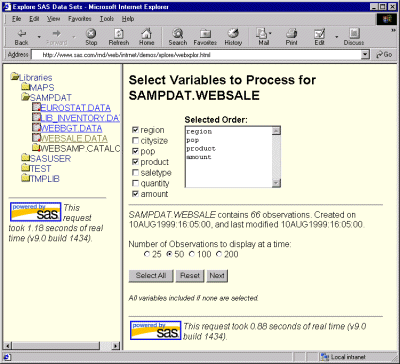
PROC SUMMARY data sets, Xplore's right frame displays a dialog box
that enables you to customize how Xplore displays your data.
This dialog box enables you to select the variables that you want
to display, the order in which to display the variables, and the number
of observations to display per Web page. In a subsequent dialog box,
you can also download your data to a spreadsheet. For data files only,
the dialog box also specifies the number of observations that are
in the data file (Xplore cannot determine the number of observations
in a data view, so it cannot provide this information for data views).
-
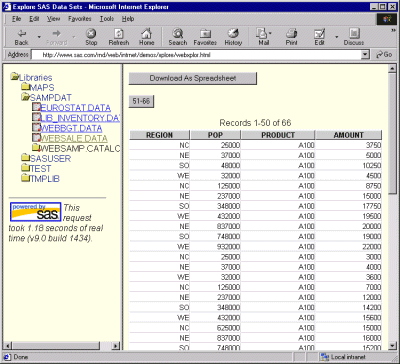
Xplore then displays the data in an HTML table and provides a Download As Spreadsheet button that you can click to download the table data into your local spreadsheet application.Note: Only the variables that you selected in the initial dialog box are downloaded into the spreadsheet.Xplore also provides buttons that enable you to see the next or previous page of observations. For data files only, the buttons state the range of rows that the next or previous page contains. (Xplore cannot determine the number of observations in a data view, so the buttons that are generated for data views are not always accurate.) The number of rows that are shown depends on the selection that you made for the Number of Observations to display at a time prompt (see above).