Working with Visualizations

Manage Visualizations


Show and Minimize Visualizations
To minimize a visualization,
click  for the visualization that you want to minimize.
The visualization appears on the dock panel at the bottom of the workspace.
for the visualization that you want to minimize.
The visualization appears on the dock panel at the bottom of the workspace.
for the visualization that you want to minimize.
The visualization appears on the dock panel at the bottom of the workspace.
You can also select
which visualizations are visible by using the  button on the toolbar. The button opens a window that enables you to select
the visualizations that you want to show. The Manage Visualizations window
displays a thumbnail image of each visualization and enables you to
select and deselect each visualization by using a check box.
button on the toolbar. The button opens a window that enables you to select
the visualizations that you want to show. The Manage Visualizations window
displays a thumbnail image of each visualization and enables you to
select and deselect each visualization by using a check box.
button on the toolbar. The button opens a window that enables you to select
the visualizations that you want to show. The Manage Visualizations window
displays a thumbnail image of each visualization and enables you to
select and deselect each visualization by using a check box.


Arrange the Visualizations in the Workspace
Move the Position of a Visualization
To move a visualization,
drag the title bar of the visualization to the location where you
want to place the visualization.
When you drag a visualization
onto another visualization, the placement of the visualization is
determined by the edge that is closest to the drop point.
For example: Your workspace
contains two visualizations named “A” and “B”.
If you drag A to the left edge of B, then A is placed to the left
of visualization B. If you drag A to the bottom edge of B, then A
is placed below B.
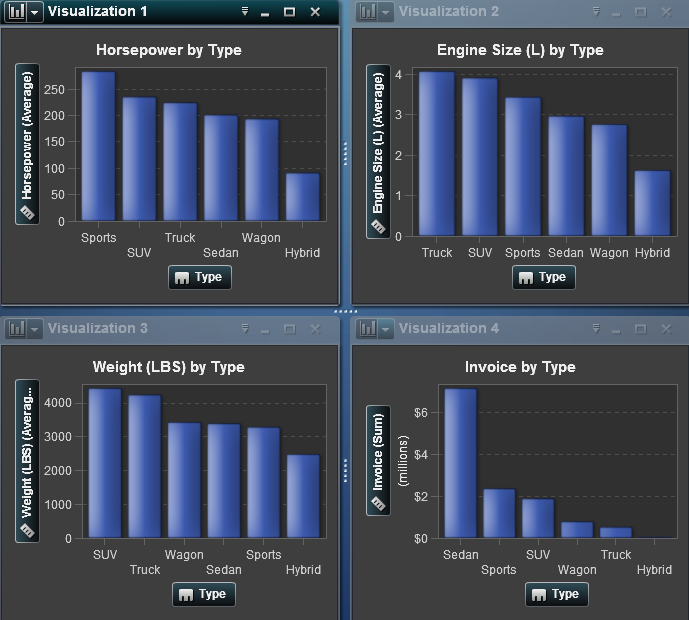
Example Layout with Four Visualizations shows an example
layout with four visualizations.
Example Layout with Four Visualizations
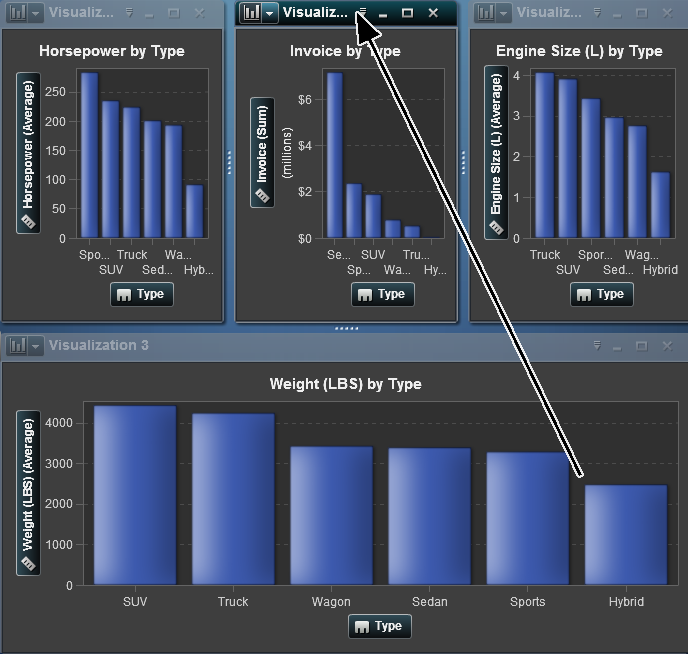
Example Layout After Moving 4 to the Right Edge of 1 shows the effect
of moving a visualization to the right edge of another visualization.
Example Layout After Moving 4 to the Right Edge of 1
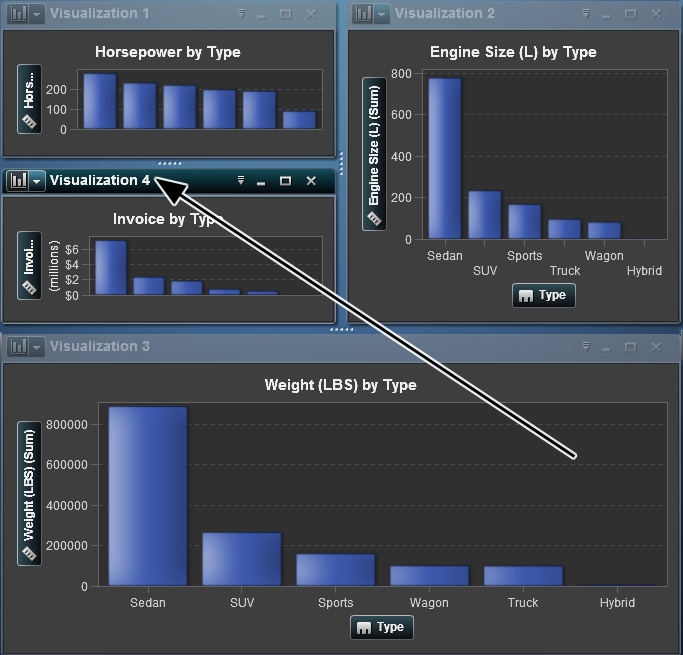
When your workspace
contains visualization in multiple rows, if you drag to the bottom
or top edge of a visualization then the target visualization and the
moved visualization split the space that was previously occupied by
the target visualization.
Example Layout After Moving 4 to the Bottom Edge of 1 shows the effect
of moving a visualization to the bottom edge of another visualization.
Example Layout After Moving 4 to the Bottom Edge of 1

Copyright © SAS Institute Inc. All rights reserved.