Building a Cube from a Star Schema
Overview
In this example, you build
a cube from a star schema. A star schema is a data source that contains
tables in a database in which a single fact table is connected to
multiple dimension tables. With a cube based on a star schema, you
identify the fact table, the dimension tables, and the keys that map
the tables together. In this example, you use data from a product
marketing campaign to establish measures and summaries of product
statistics, geographic location of potential customers, and revenue.
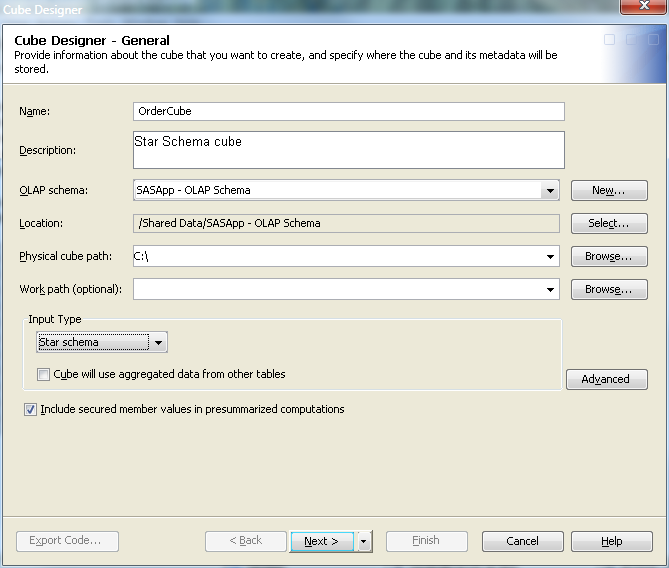
Enter General Cube Information
After you have established
a connection profile, you can begin to create a cube. Select File NewCube. On the Cube Designer – General page, enter the basic cube information. For the input type in this
example, you click Star Schema. The following
display shows fields that you enter information for.
NewCube. On the Cube Designer – General page, enter the basic cube information. For the input type in this
example, you click Star Schema. The following
display shows fields that you enter information for.
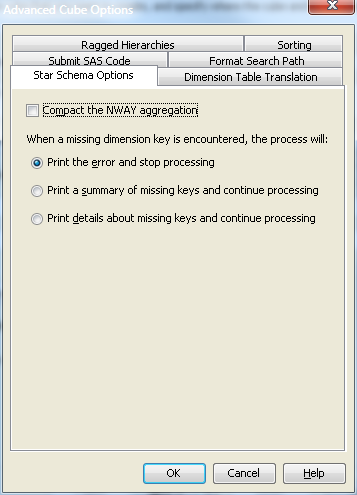
After you have selected
the star schema input type, you can click Advanced and define star schema options and dimension table translation languages
for the cube. The following display shows the Advanced
Cube Options dialog box. For star schema cubes you can
specify options for missing keys and whether to compact the NWAY aggregation
at build time.
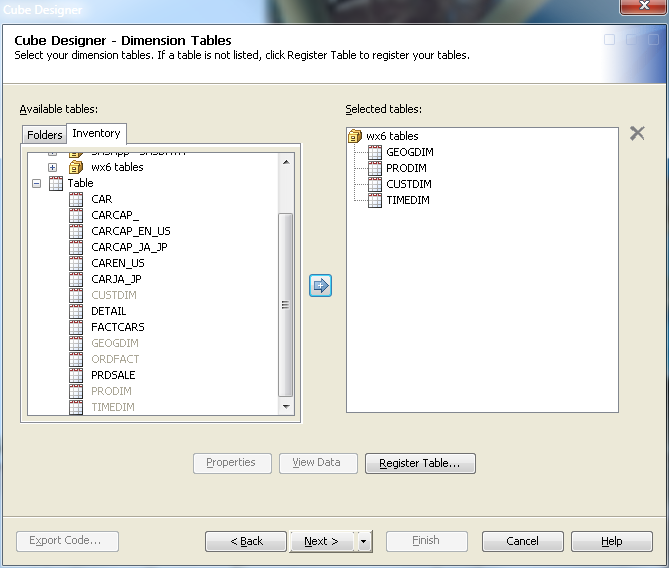
Select Fact and Dimension Tables
Overview
On the Cube
Designer – Input page, select a fact table for
your cube. If one does not exist for your data, click Define Table, and then define the source from which
you will import your metadata. You can also select or define an optional
drill-through table. Drill-through tables can be used by client applications
to provide a view from processed data into the underlying data source.
If a drill-through table does not exist for your data, click Define Table, and then define the source from which
will import your metadata.
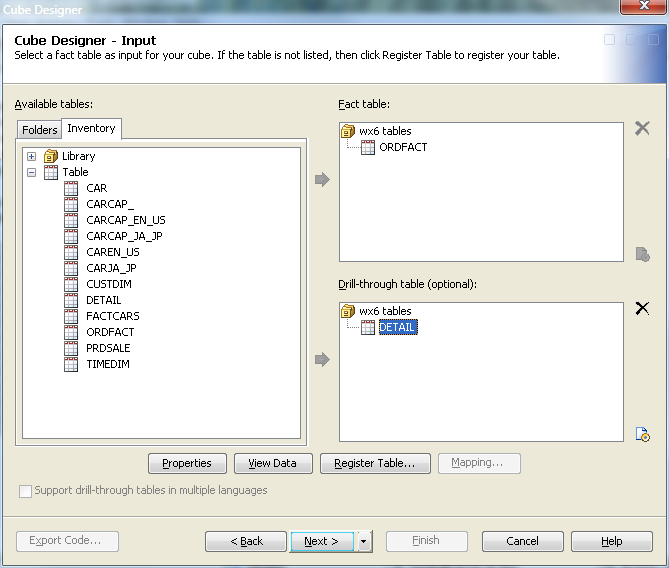
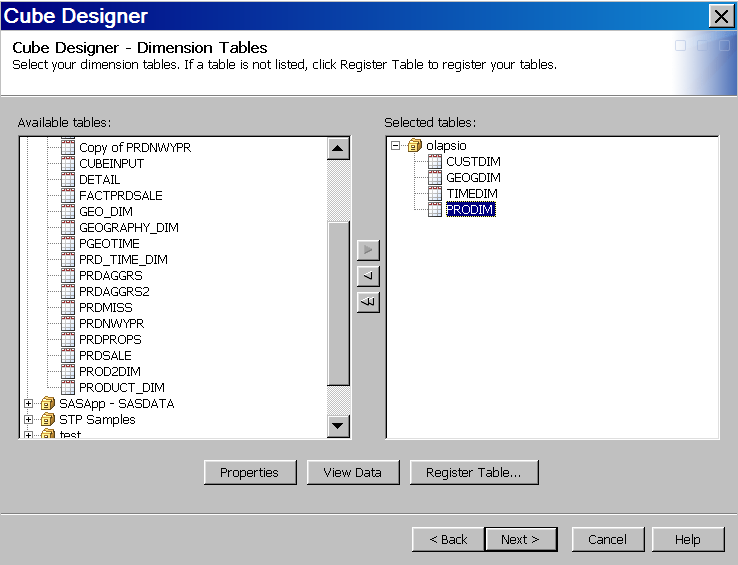
Table Options
The Table
Options button is available in both the Cube
Designer – Input and the Cube Designer
– Drill-Through dialog boxes. It opens the Table Options dialog box. It enables you to specify
data set options that are used to open the data set. For example,
you could enter a WHERE clause or other information that subsets or
filters the selected table when it is opened. The options are stored
as part of the cube and then reapplied when the data is accessed at
run time. You can also specify data set options in the Dimension Designer – General dialog box (for
use with star schemas) and the Stored Aggregates dialog box (for use with summarized tables). For more information,
see “Data Set Options” in the SAS Language
Reference: Concepts.
Define Dimensions, Levels, and Hierarchies
Now that your basic
metadata server and cube information has been entered, you can define
the different dimensions and their respective levels and hierarchies.
For this example, the following dimensions are created:
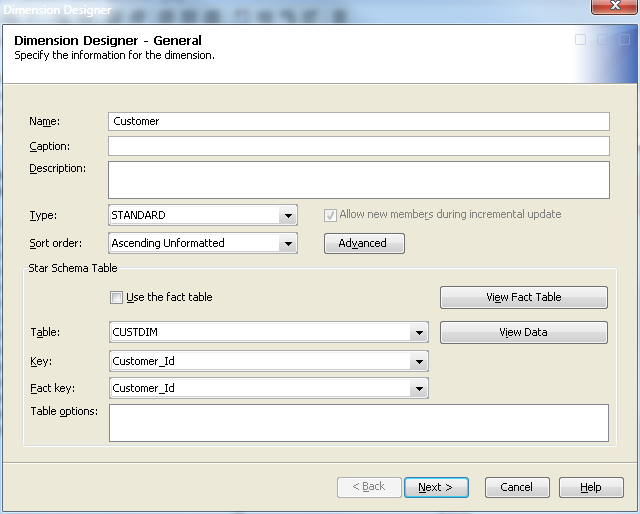
Because you are building
a cube from star schema data, you must identify the table for the
dimension, and the keys that link the dimension and fact tables together.
For each dimension that you define, specify the following:
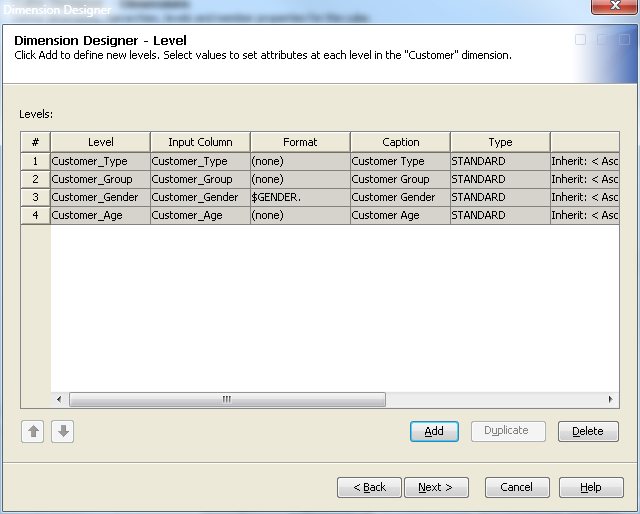
Select Next. This opens the Dimension Designer – Level page. Next, click Add to open the Add Levels page, as seen in the following display.
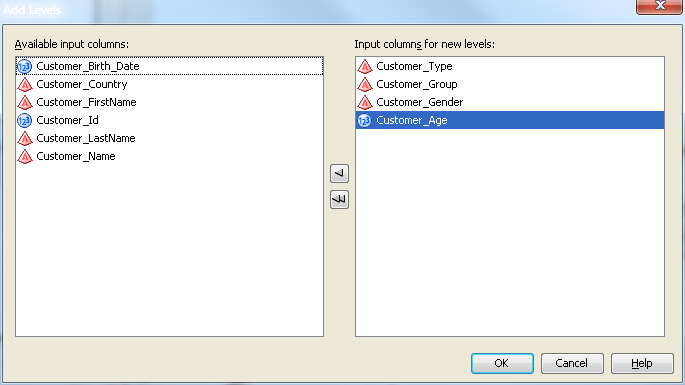
Select the levels that
you want to add to the dimension. Select OK to return to the Dimension Designer – Level page, where the selected levels are listed. You can now define properties
such as format, time type, and sort order for the levels that you
have selected. See the following display.
Next, define hierarchies
for the levels on the Dimension Designer – Hierarchy page. Select Add to on the Dimension Designer – Define a Hierarchy page
and individually select the levels for the hierarchy.
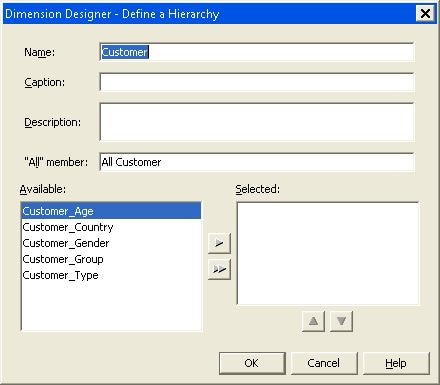
You can also click Finish on the Dimension Designer –
Hierarchy page to accept the order of the levels that
are defined on the previous Dimension Designer –
Level page. If you select this option, the hierarchy
is assigned the same name as the dimension. See the following display.

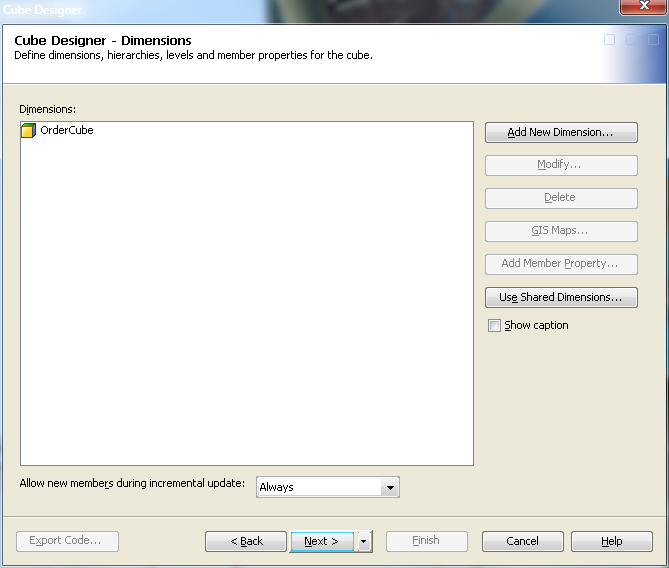
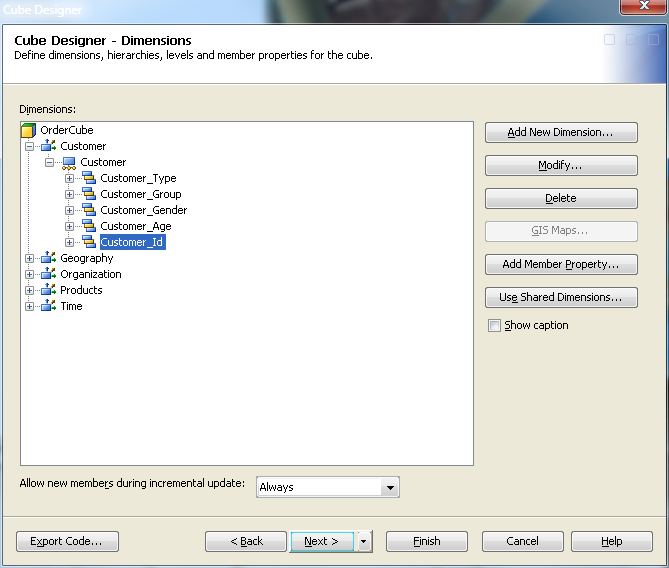
Repeat this process
for each dimension. After you create each dimension, it is listed
in the Dimensions panel of the Cube Designer – Dimensions page. See the following
display.

Note: If you are defining a TIME
dimension, you can click Supplied on the Dimension Designer – Level page. See Creating a TIME Dimension in SAS OLAP Cube Studio
for more information.
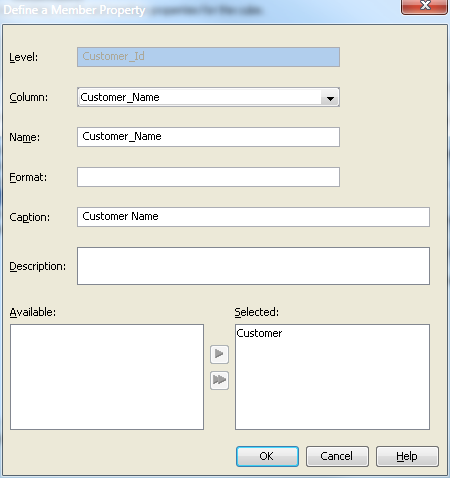
Define Member Properties
You can now define the
member properties for any needed cube members. A member property is
an attribute of a dimension member. A member property is also an optional
cube feature that is created in a dimension to provide users with
additional information about members. For this example, you can define
the customer name as a member property. On the Cube Designer
– Dimensions page, select the level for the member
property, and then click Add Member Property. See the following display.
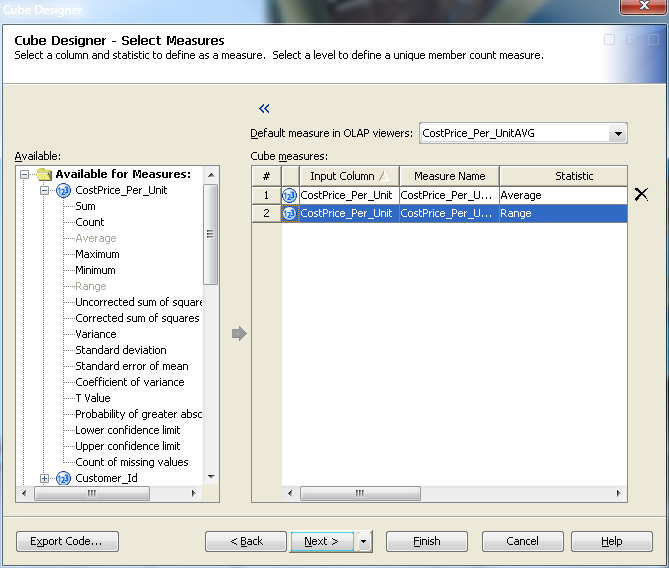
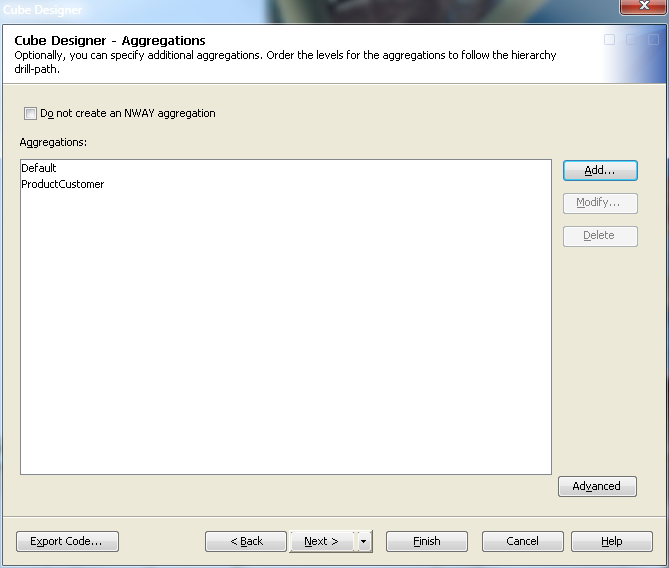
Define Aggregations
You can now define
the aggregations for the cube. Aggregations are summaries of detailed
data that are stored with a cube or referred to by a cube. They can
help contribute to faster query response. You define the aggregations
for the cube from the Cube Designer – Aggregations page.
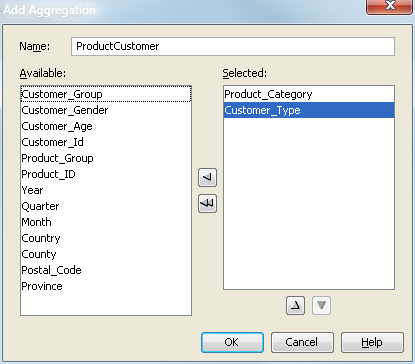
Select Add to specify a user-defined aggregation. This opens the Add Aggregation dialog box, as shown in the following
display. In this dialog box, you can select levels to add to your
aggregation.
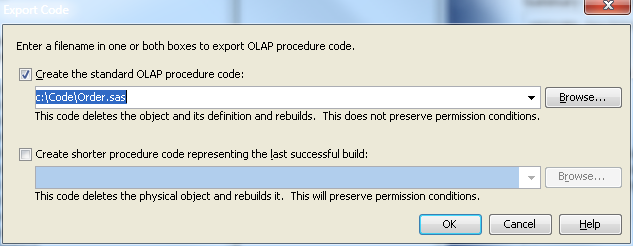
Build the Cube
You can now build the
cube. On the Cube Designer – Finish page, review the settings for the cube, and then click Finish to display the Finish dialog box. In the Finish dialog box, you
can choose to build the physical cube or save the cube definition
and build the physical cube later.
PROC OLAP CODE for the Star Schema Example
LIBNAME olapsio BASE "\\olap\tmp\libolap" ;

PROC OLAP
   CUBE                   = "/Shared Data/OLAPSchemas/OrderCube"
   PATH                   = 'c:\v9cubes'
   DESCRIPTION            = 'starschemacube'
   FACT                   = olapsio.ORDER_FACT
;


   METASVR
      HOST        = "J12345.na.abc.com"
      PORT        = 8561
      OLAP_SCHEMA = "SASApp - OLAP Schema";

   DIMENSION Customers
      CAPTION          = 'Customers'
      SORT_ORDER       = ASCENDING
      DIMTBL           = olapsio.CUSTDIM
      DIMKEY           = Customer_Id
      FACTKEY          = Customer_ID
      HIERARCHIES      = (
         Customers
         ) /* HIERARCHIES */;

      HIERARCHY Customers
         ALL_MEMBER = 'All Customers'
         CAPTION    = 'Customers'
         LEVELS     = (
            Customer_Type Customer_Group
            Customer_Gender Customer_Age
            ) /* LEVELS */
         DEFAULT;

      LEVEL Customer_Type
         CAPTION        =  'Customer Type'
         SORT_ORDER     =  ASCENDING;

      LEVEL Customer_Group
         CAPTION        =  'Customer Group'
         SORT_ORDER     =  ASCENDING;

      LEVEL Customer_Gender
         FORMAT         =  $GENDER.
         CAPTION        =  'Customer Gender'
         SORT_ORDER     =  ASCENDING;

      LEVEL Customer_Age
         CAPTION        =  'Customer Age'
         SORT_ORDER     =  ASCENDING;

   DIMENSION Geography
      CAPTION          = 'Geography'
      TYPE             = GEO
      SORT_ORDER       = ASCENDING
      DIMTBL           = olapsio.GEOGDIM
      DIMKEY           = Street_Id
      FACTKEY          = Street_ID
      HIERARCHIES      = (
         Geography
         ) /* HIERARCHIES */;

      HIERARCHY Geography
         ALL_MEMBER = 'All Geography'
         CAPTION    = 'Geography'
         LEVELS     = (
            Country Region State
            ) /* LEVELS */
         DEFAULT;

      LEVEL Country
         FORMAT         =  $COUNTRY.
         CAPTION        =  'Country'
         SORT_ORDER     =  ASCENDING;

      LEVEL Region
         CAPTION        =  'Region Name'
         SORT_ORDER     =  ASCENDING;

      LEVEL State
         CAPTION        =  'State'
         SORT_ORDER     =  ASCENDING;

   DIMENSION Organization
      CAPTION          = 'Organization'
      SORT_ORDER       = ASCENDING
      DIMTBL           = olapsio.ORGDIM
      DIMKEY           = Employee_Id
      FACTKEY          = Employee_ID
      HIERARCHIES      = (
         Organization
         ) /* HIERARCHIES */;

      HIERARCHY Organization
         ALL_MEMBER = 'All Organization'
         CAPTION    = 'Organization'
         LEVELS     = (
            Company Group Department
            ) /* LEVELS */
         DEFAULT;

      LEVEL Company
         CAPTION        =  'Company'
         SORT_ORDER     =  ASCENDING;

      LEVEL Group
         CAPTION        =  'Group'
         SORT_ORDER     =  ASCENDING;

      LEVEL Department
         CAPTION        =  'Department'
         SORT_ORDER     =  ASCENDING;

   DIMENSION Product
      CAPTION          = 'Product'
      SORT_ORDER       = ASCENDING
      DIMTBL           = olapsio.PRODIM
      DIMKEY           = Product_ID
      FACTKEY          = Product_ID
      HIERARCHIES      = (
         Product
         ) /* HIERARCHIES */;

      HIERARCHY Product
         ALL_MEMBER = 'All Product'
         CAPTION    = 'Product'
         LEVELS     = (
            Product_Category Product_Group Product_Line
            ) /* LEVELS */
         DEFAULT;

      LEVEL Product_Category
         CAPTION        =  'Product Category'
         SORT_ORDER     =  ASCENDING;

      LEVEL Product_Group
         CAPTION        =  'Product Group'
         SORT_ORDER     =  ASCENDING;

      LEVEL Product_Line
         CAPTION        =  'Product Line'
         SORT_ORDER     =  ASCENDING;

   DIMENSION Time
      CAPTION          = 'Time'
      TYPE             = TIME
      SORT_ORDER       = ASCFORMATTED
      DIMTBL           = olapsio.TIMEDIM
      DIMKEY           = Date
      FACTKEY          = Order_Date
      HIERARCHIES      = (
         Time
         ) /* HIERARCHIES */;

      HIERARCHY Time
         ALL_MEMBER = 'null'
         LEVELS     = (
            Year Quarter Month
            ) /* LEVELS */
         DEFAULT;

      LEVEL Year
         COLUMN         =  Date
         FORMAT         =  YEAR4.
         TYPE           =  YEAR
         CAPTION        =  'Year'
         SORT_ORDER     =  ASCFORMATTED;

      LEVEL Quarter
         COLUMN         =  Date
         FORMAT         =  QTR1.
         TYPE           =  QUARTERS
         CAPTION        =  'Quarter'
         SORT_ORDER     =  ASCFORMATTED;

      LEVEL Month
         COLUMN         =  Date
         FORMAT         =  MONNAME9.
         TYPE           =  MONTHS
         CAPTION        =  'Month'
         SORT_ORDER     =  ASCFORMATTED;

   PROPERTY Ages
      LEVEL          = Customer_Age
      COLUMN         = Customer_Birth_Date
      CAPTION        = 'Customer Birth Date'
      HIERARCHY      = (
         Customers
         ) /* HIERARCHIES */;

   MEASURE Total_Retail_PriceMAX
      STAT        = MAX
      COLUMN      = Total_Retail_Price
      CAPTION     = 'Maximum Total_Retail_Price'
      FORMAT      = DOLLAR13.2
      DEFAULT;

   MEASURE Total_Retail_PriceAVG
      STAT        = AVG
      COLUMN      = Total_Retail_Price
      CAPTION     = 'Average Total_Retail_Price'
      FORMAT      = DOLLAR13.2;

   MEASURE CostPrice_Per_UnitMAX
      STAT        = MAX
      COLUMN      = CostPrice_Per_Unit
      CAPTION     = 'Maximum CostPrice_Per_Unit'
      FORMAT      = DOLLAR13.2;

   MEASURE CostPrice_Per_UnitAVG
      STAT        = AVG
      COLUMN      = CostPrice_Per_Unit
      CAPTION     = 'Average CostPrice_Per_Unit'
      FORMAT      = DOLLAR13.2;

   AGGREGATION /* Default */
      /* levels */
      Company Country Customer_Age Customer_Gender Customer_Group
      Customer_Type Department Group Month Product_Category
      Product_Group Product_Line Quarter
      Region State Year
      / /* options */
      NAME      = 'Default';

   AGGREGATION /* ProductCustomer */
      /* levels */
      Customer_Type Customer_Group Customer_Gender
      Customer_Age Product_Category
      / /* options */
      NAME      = 'ProductCustomer';

   FORMAT Customer_Birth_Date DATE9.;

   RUN;
PROC OLAP Statements and Options for a Star Schema
The following table
lists the PROC OLAP statements and options that you use to load a
cube from a star schema. A star schema is a set of input tables that
are defined in a repository. The set of tables includes a single fact
table and one or more dimension tables. The fact table must contain
at least one numeric analysis column for each set of measures that
is generated. To specify the data source for a star schema, you must
use the FACT=, DIMTBL=, DIMKEY=, and FACTKEY= options.