Working with SAS Management Console
Introduction to SAS Management Console
SAS Management Console
provides a single point of control for managing resources on all platforms
that are supported by SAS. By invoking SAS Management Console, the
data administrator has access to the many management functions that
it provides. For information about these functions, see the SAS
Management Console: User's Guide at http://support.sas.com/documentation/index.html. Use the A-Z index to SAS Product Documentation to locate
the documentation for SAS Management Console.
SAS Management Console
enables SAS IT Resource Management data administrators to perform
the following tasks:
-
Manage metadata for users, roles, and groups in the SAS Metadata Repository. These objects govern how users access ITRM Report Center.
-
After users define their jobs, they can submit those jobs for immediate execution or deploy them for scheduling in SAS Management Console. After a job is deployed, users can schedule the jobs to run in batch mode at a specified date and time. Use the Schedule Manager component of SAS Management Console to specify a job deployment directory.In addition, to successfully deploy jobs in batch mode on Windows operating environments, the user must have log on as batch privilege.Note: The Schedule Manager component of SAS Management Console controls the function of specifying a job deployment directory.
To access SAS Management Console, from your Microsoft
Windows, select Start Programs
 SAS
SAS SAS Management Console.
Adding Users and Groups of Users
About SAS IT Resource Management User Groups
The installation
process of SAS IT Resource Management establishes two user groups:
IT Resource Management Report Center Administrators and IT Resource
Management Report Center Users. In addition, for all SAS applications,
a group called SASUSERS is established.
-
IT Resource Management Report Center AdministratorsIT Resource Management Report Center Administrators can access all the workspaces of ITRM Report Center. These workspaces are: Home, Gallery, Resource, and Administration.
-
IT Resource Management UsersIT Resource Management Report Center Users can access these workspaces: Home, Gallery, andResource.
-
A SASUSER who does not belong to either group has limited access to the Home and Gallery workspaces.
Note: For more information, see
“Overview of ITRM Report Center “ in Chapter 1, “About
ITRM Report Center,” in the SAS IT Resource Management
3.7: Report Center Guide.
To add new or existing
users to a SAS IT Resource Management Report Center administrator
or user group, perform the following steps:
-
In the Repository field at the top of the Plug-ins tab, select the foundation repository that you want to work with from the drop-down list.Note: The selected repository must be the repository that is the required metadata store for a SAS Metadata Server. Each metadata server has one foundation repository. As a default, the name of the foundation repository is
Foundation. (If you performed a custom installation, then you might have assigned a different name.)
Add a New User to a SAS IT Resource Management Report Center User Group
SAS IT Resource Management
provides these two groups: IT Resource Management Report Center Administrators
and IT Resource Management Report Center Users. To add a new user
to one of these groups, perform the following steps:
-
Click the Groups and Roles tab. From the Available Groups and Roles column, select the group (that is, IT Resource Management Report Center Administrators or IT Resource Management Report Center Users) into which you want to place the new user. Click the arrow to add the selected group to Member of column.
-
Click the Accounts tab. Click New to display the New Login Properties dialog box where you can add sign-in information for the new user. Ensure that the User ID and Password fields are entered. (DefaultAuth is the supplied entry that contains the login for the SASITRM server.)
Add an Existing User to a SAS IT Resource Management Report Center Group
To add an existing user
to one of the two groups that are provided by SAS IT Resource Management,
perform the following steps:
-
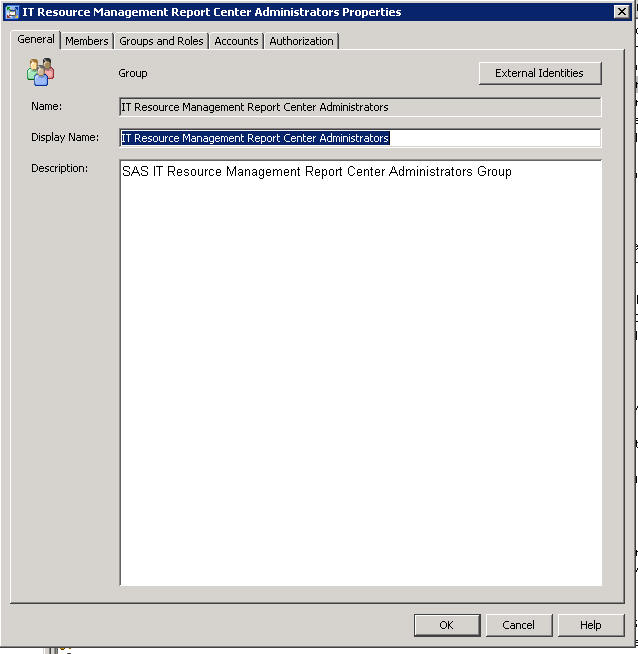
From the list of registered users in the User, Group, or Role column, right-click the IT Resource Management Report Center Administrators or IT Resource Management Report Center Users. Then select Properties.The dialog box contains five tabs: General, Members, Groups and Roles, Accounts, and Authorization. The Properties dialog box enables you to view and modify information about the selected user or user group.
Note: For more information, see
the SAS 9.4 Intelligence Platform: Security Administration
Guide.
Enabling the Log On as a Batch Job Privilege for Windows Users
All Windows users of
SAS IT Resource Management need the Log On as a Batch
Job privilege.
To meet this requirement,
log on to Windows as an Administrator and modify the local security
policy. To do so, select Start Administrative Tools
 Local Security
Policy
  Local Policies
 User
Rights Assignment
  Log on as a batch job.
Note: The “Log on as a batch
job” privilege is relevant only to Windows. There is no direct
analog on UNIX or z/OS.
Tip
If you have an operating system
group (such as SAS Server Users) that has this right, you can just
add users and service account identities to that group.
Adding Locations for the Deployment of Jobs
In order to run a job in batch mode, a job must be
deployed into a directory on the application server. The location
of this directory can be defined in SAS Management Console. New deployment
directories can also be defined in the SAS IT Resource Management
client, while you are deploying a job. To specify the location, perform
the following steps:
-
Click the Plug-ins tab, if necessary, to display plug-ins in the left panel of SAS Management Console. In the Repository field at the top of this panel, select the foundation repository from the drop-down list.Note: The selected repository must be the repository that is the required metadata store for a SAS Metadata Server. Each metadata server has one foundation repository. As a default, the name of the foundation repository is
Foundation. (If you performed a custom installation, then you might have assigned a different name.) -
In the Application Server field, you can specify the application server that you want to use for deploying jobs. Use the drop-down list to show the application servers that are available, and click to select a server. (SASITRM is the application server that is configured by default when SAS IT Resource Management is installed.)SAS IT Resource Management establishes a SAS Application Server named SASITRM that sets properties such as memory size options and formats for the exclusive use of the solution. Establishing SASITRM as the SAS Application Server ensures that SAS IT Resource Management can be installed and operated with other SAS products and solutions. Some of these might also establish SAS Application Servers.Note: For more information, see “Defining Multiple Application Servers” in the SAS 9.4 Intelligence Platform: Application Server Administration Guide.
-
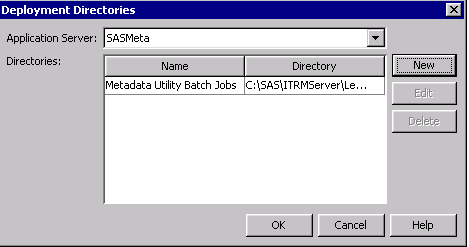
In the Directories section of the Deployment Directories dialog box, you can specify one or more directories where the generated code for deployed jobs is to be stored. The server that is selected in the Application Server field must be able to resolve the paths to these directories.SAS IT Resource Management supplies a Batch Jobs directory. The path to this supplied directory on the SASITRM server is:
SASEnvironment\SASCode\Jobs.In the Deployment Directories dialog box, you can perform the following tasks:-
Define a new directory. To do so, click New.
-
Update a directory. To do so, select the directory and click Edit.
-
Remove the metadata for a directory. To do so, select the directory and click Delete.
If you are defining locations in z/OS traditional file system locations, you can specify the name of the directory as the full name of a partitioned data set.For more detailed information about these tasks, click Help. -
Copyright © SAS Institute Inc. All rights reserved.

