Install and Configure SAS

You install and initially configure SAS by running the SAS Deployment Wizard.
To install and configure SAS:
  1. Make sure that you have completed the Pre-Installation Checklist.
  2. Log in to your machine as the SAS Installer user (for example, sas).
    This can be your regular account, but you must use this same account in the future if you want to add, modify, or remove SAS software.
  3. Change to the location where the SAS installation files (referred to as the SAS Software Depot) were downloaded (for example, /opt/sas9.4/depot).
  4. Enter the following command:
    ./setup.sh
    You see output similar to the following:
    Preparing the SAS Deployment Wizard...
    Launching the SAS Deployment Wizard...
    
    The Choose Language dialog box is displayed.
    Choose Language dialog box
  5. Select the language that you want the SAS Deployment Wizard to use when it displays text, and click OK.
    The download wizard splash screen is displayed.
    SAS Deployment Wizard splash screen
    Next, the Select Deployment Task page is displayed.
    Select Deployment Task page
  6. Make sure that Install SAS Software is selected, and click Next.
    The Specify SAS Home page is displayed.
    Specify SAS Home page
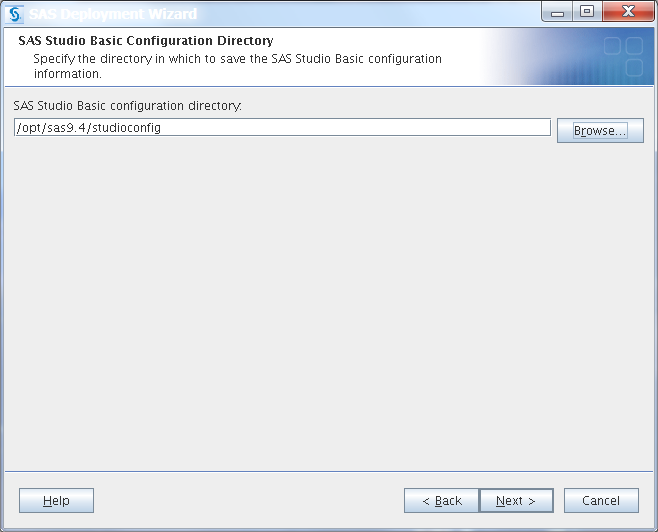
  7. Enter the path where you want the deployment wizard to install SAS (for example, 
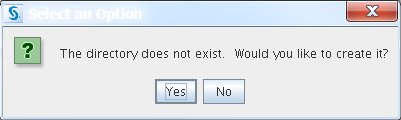
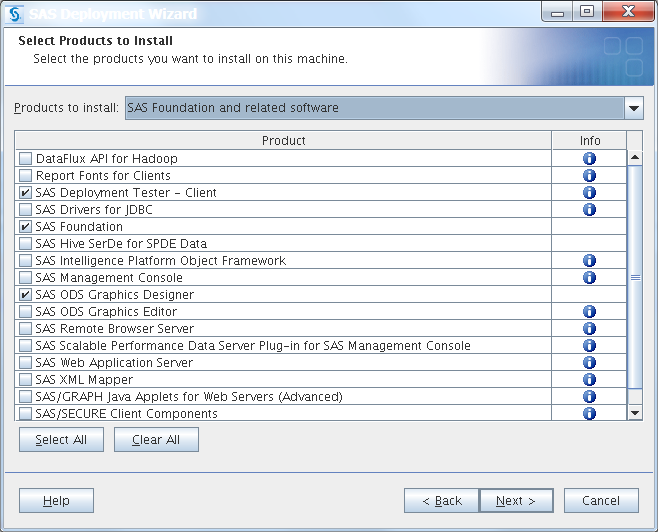
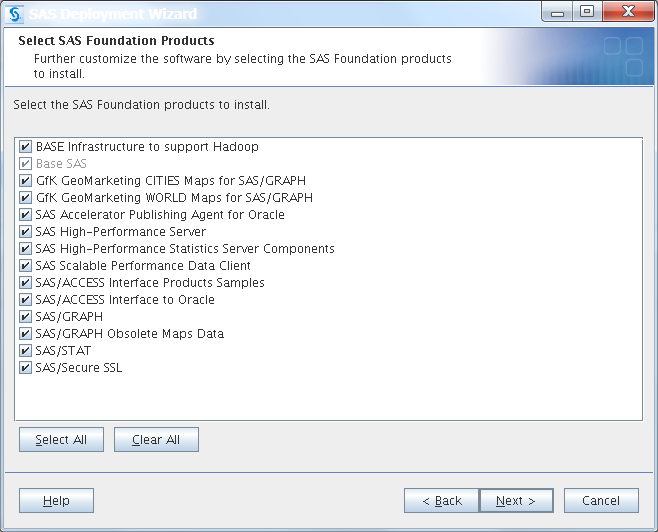
/opt/sas9.4/install/SASHome). Click Next.
    If you have not yet created the SAS installation directory, you see the following alert box.
    Select an Option alert box
    Click Yes, to have the deployment wizard create the directory automatically for you.
    The Select Products to Install page is displayed.
    Select Products to Install page
  8. Click Next.
    Tip
    We recommend that you do not change the default settings on this page.
    The Select SAS Foundation Products page is displayed.
    Select SAS Foundation Products page
  9. Click Next.
    Tip
    We recommend that you do not change the default settings on this page.
    The Specify SAS Installation Data File page is displayed.
    Specify SAS Installation Data File page
  10. If your order has more than one SID file, be sure to select the one that includes the SAS Foundation products that you want to install.
    Click Next.
    The Select Language Support page is displayed.
    Select Language Support page
  11. Select the languages for your SAS software to support:
    1. Click Clear All. (English remains selected as the default language.)
    2. Add any additional languages that you want SAS software to support.
      By default, SAS attempts to support all languages for which your machine’s operating system is configured.
    3. Click Next.
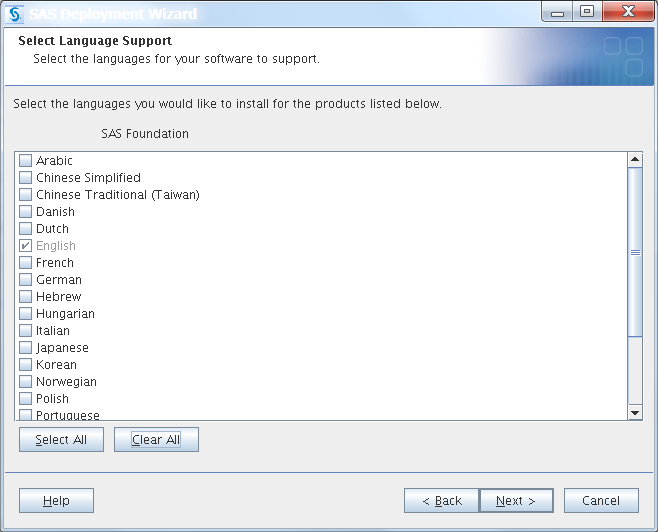
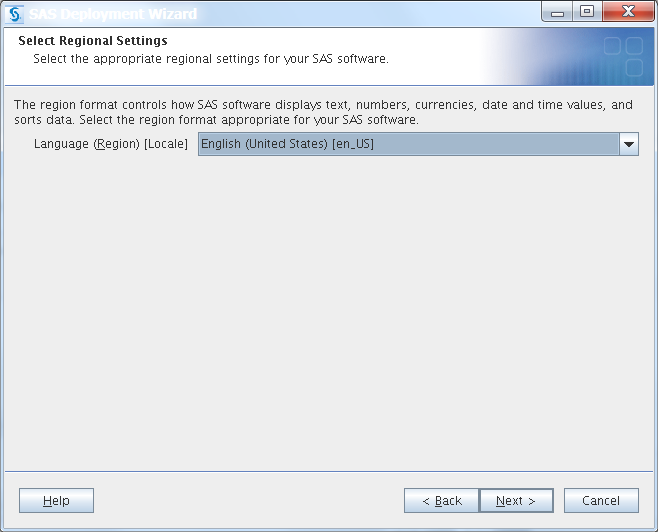
    The Select Regional Settings page is displayed.
    Select Regional Settings page
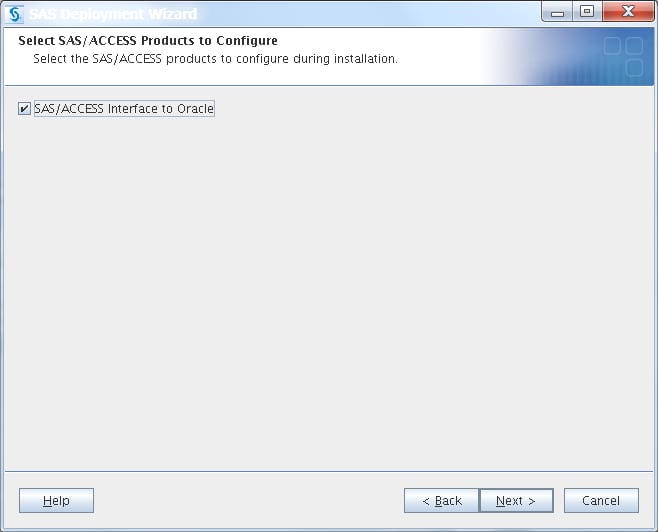
  12. Select the language, region, and locale settings that affect how SAS displays text, numbers, currencies, dates, and times and how SAS sorts data. Then click Next.
    At this point in the installation, you might see different SAS Foundation products to configure.
    For example, you might see an offering such as SAS/ACCESS for Oracle.
    Select SAS/ACCESS Products to Configure page
  13. Supply the necessary information, and click Next.
    The Select Authentication Type page is displayed.
    Select Authentication Type page
  14. Click Next.
    The Configure SAS Studio Basic page is displayed.
    Configure SAS Studio Basic page
  15. Click Next.
    The SAS Studio Basic Configuration page is displayed.
    SAS Studio Basic Configuration page
  16. Enter a path (for example, /opt/sas9.4/studioconfig), and click Next.
    The SAS Studio Basic Ports page is displayed.
    SAS Studio Basic Ports page
  17. Click Next.
    The SAS Studio Basic Password page is displayed.
    SAS Studio Basic Password page
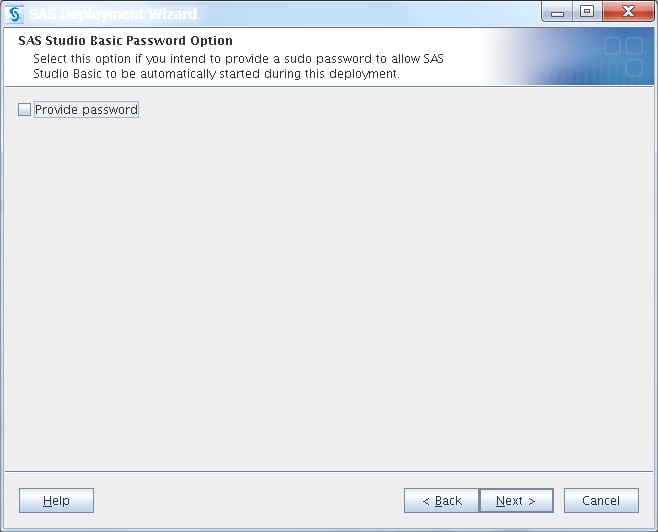
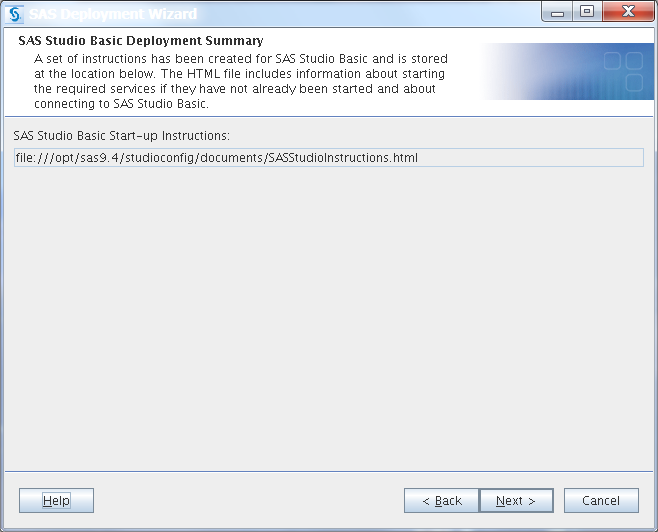
  18. If you have decided to allow the deployment wizard to use sudo to run the setuid.sh script, select Provide password and click Next. Otherwise, click Next only. (For more information about why sudo access is needed, see Deploying SAS Foundation.)
    The SAS Studio Basic E-mail Support page is displayed.
    SAS Studio Basic E-mail Support page
  19. Click Next.
    The SAS Studio Basic Deployment Summary page is displayed.
    SAS Studio Basic Deployment Summary page
  20. Click Next.
    The deployment wizard scans your machine to determine whether any pre-existing SAS files are locked or do not have Write permission. The wizard also checks whether there is adequate disk space to install SAS.
    Checking System page
  21. When the scan is completed, If no action is required, click Next.
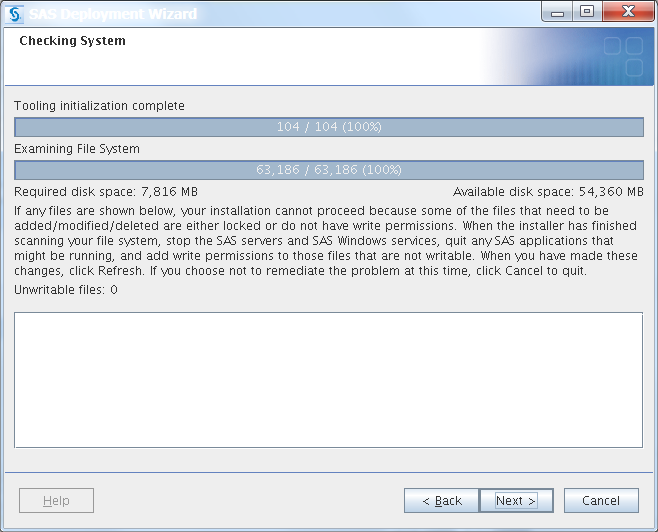
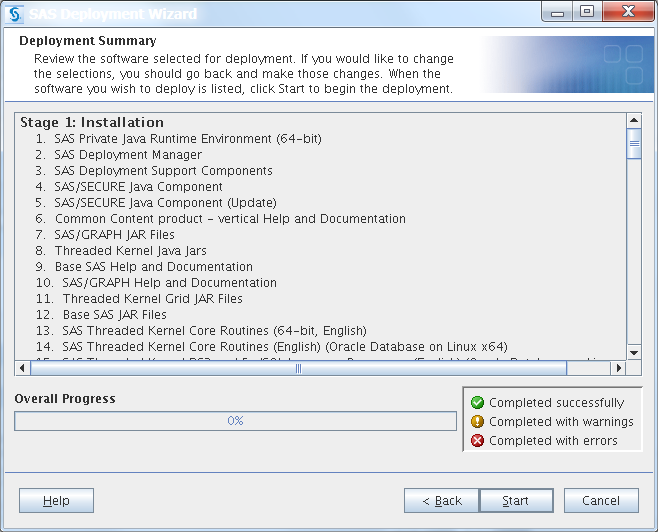
    If the wizard lists any files in the text box, then while the wizard is running, quit SAS and add Write permission to the files listed, or clear the lock on any affected files. When you finish, click Next.
    The Deployment Summary page is displayed.
    Deployment Summary page
  22. Review the summary of software that the deployment wizard will install.
    This is the last opportunity to go back and change any information that you have provided in previous pages before the wizard begins installing SAS. Make one of the following choices:
    • Click Start to begin installing SAS files. The deployment wizard launches the installation and provides an ongoing status update.
    • Click Back to navigate to earlier wizard pages to change installation information previously entered.
    • Click Cancel to terminate the wizard session. Note that you will lose installation information previously entered.
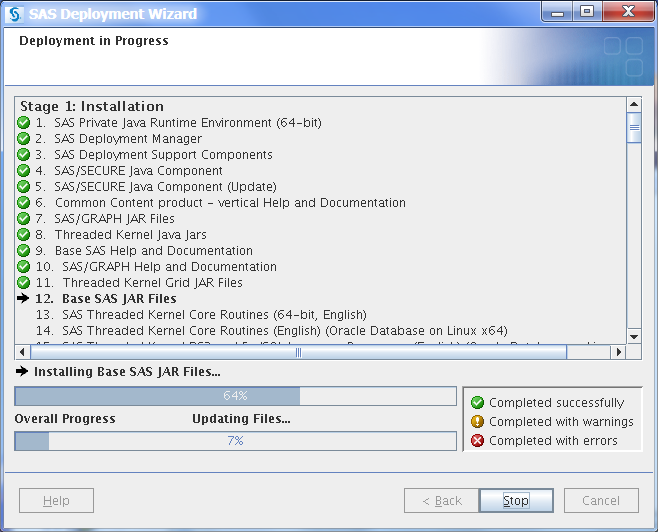
    If you click Start, the Deployment in Progress page is displayed.
    Deployment in Progress page
    When the deployment wizard has finished installing SAS, the Deployment Complete page is displayed.
    Deployment Complete page
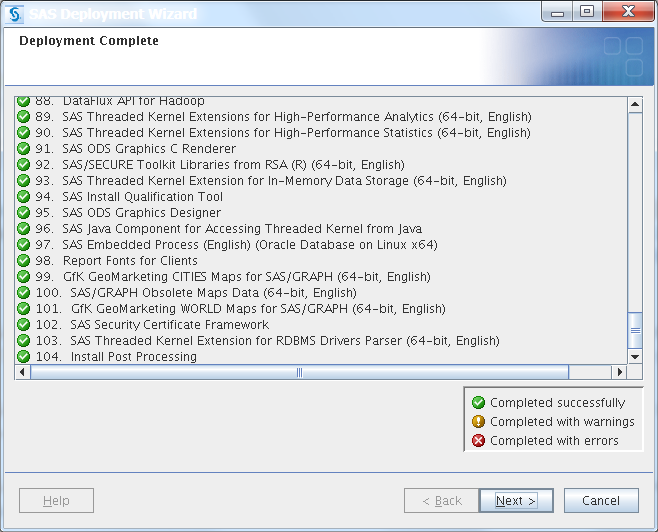
  23. The Deployment Complete page displays the installation results for each SAS product.
    • Green check marks next to every item on this page indicate that your installation completed successfully. Click Next.
    • If you received errors during your installation, review Troubleshooting a SAS Deployment.
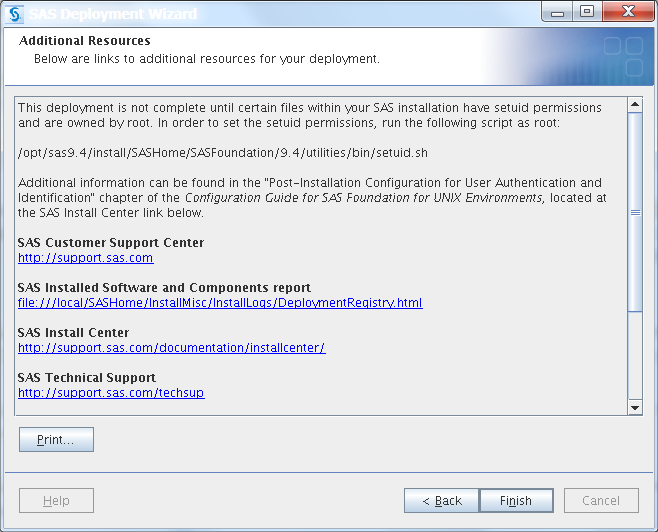
    The Additional Resources page is displayed.
    Additional Resources page
  24. Use the links displayed to review more information about your SAS deployment.
    Click Finish to close the SAS Deployment Wizard.
  25. If you did not set up sudo for the SAS Installer or provide the sudo password when prompted by the deployment wizard, you must run the setuid.sh script with sudo or be logged in as the root user as shown below.
    Enter the following command:
    sudo SAS-installation-directory/SASFoundation/9.4/utilities/bin/setuid.sh
    Output similar to the following indicates that setuid.sh ran successfully:
    Performing the User Authentication setup step required by SAS.
    Attempting to setuid bit and change ownership of files:
    sasperm sasauth elssrv, to root
    User Authentication setup has successfully completed.