Converting a SAS Code File to a Job
Solution
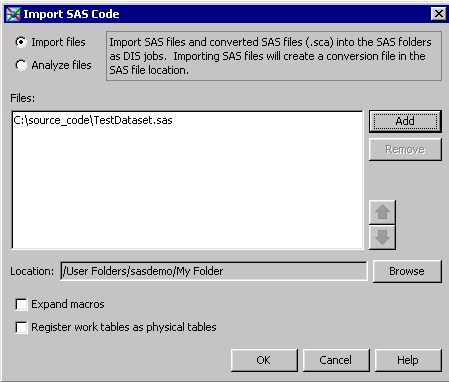
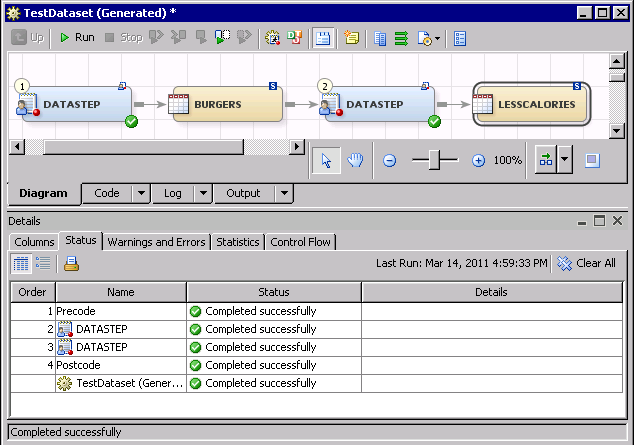
You can use the Import SAS Code wizard in SAS Data Integration Studio
to convert a SAS program file and import it into SAS Data Integration
Studio. The sources, targets, and procedures in the program file are
rendered as metadata objects in a job.
The Import
SAS Code wizard enables you to analyze your code and
to automatically create SAS Data Integration Studio jobs. Behind the
scenes, it calls the SCA (SAS Code Analyzer) procedure to analyze
your SAS program. The SAS Code Analyzer captures information about
input, output, and the use of macro symbols from a SAS job while it
is running. The output generated is a file with your SAS program and
any additional comments.
Note: The Import SAS
Code wizard cannot parse all possible LIBNAME options
for DBMS engines. If you import SAS code that includes LIBNAME options
for DBMS engines, verify that the imported LIBNAME statement is correct,
and that you can access the appropriate library. If some LIBNAME options
are missing, configure them manually.
Two additional options
are available as check boxes. You can select the Expand
macros check box. This option creates a node for each
step inside of your macros and provides additional detail about your
job and how it works, including performance information about slow
running steps, which steps use more memory or I/O, and CPU performance.
You can also select the Register work tables as physical
tables check box. This option registers all work tables
as physical tables in a WORK library so that your imported SAS code
uses temporary tables that are both the source and target of a step.
You can also analyze your job to determine the type and number of
steps in your job. This information is provided in a report that you
can review prior to importing the job.
Tasks
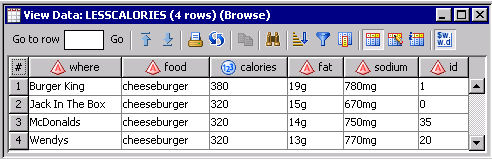
Review the SAS Program File
libname ditest 'c:\\DISdata';

data temp.burgers;
 input where $ 1-18 food $ 19-34 calories fat $ sodium $ id $;
     cards;
 Burger King       cheeseburger    380  19g 780mg 1
 Hardees           cheeseburger    390  20g 990mg 10
 Jack In The Box   cheeseburger    320  15g 670mg 0
 McDonalds         cheeseburger    320  14g 750mg 35
 Wendys            cheeseburger    320  13g 770mg 20
 ;
run;

data temp.lesscalories;
   set temp.burgers;
   where calories < 390;
run;