| Useful Techniques |
Importing Data
ADX can import data from a SAS data set. If SAS/ACCESS software is installed, ADX can also import data from a Microsoft Excel spreadsheet, a dBase database, a delimited text file, and files with other common formats.
You can import a complete design or just the responses.
Importing a Complete Design
In this section you import the data set you created in the section "Exporting Information". To import a design from the SAS data set, follow these steps:- Close all designs to return to the ADX desktop. If you want to import the design into another folder, follow the steps outlined in the section "Changing the Current Folder".
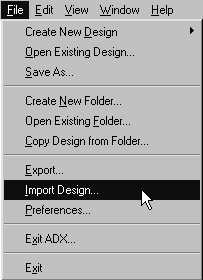
- Select File
 Import Design.
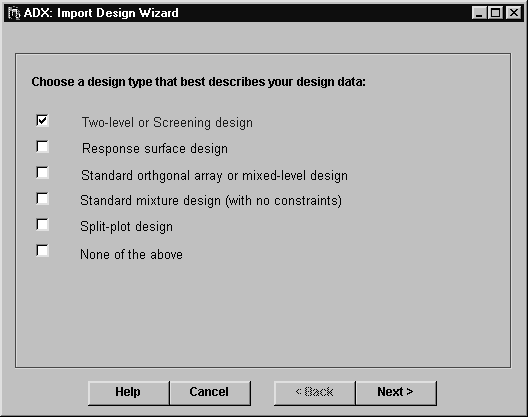
- Select the design type that most closely fits the purpose of the design you want to import. In this case, you will simply create another two-level design with the data set.
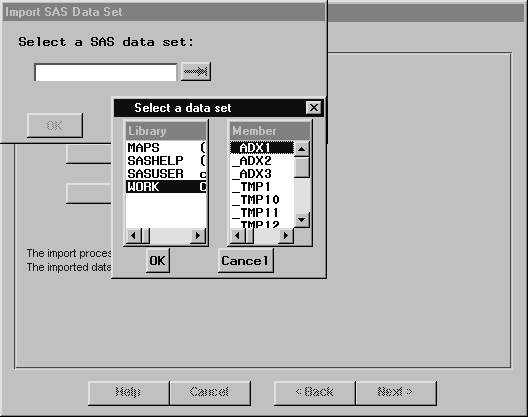
- Click Next. This window directs you to select the source of your data: either a SAS data set or (if SAS/ACCESS is installed) an external data source. Select SAS data set.
- Navigate to the data set you created in the section "Exporting Information", which might differ somewhat from the illustration. Click OK.
- ADX indicates whether the import was successful. If not, check the data source and try again.
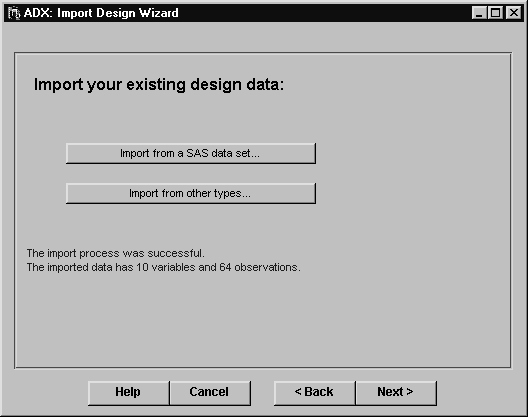
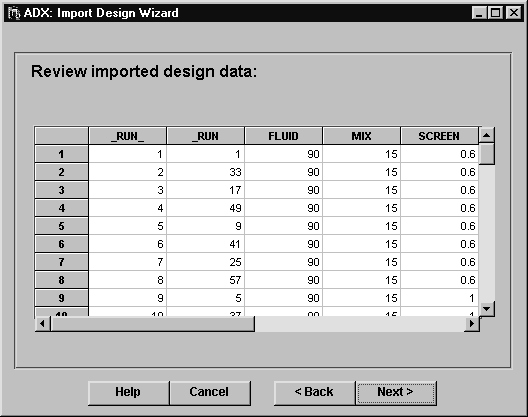
- Click Next. This window shows you the data that were imported. Here you can verify whether you selected the file you wanted. If not, click Back and select another file.
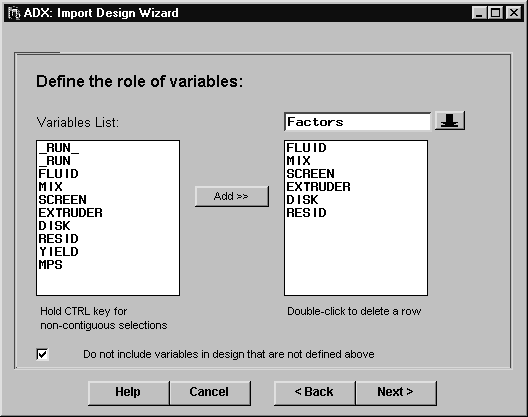
- Click Next. You can use this window to assign roles to columns. The down arrow enables you to select the role: factor, response, or block. Click the column name and click Add to assign a column to that role.
- Repeat the previous step for Responses, and, if applicable, Blocks. (There is no block variable in this case.)
- If you want to exclude columns from the design, select the check box labeled Do not include variables in design that are not defined above.
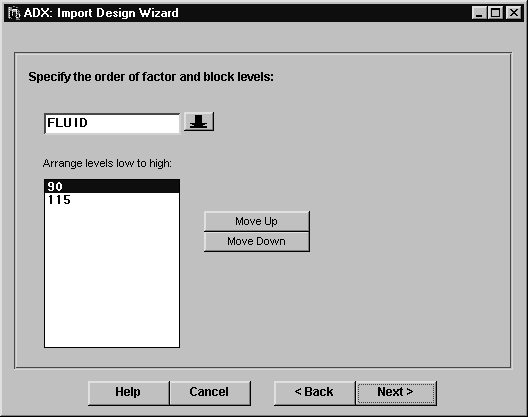
- Click Next. Order the levels for each factor if necessary. ADX does this automatically, but you might want to reorder the levels of categorical factors.
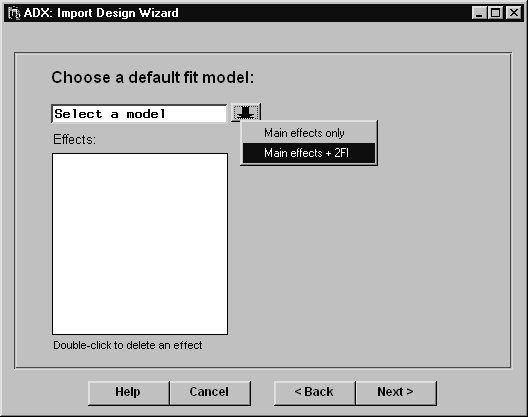
- Click Next. Specify a default master model. You can choose a main-effects model or one that also includes two-factor interactions. Double-click any effects you want to delete (for example, to induce nesting). (Note: Be sure to select a model in which all effects are estimable.)
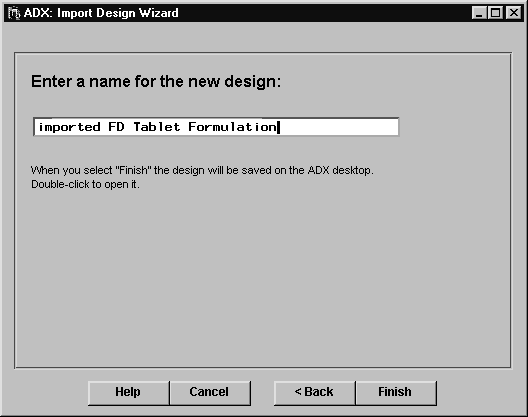
- Click Next. Enter the name of the design and click Finish.
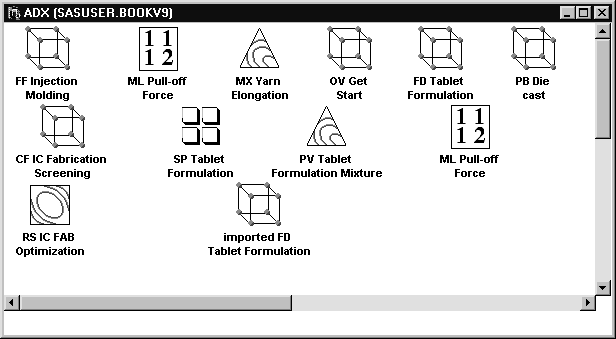
- The new design is saved in the current folder on the ADX desktop. You can now treat this design as if it were created in ADX.
Importing Responses into a Design
In some experimental situations the response values for a design are recorded in an external data source, such as a spreadsheet . Assuming that the design was initially created in ADX, you can use the import facility in ADX to merge the response values with the design. (Of course, this assumes that the response values have the same order as the design runs.)To merge response values with a design, do the following:
- Open the design.
- Click Edit Responses.
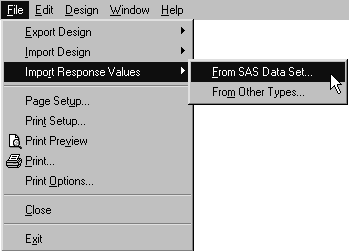
- Select File Import Response Values From SAS Data Set. (Note that if SAS/ACCESS is installed, you can choose an external source by selecting From Other Types.)
- Navigate to the location of the data set.
- In the Import Response Values window, there are two columns, labeled From and To, and a row for each response variable in the design. Use the down arrows and the pop-up menus in the From column to select the variable to import for each response in the To column.
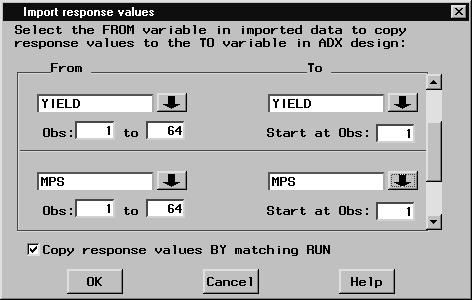
- Click OK to import the response values.
The values will be copied from the data set in the order in which they are encountered. If the runs are ordered differently, then create a column called RUN in the data set. When you import the response values, the check box Copy response values BY matching RUN will be selected, and the run order specified by RUN will be used.
Copyright © 2008 by SAS Institute Inc., Cary, NC, USA. All rights reserved.