


|
|
User's Guide 1.1 |
|
The SAS Information Delivery Portal allows you to add your own personal webEIS documents to the portal. webEIS documents provide point-and-click access to live data from enterprise databases that can be centrally located on SAS servers. The data is presented in the form of charts, tables, and images. Users can drill into the data, create subsets, highlight exceptions, and create new computations.
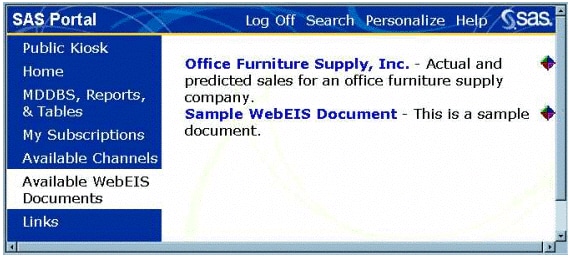
After adding webEIS documents to the portal, you can include them in lists and display them in windows in the portal. In the following example, the Available webEIS Documents window shows a list of sample webEIS documents.
To add a new personal webEIS document:
If the webEIS document has already been created and installed in the portal file system, skip to step 2. If not, follow these steps:
Use the SAS webEIS application (Version 2.0 or later) to create a webEIS document. Save the document as a JSP file.
Move or copy the JSP file to the server on which the SAS Information Delivery Portal application resides. You must store the JSP file on the server in or below the Portal directory, which is created automatically when you install the portal application. This directory contains subdirectories expressly for JSP files. If you do not know where the directory is located or if you do not have write access to it, please contact your portal system administrator for assistance.
If you have not already done so, open the SAS Information Delivery Portal, log on with your user name and password, and click Personalize on the toolbar. The Personalize window appears.
At the prompt Select a role to personalize, choose Personal.
At the prompt Select what to personalize, choose webEIS Documents from the drop-down list. The Personal webEIS Documents control panel appears showing the existing webEIS documents.
Opposite Add a new personal webEIS document, click
![]() to add a webEIS document.
The New Personal webEIS Document control panel appears.
to add a webEIS document.
The New Personal webEIS Document control panel appears.
Fill in the fields as follows:
/jsp/html/samples/WebEISSample1.jsp
Click Create webEIS Document. The Personal webEIS Document control panel reappears showing the new webEIS document. You can now proceed by choosing another Personalize function, choosing another task, or opening another window.
Note: To display the new webEIS document, you must now add it to a list. For instructions, see Creating and Editing Personal Lists.
For more information on viewing webEIS documents, see Viewing webEIS Documents.
To edit or delete an existing personal webEIS document:
If you have not already done so, open the SAS Information Delivery Portal, log on with your user name and password, and click Personalize on the toolbar. The Personalize window appears.
At the prompt Select a role to personalize, choose Personal.
At the prompt Select what to personalize, choose webEIS Documents from the drop-down list. The Personal webEIS Documents control panel appears.
Under Manage personal webEIS documents, find the webEIS document you want to edit or delete.
Then click ![]() to delete the webEIS document
or
to delete the webEIS document
or ![]() to edit the webEIS document.
If you click
to edit the webEIS document.
If you click ![]() ,
the webEIS document disappears immediately, and you are finished.
If you click
,
the webEIS document disappears immediately, and you are finished.
If you click ![]() ,
the Update Personal webEIS Document control panel appears.
,
the Update Personal webEIS Document control panel appears.
Update the Name, JSP, Description, and Keywords fields as necessary.
Click Update webEIS Document. The Personal webEIS Documents control panel reappears.
Note: For the change to take effect, you must log off of the portal and then log back on.
|
|
User's Guide 1.1 |
|