The folder you are creating contains metadata concerning the input (or output) library.

The New Folder Wizard opens.
This process must be performed for both the input and output directories.
You can name your folders as you like and locate them as you like. The following picture is only a suggestion.
Note: It is not recommended, however, to place your folders under the already-existing Products folder or the already-existing System folder.

In the preceding picture, you can see the following folders:
| PM Data | Metadata for Profitability Management libraries on this Metadata Server |
| Baby Bank | Metadata for this model's libraries |
| Analysis | Metadata for the library containing the analysis view. This folder is optional. |
| Input | Metadata for the library containing the model's input files. |
| Output | Metadata for the library containing the model's output files—the calculated transactions. |
The important point is that it is desirable to have a separate metadata folder for each model, and to have separate metadata folders at least for input and output (a separate Analysis folder is optional).
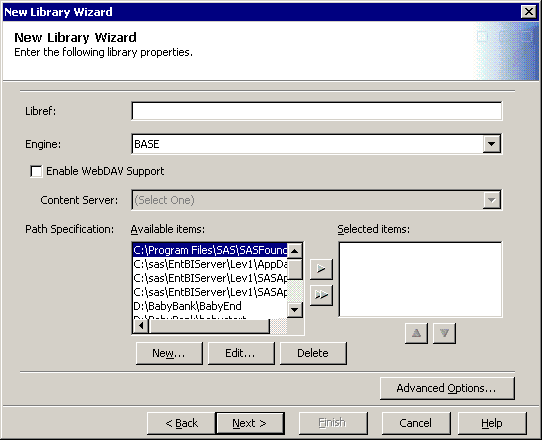
This is the text that appears in the navigation and display areas of SAS Management Console, but is not the LIBREF for the library. The name can contain up to 60 characters. It must be unique within the folder specified in the Location field. It must also be unique on all servers where the library is assigned.
It is strongly recommended that you choose a unique folder for each library. If two libraries share the same metadata folder and both libraries contain same-named items, then the metadata folder will contain incorrect information about one of those items.
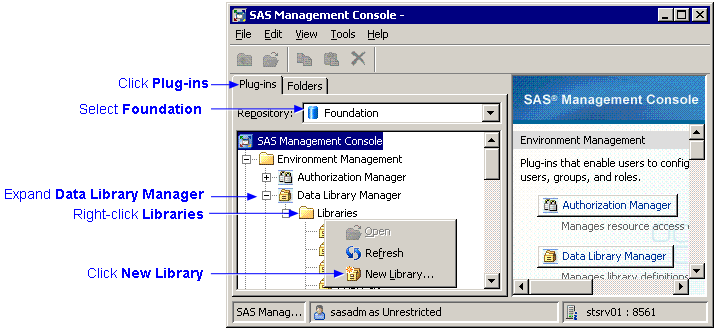
Note: You can also click the New
folder button ![]() to
create a new folder.
to
create a new folder.

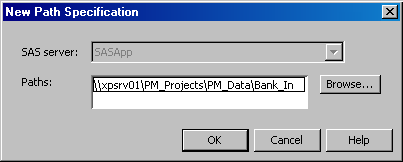
Note: If the path is on another server as shown, you can simply type the path in the New Path Specification window.
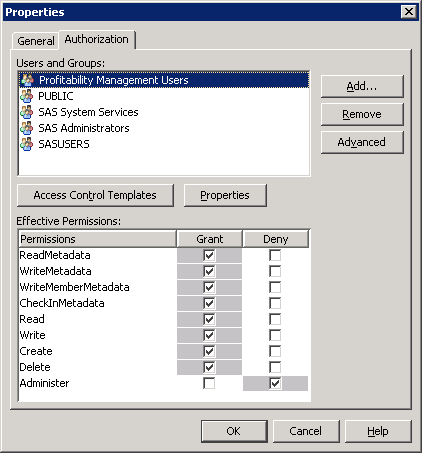
Grant permissions to both the libraries and their associated metadata folders to the group, Profitability Management Users:
Right-click each of the libraries and folders in turn and select Properties.
Click the Authorization tab..
Grant all but Administer permission to the group, Profitability Management Users, as shown in the following picture.