DataFlux Data Management Studio 2.5: User Guide
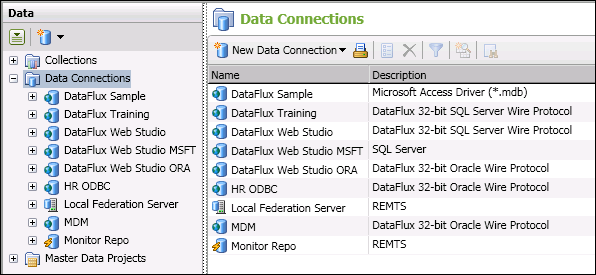
To add a connection definition, click the Data riser bar, and then select the Data Connections folder. The next figure shows an expanded the Data Connections folder on the left and the Data Connections pane on the right.
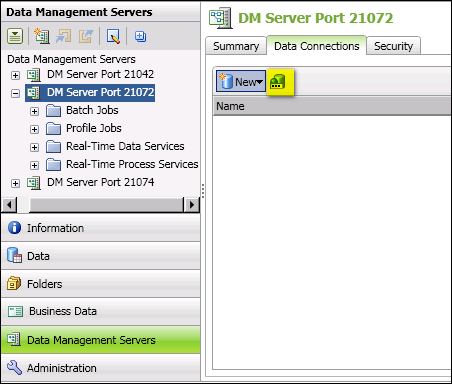
Click the down arrow in the New Data Connection control on the right and select the kind of connection that you want to add. For an overview of the connection types, see Connection Types.
You can right-click a connection in the Data Connections pane to access a group of maintenance functions in a pop-up window. These functions are covered in the following table:
| Function | Description |
|---|---|
| Properties | Displays the dialog for the selected connection type. You can use the dialog to edit an existing connection. |
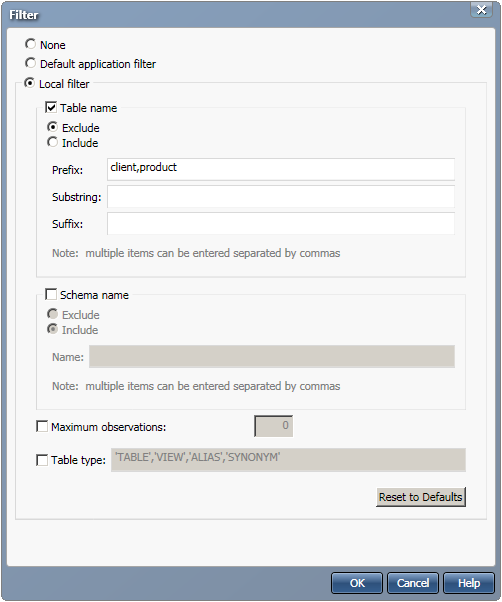
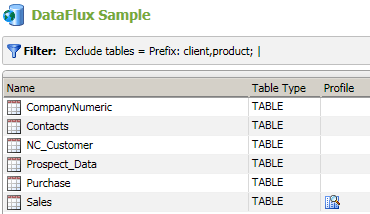
| Filter | Enables you to restrict the data that is available in a connection. See Filter a Data Connection. |
| Save/Clear Credentials | Enables you to save or clear authentication credentials for a selected data connection. See Saving User Credentials for a Connection. |
| Explore | Enables you to create a new data exploration. See Maintaining Data Explorations. |
| Find in Data | Displays the selected connection (or table) in the Data Connections folder in the Data riser bar. |
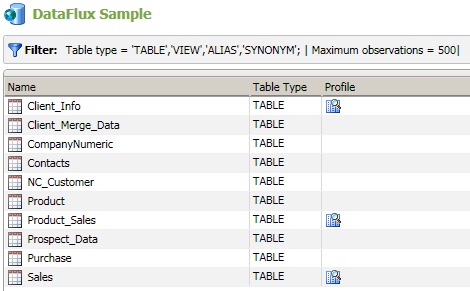
You can also click a connection to view a list of the tables that it contains. You can use the tools displayed above the table to perform the following functions:
![]() Note: If the connection to a server is broken, and then it is restored in the same DataFlux Data Management Studio session, you might need to clear the DSN connection cache. To do so, click Clear DSN Connection Cache in the Tools menu in the main menu to restore your connection.
Note: If the connection to a server is broken, and then it is restored in the same DataFlux Data Management Studio session, you might need to clear the DSN connection cache. To do so, click Clear DSN Connection Cache in the Tools menu in the main menu to restore your connection.
By filtering the data in a connection, you can analyze a set of records that share some attribute, execute a test job on a small subset of the data that is available in a connection, or perform similar tasks. You can use the Filter dialog to specify that the connection is unfiltered (None), processed by the default application filter (Default application filter), or processed by a local filter (Local filter). For example, you can perform the following steps to create a local filter:
If you specify a DSN connection in a data job or a process job, and no credentials have been saved to the connection, then the job will fail. The job will not prompt you to enter the missing credentials. This is appropriate because jobs are often executed in batch, so prompting for credentials would not work in that context. To use this DSN in a job, you would have to do one of the following, depending on the type of connection.
ODBC DSNs. You can specify credentials on several levels. You can save credentials in the ODBC properties dialog for this connection. Alternatively, you can right-click the connection in the Data Connections folder, select Save User Credentials, and then enter any credentials that are required to access data with that connection. If saving credentials to the ODBC connection is not acceptable, consider using a domain-enabled ODBC connection. Basically, you create a connection that references an ODBC connection and an appropriate Authentication Server domain. For more information, see Adding Domain Enabled ODBC Connections.
Custom DSNs. You can right-click the connection in the Data Connections folder, select Save User Credentials, and then enter any credentials that are required to access data with that connection.
Connections to the Federation Server. You can save credentials in the Federation Server Connection dialog. Alternatively, you can store credentials in an Authentication Server domain and reference that domain in the dialog for this connection.
Federation Server DSNs. The credentials for these connections are managed by a Federation Server.
SAS data set connections. No user credentials are required for a connection that is created with the SAS Data Set Connection dialog. The SAS data is accessed directly on disk without mediation by a server.
Saved connections are saved to the folder where all of the application-specific settings supplied by a user are stored. Here is an example path under Windows 7:
C:\Users\[username]\AppData\Roaming\DataFlux\dac\9.x
You can use the DAC/SAVEDCONNUSER option to change the default location of saved connections. See the DataFlux Data Integration Studio Installation and Configuration Guide for details about this option.
You can upload a DataFlux Data Management Studio job to a Data Management Server for execution, as described in Deploying Jobs to a Data Management Server. If you deploy a job that uses a DSN connection, and that DSN is not defined on the Data Management Server, then the job will fail to run on the server because the referenced DSN is not available.
The remedy is to define a DSN connection on the Data Management Server that uses the same DSN name and the same connection attributes as the missing connection. Then, when you execute the job on the Data Management Server, the DSN name will reference the local connection, and the job will succeed, if the connection is to data in a database management system.
Here is a summary of the steps that are required on a Windows-based Data Management Server. For details about adding data connections under UNIX, see the DataFlux Data Management Server User's Guide.
Now, when you execute the deployed job on the Data Management Server, the DSN name will reference the local connection, and the job will succeed if the connection is to data in a database management system.
For more information about using the Data Management Server, see the DataFlux Data Management Server User's Guide.
In general, a 32-bit ODBC driver can access a database running in 64-bit mode, and a 64-bit ODBC driver can access a database running in 32-bit mode. Not all ODBC drivers are this versatile, however. In some cases, you might encounter the following scenario with Windows-based systems.
Suppose that DataFlux Data Management Studio, which is a 32-bit application, is running on a computer with a 64-bit version of Windows. Suppose also that a 64-bit Data Management Server is running on the same computer. When you create an ODBC DSN connection in DataFlux Data Management Studio, you will specify a 32-bit driver. (The DataFlux Data Management Studio interface for ODBC connections always calls the 32-bit ODBC Data Source Administrator, even on a computer with a 64-bit version of Windows.) The 32-bit driver will work if you use the connection in DataFlux Data Management Studio. However, if you deploy a job that uses a 32-bit data connection to the local 64-bit Data Management Server, then the job might fail to run on the server because of an architecture mismatch between the 32-bit connection and the 64-bit server.
The remedy is to define a 64-bit connection on the Data Management Server that uses the same DSN name and the same connection attributes as the 32-bit connection. Then, when you execute the job on the Data Management Server, the DSN name will reference the 64-bit connection, and the job will succeed, if the connection is to data in a database management system. The job itself does not have to be modified.
Here is a summary of the steps that are required on a 64-bit Windows-based Data Management Server.
Now, when you execute the deployed job on the Data Management Server, the DSN name will reference the 64-bit connection, and the job will succeed if the connection is to data in a database management system. If the connection points to a file path, such as an SQLite file, then you will have to copy the file to the Data Management Server. The file must be stored in the location that is specified in the 64-bit DSN connection.
For more information about using the Data Management Server, see the DataFlux Data Management Server User's Guide.
|
Documentation Feedback: yourturn@sas.com
|
Doc ID: dfU_T_DataConnMntn.html |