You are here: Folders Riser Bar>Maintaining Business Rules and Tasks>Using the Execute Custom Metric Node

DataFlux Data Management Studio 2.5: User Guide

Using the Execute Custom Metric Node

Overview

A custom metric is a reusable object that specifies a DataFlux expression that performs an aggregate calculation. For example, a custom metric might calculate the average value of a sales field in all records from a particular state. Use a custom metric when there is no standard metric for that operation. A custom metric can be used in one or more business rules, profiles, or data jobs.

This topic describes how to use the Execute Custom Metric node to apply a custom metric to a set of data in a data job. This node extends the usage of custom metrics beyond group and set rules and data profiling.

Before you can use this node: 

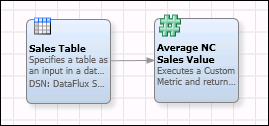
The following example job is used for illustration:

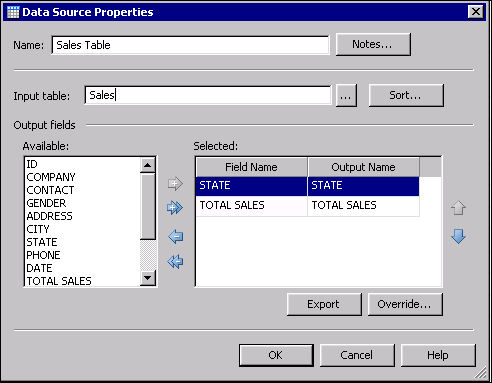
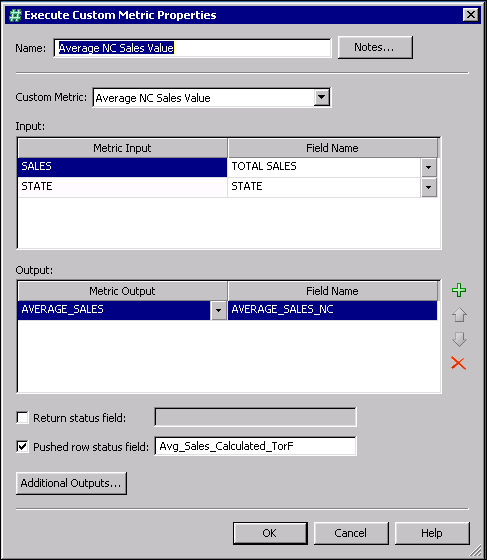
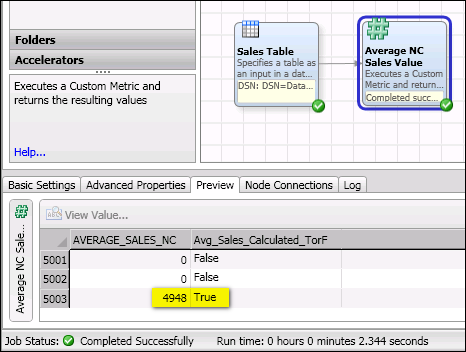
The goal of this job is to calculate the average value for a sales field in all records from a particular state. The first node is a Data Source node that specifies a DSN connection to the Sales table. It also specifies the fields that will be evaluated by the custom metric. The second node is an Execute Custom Metric node that specifies a custom metric which calculates the average value for a sales field in all records from a particular state.

Create and Run the Data Job

It is assumed that you know how to create and run data jobs.

  1. Create a data job that includes an Execute Business Rule node. The data job shown above is one example.
  2. Specify the data source. Begin by opening the properties dialog for the Data Source node.
  3. Specify a name for the node. Use any name that helps you understand the role of this node in the current job.
  4. Specify a DSN connection for a table that contains data to be evaluated.
  5. Specify the data that you want to evaluate with the custom metric. In the example job, you might select the fields shown in the next display.


  6. The next task is to configure the Execute Custom Metric node. Begin by opening the properties dialog for the node.
  7. Specify a name for the node. Use any name that helps you understand the role of this node in the current job.
  8. Select a previously-defined custom metric that is appropriate for your goals.
  9. Map fields in the input table to fields that have been defined in the selected metric.
  10. Specify one or more new fields for the output table that corresponds to the outputs that have been defined in the selected metric.
  11. Specify a Return Status Field if desired. When selected, the specified status field will contain the return value of the expression for the row. If this option is not checked, then any value that returns false will be filtered out.
  12. Specify a Pushed row status field if desired. When selected, a status field that you specify will contain a value of True or False. True indicates that the current row contains the output of the calculation performed by the custom metric. False indicates that the current row does not contain the output of the calculation performed by the custom metric.
  13. Review the configuration of the Execute Custom Metric node. The next display shows one possible configuration for the example job.


  14. Click OK to save the configuration.
  15. Run the job as usual.
  16. If the job is successful, select the Execute Custom node, then click the Preview tab in the Details pane at the bottom of the job editor. The next display shows the average value for North Carolina sales in the Sales table.


Documentation Feedback: yourturn@sas.com
Note: Always include the Doc ID when providing documentation feedback.

Doc ID: dfDMStd_Task_Execute_CustomMetric.html