You are here: Data Riser Bar>Maintaining Data Connections>Adding ODBC Connections for Excel

DataFlux Data Management Studio 2.5: User Guide

Adding ODBC Connections for Excel

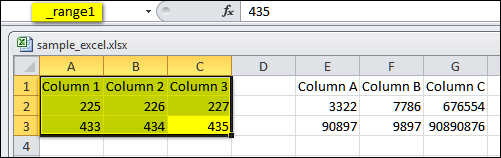
A named range is a set of columns and rows that have a unique name within an Excel file. For example, the next display shows two named ranges. One range (_range1) is selected.

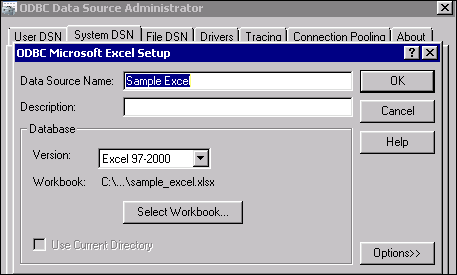
You can use ODBC DSN connections to read named ranges in an Excel spreadsheet. Each Excel file can have multiple named ranges (tables). The next display shows a DSN connection for the Excel file above.

Note Note: You cannot use a DSN to write output to Excel format. You can, however, use a Text File Output node in a data job to write output in CSV format. You can then import the CSV file into Excel.

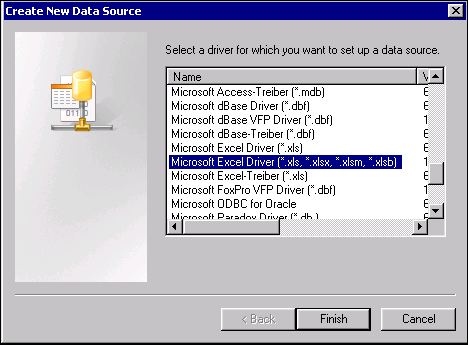
Perform the following steps to create an ODBC DSN to read named ranges in an Excel spreadsheet: 

  1. Identify the appropriate named ranges in the Excel spreadsheet that you want to access. Create the named ranges if they do not already exist.
  2. Click the Data riser on the DataFlux Data Management Studio desktop.
  3. Expand the Data Connections folder.
  4. Select the New Data Connection menu in the Data Connections pane on the right. Then select ODBC Connection to display the ODBC Data Source Administrator dialog.
  5. Select the type of connection that you want to establish. For example, you can click System DSN to create a connection to a data source that all users on the machine can access. The System DSN tab is shown in the following display:

  6. Click Add to select the driver for your data source. Select the appropriate driver for your version of Excel, as shown in the following display.

  7. Click Finish. A setup dialog displays for the selected driver (connection type).
  8. Enter a name, a description, and other attributes into the setup dialog. We recommend that you avoid using special characters such as quotation marks in your data source names.
  9. Use the Version control to select your version of Excel.
  10. Click the Select Workbook button to select the Excel file. XXXX The following display shows a set of attributes for an Excel connection.


  11. Click OK to save the connection and return to the ODBC Data Source Administrator dialog. The new connection is included on the System DSN tab of that dialog.
  12. Click OK to close the ODBC Data Source Administrator dialog and return to the Data riser.
  13. Refresh the Data riser in order to see the new connection in the Data Connections folder in the left pane. Select View, and then select Refresh from the main menu. The new connection should appear in the Data Connections folder.
  14. To verify a connection, double-click the connection in the Data Connections folder in the left pane. If the connection works, you will be able to see tables, fields, and other attributes in the right panel.

For an example of how an Excel DSN can be used in a data job, see Reading Named Ranges in an Excel Spreadsheet.

See also Data Connection Usage Notes.

Documentation Feedback: yourturn@sas.com
Note: Always include the Doc ID when providing documentation feedback.

Doc ID: dfDMStd_T_Excel_ODBC.html