DataFlux Data Management Studio 2.5: User Guide
In general, the DataFlux Data Management Studio interface to Business Data Network is used to set up a glossary and to associate terms with objects that are visible only in DataFlux Data Management Studio, such as jobs, profiles, rules, and tasks. The DataFlux Web Studio interface can be used to support a collaborative effort to add and update terms in a glossary. The DataFlux Web Studio interface can also be used to link Reference Data Manager domain items to a term.
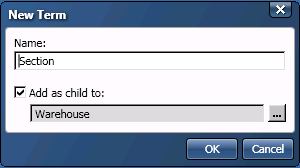
You can create and define terms in the Business Data riser bar. When you create a term, you specify a name and a position in the hierarchy and the term appears in the All Terms list. Then, you can open the term in View mode, enter Edit mode, and define it in its property tabs. Perform the following tasks:
Perform the following steps to create a new term:
You can define the term that you have just created by opening the term in View mode. Then, click Edit and begin working through its property tabs. You need to perform the following tasks:
Click the Summary tab to define the parameters for the term. Perform the following steps:

Click the Hierarchy tab to review the placement of the term in the hierarchy, as shown in the following display:
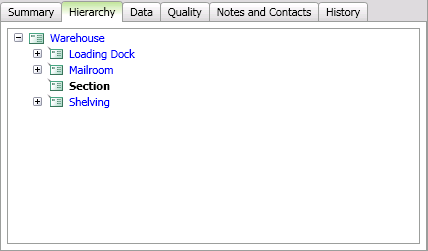
You selected this position when you created the Section term and designated Warehouse as the parent term. If you need to change the position of the term, you can find instructions in Change the Parent of a Term.
Click the Data tab. Then click Add to add a relationship between the term and data such as collections, tables, and fields. For example, you can add a table of data related to the products stored in the Section term, as shown in the following display:

When items are added to the Data and Quality tabs, they are displayed in color if they are accessible to the current repository. If they grayed out, they are not accessible to the repository.
Click the Quality tab. Then click Add to add a relationship between the term and objects that are visible only in DataFlux Data Management Studio, such as jobs, profiles, rules, and tasks.
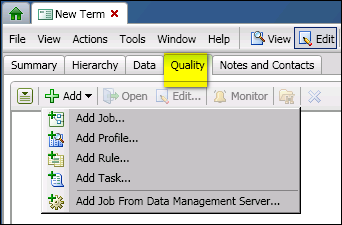
The following display shows a job added to the Section term:

Note that if you add rules and tasks that are included in data monitoring jobs, you can click Monitor on the Quality tab to see them in the Monitor Viewer.
Click the Notes and Contacts tab to add notes and contacts to the term. Note that you can click the Action button for contacts to manage the term's contacts and send a message to the contacts list. The following display shows a contacts notification message:
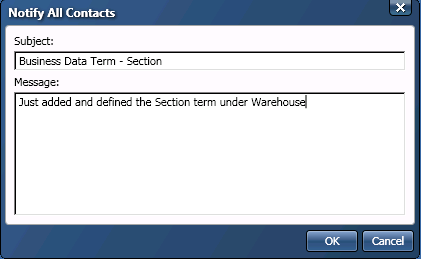
This notification can be sent only to contacts defined with an email address.
|
Documentation Feedback: yourturn@sas.com
|
Doc ID: dfDMStd_T_BDN_Create.html |