Working with Tasks
Adding Tasks
A task is a workflow
element that represents a step or unit of work in the workflow. To
define a new task, follow these steps:
-
Start SAS Workflow Studio and either open a saved template, download a template from the content repository, or create a new template.
-
In the toolbar, select the Add Task icon (
 ).
).
-
Click anywhere on the diagram editor to create a task.
-
Move the task to the desired position on the diagram editor by clicking the selection tool (
 ) on the toolbar, selecting the desired task, and
dragging it to the new location.
) on the toolbar, selecting the desired task, and
dragging it to the new location.
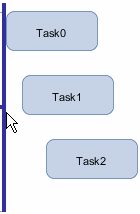
The default name of the first task is Task0. The second task is named Task1, and so
on.
Connecting Tasks in a Sequential Flow
To define a logical
sequence of tasks, you connect them in the desired order. You can
also assign a status. See Working with Statuses for details.
To link two tasks together,
follow these steps:
-
Select the Add Sequence Flow icon (
 ) from the toolbar.
The cursor changes to a large plus sign (
) from the toolbar.
The cursor changes to a large plus sign ( ) and a four-sequence flow anchor blinks when the cursor is in the proper position to make the connection.
Flow Anchors for a Task
) and a four-sequence flow anchor blinks when the cursor is in the proper position to make the connection.
Flow Anchors for a Task
-
In the diagram editor, drag the mouse pointer from the first task figure toward the second task figure.A line and arrow show the direction of the link, indicating the sequence of the workflow logic.
For example, a workflow might contain Tasks A1, A2, and A3. Task A1 executes first,
followed by A2 upon
completion of A1, and so on, until A3 completes to terminate the workflow. Such a
workflow could be modeled as follows:
Sequential Workflow Flow

Editing Tasks
To edit a task, follow
these steps:
-
Open the Edit Task dialog box by double-clicking the task.Alternatively, right-click on the task in either the diagram or the workflow tree and select the Edit option.
-
Enter the desired name in the Task Name field.
-
(Optional) Add a description for the task in the Description field.
-
(Optional) Enable the desired notifications, which are generated using the SAS Notification Service.
-
(Optional) Add localized versions of the name and description. For more information, see Text Localization.
-
(Optional) Add custom attributes. For more information, see Custom Attributes.
-
Click OK to save the updated task definition.
Deleting Tasks
To delete a task, follow
these steps:
-
Right-click on the task in either the diagram editor or workflow tree and select the Delete option.Alternatively, select the task in the diagram editor or workflow tree, and press the Delete key or CTRL+X.
-
Select Yes in the confirmation dialog box to permanently remove the selected task.
The deleted task is no longer visible in the diagram editor or the workflow tree.
Tip
To delete multiple tasks and
the links among them, drag a selection box around the desired elements
(or use the Shift-click selection technique) and then press the Delete
key.
Note: All locally defined data
objects, statuses, participants, and policies are also deleted when
the containing parent task is deleted. If you attempt to delete an
element that is referenced elsewhere in the template, then you are
notified that it should not be deleted until all references are removed.
Note: SAS Workflow Studio does
not currently support the undo or CTRL+Z operation.
Adding a Subflow
As described in Creating a Workflow, a workflow
is a series of tasks, together with the participants and the logic
required to execute the tasks. A subflow is a workflow that is a child of a parent workflow. You can use subflows to refactor
a larger workflow template into smaller components. Grouping elements together into a subflow helps organize
and reuse business logic. Using subflows improves readability of the workflow template
and promotes consistent reuse of business logic within the organization.
To create a subflow,
follow these steps:
-
In the diagram editor, right-click on the task that you want to convert to a subflow and then select the Create Subflow from option.
-
When prompted, select one of the following options:
-
Create New
-
Load from file
-
Open from repository
-
-
Select OK to save the subflow definition.
For each option, the
relevant diagram opens. For the Create New selection,
the diagram is blank and untitled. For the other options, the diagram
is a copy of the existing designated template.
The original parent workflow elements remain visible in the workflow tree.
After an element is added to the new diagram, the transformed task is denoted with
the process icon ( ) in the workflow tree. The subflow data objects, statuses, policies, and participants
are also visible in the workflow
tree hierarchy.
) in the workflow tree. The subflow data objects, statuses, policies, and participants
are also visible in the workflow
tree hierarchy.
) in the workflow tree. The subflow data objects, statuses, policies, and participants
are also visible in the workflow
tree hierarchy.
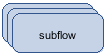
After adding a subflow, the task symbol in the parent workflow becomes a stacked icon
representing a set of tasks rather than a single step in the
template. The following figure shows an example of subflow notation:
Subflow Symbol
Aligning Tasks
Multiple tasks can be
aligned using the alignment tool.
To activate the alignment
tool, follow these steps:
-
In the diagram editor, hold down the Ctrl key, and click the left mouse button. A blue plus sign (
 ) appears on the diagram editor.
-
Drag the cursor (plus sign) vertically or horizontally to form an alignment bar.
You can toggle among the following alignment
modes by pressing the spacebar:
-
Space evenly
-
Pack tightly
-
Spread out
-
Original
Copyright © SAS Institute Inc. All Rights Reserved.
Last updated: March 5, 2020