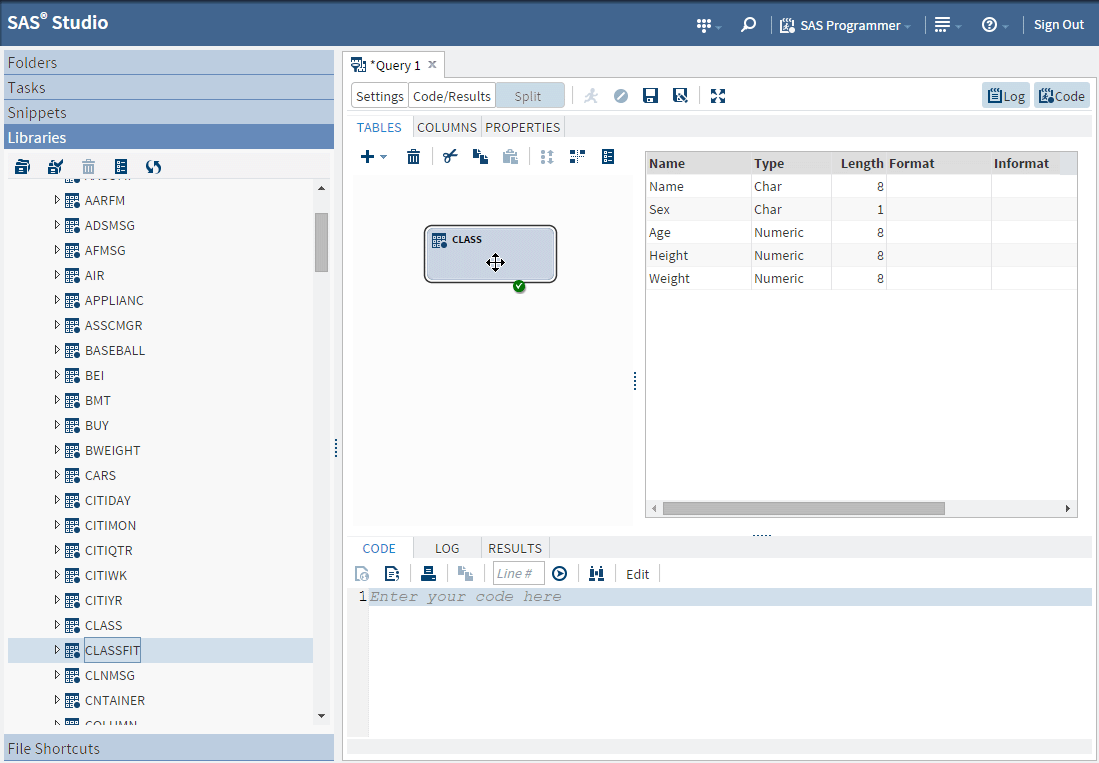
Understanding Joins
Joining Tables
When you create a query,
you can join multiple tables together. SAS Studio can automatically
join the tables together for you, or you can manually create the join.
SAS Studio attempts to join tables by columns that have the same
name and type. If no matches for column name and type are found, then
you can specify the join criteria.
Note: If you have more than one
table in your query and you do not specify join criteria, then your
output data includes the Cartesian product, or every possible combination,
of the data values.
Creating a Join
To add a table and automatically
create a join:
From the Libraries section
of the navigation pane, drag the table that you want to add to the
query to the Tables tab. Next, drop that table on top of the first
table in the query to join the two.
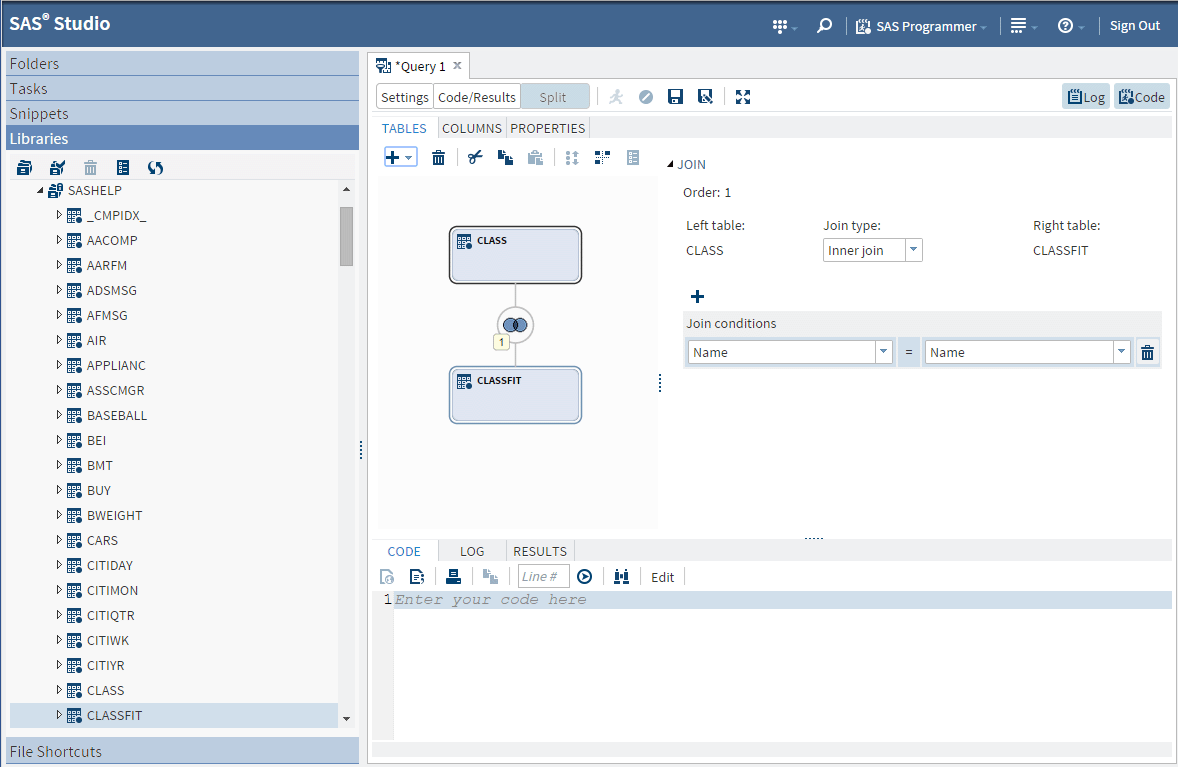
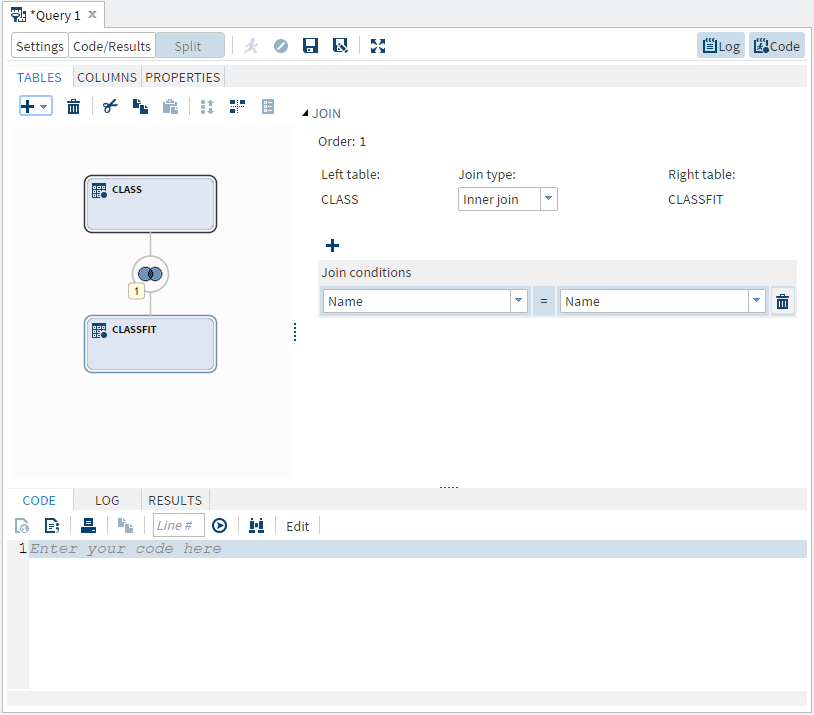
The Join window displays
the join criteria. In the following example, the Classfit table is
automatically joined to the Class table by using the Name column in
both tables.
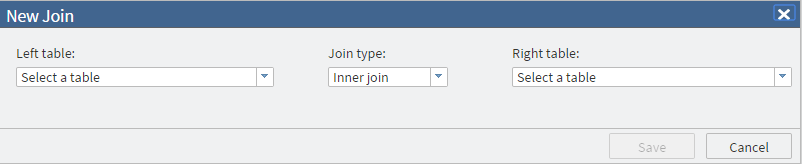
If a join cannot be
created automatically, you can specify the join condition manually.
To manually create a
join:
-
Click Save. A join is created between the tables. If the tables include columns with matching names and data types, then a join condition is automatically created. If the tables do not include columns with matching names and data types, then you can select the columns for the join condition from the column drop-down lists.

Understanding the Types of Joins
SAS Studio supports
four different types of joins. You can select the type of join you
want by modifying an existing join.
You can select the join
option that you want to use in the Join window.
|
SAS Studio Join Type
|
Join Icon
|
Description
|
|---|---|---|
|
Inner Join
|

|
The output rows include
those for which the column in the first table matches the joining
criterion of the column in the second table. Joins are inner joins
by default.
|
|
Left Join
|
 |
The output rows include
all rows from the first table and the rows from the second table in
which the joining criterion is met.
|
|
Right Join
|
 |
The output rows include
all rows from the second table and the rows from the first table in
which the joining criterion is met.
|
|
Full Join
|
 |
The output rows include
all matching and nonmatching rows from both tables.
|
Modifying an Existing Join

Copyright © SAS Institute Inc. All rights reserved.