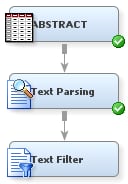
Using The Text Filter Node
Note: This example
assumes you completed the example in Using the Text Parsing Node. It builds
off the process flow diagram created there.
Now
that you have parsed the terms in the text of the abstracts, you want
to filter out the terms that have little to no information value.
This will create more relevant topics in the next step.
-
Click the Text Filter node in the diagram workspace and notice the Minimum Number of Documents property in the Term Filters section of the Train properties. Change this property from the default value to
10. This ensures that only terms that occur in at least ten documents are included in your analysis. -
To enable spell checking, set the Check Spelling option in the Spelling section of the Train properties to
Yes.Because you are dealing with professionally written documents, you might think that there is no reason to perform this operation. However, this spell checking might suggest terms that should be treated as synonyms. The algorithm used to find misspellings frequently identifies terms that are slight variants of one another in spelling and meaning. Checking for spelling should not remove a large number of terms from this data set but might help when you deal with a different collection of documents. If you are dealing with informal document sets such as e-mails or customer comments, then spell checking will prove even more beneficial. -
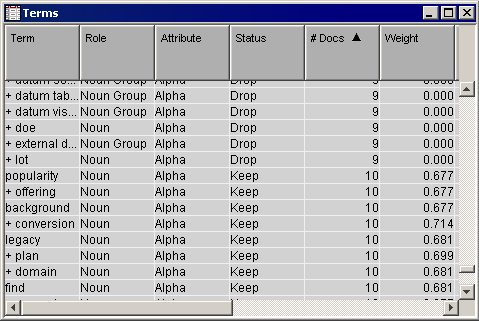
Find the Terms window within the Results window and click anywhere inside the Terms window to make it the active window. Select the #Docs column to sort terms by document frequency. Scroll down and notice that terms that appear in fewer than 10 documents are dropped by the Text Filter node. Terms in 10 or more documents might have been dropped for other reasons.
-
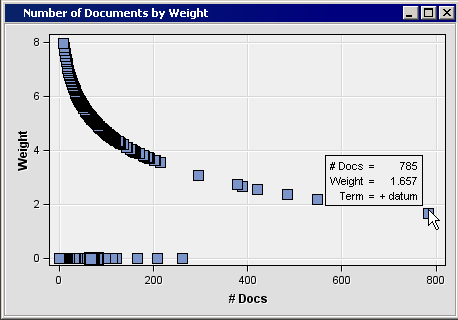
Now find and maximize the Number of Documents by Weight window. This window shows a scatter plot of the terms with the number of documents on the x-axis and term weight on the y-axis. In the image below, notice that there is a row of points that all have a weight of zero. These points represent the terms that were dropped from analysis. When you hold the mouse over a point on the graph, a tooltip appears that notes the term represented, the number of documents that it appears in, and the assigned weight value.Notice that the point representing the term datum appears separated from the rest of the points. Because the term datum appears significantly more often than any other term, you will drop this term from analysis in the following steps. There are six more terms that appear separated from the rest of the terms. These terms are system, software, paper, application, user, and information. You might choose to drop these terms from your analysis; but if you do, then you will get different results from those presented in the next chapter.
-
Now find the Results section of the Train properties and click the ellipsis button next to the Spell-Checking Results property. The EMWS.TextFilter_spellDS window lists the misspelled terms, and their assigned parent term, that were detected by the spell checker. Other information, such as the term role, term number, and number of documents, is also displayed in this window.
-
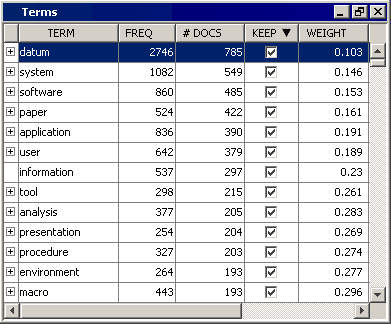
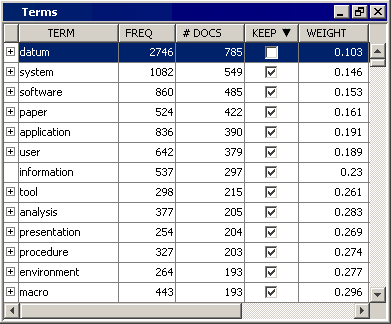
Select the Text Filter node, and then click the ellipsis for the Filter Viewer property to open the Interactive Filter Viewer. In the Interactive Filter Viewer, you can refine the parsed and filtered data that exists after the Text Filter node has run. The refinement is achieved by filtering documents based on the results of a search expression or modifying the keep or synonym status of a term. The following image shows the Terms table of the Interactive Filter Viewer.
-
For this example, you are going to exclude the single term datum because it occurs more than twice as often as the next frequent word. This will give you more relevant topics when you run the Text Topic node .